


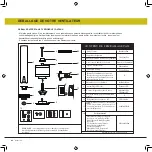


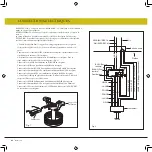

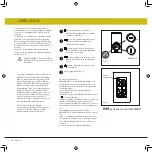

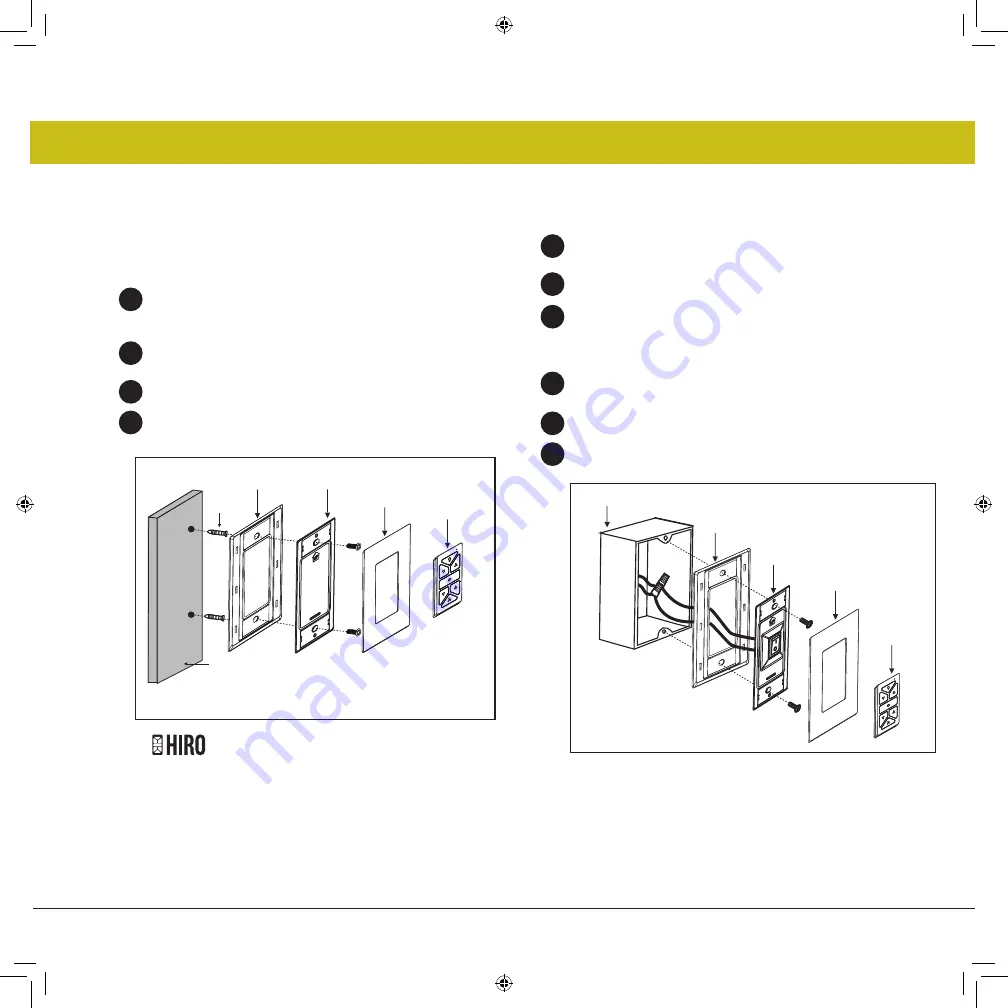
INSTALLATION DE LA COMMANDE MURALE
12
|
hinkle y.com
Fig. 1
Fig. 2
1
2
3
4
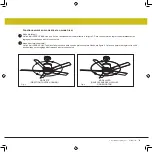
Boîte de sortie
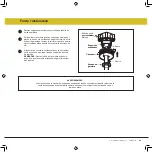
N'OUBLIEZ PAS de couper l'alimentation avant de
commencer.
REMARQUE - Se fixe à n'importe quelle surface ou
application : mur plat, boîte simple, boîte multi.
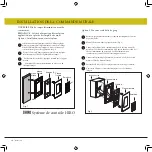
Option 1. Installation sur une surface plane
Sélectionnez un emplacement souhaité. Utilisez la plaque
murale pour marquer l'emplacement des trous de montage.
Des chevilles murales en plastique ou des vis de montage
sont nécessaires pour cette application. (Fig. 1)
Placez le berceau B dans la plaque murale. Fixez la plaque
murale au mur à l'aide de la quincaillerie fournie.
Enclenchez le couvercle de la plaque frontale sur le support
mural.
L'émetteur à distance sera maintenu en place avec un
chargeur intégré
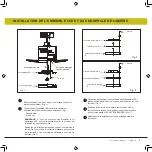
Retirez la plaque murale existante et l'ancien interrupteur de la boîte
de prise murale.
Placez le berceau A dans la plaque murale. (Fig. 2)
Connectez les fils noirs du commutateur dans le berceau A aux fils
noirs dans le boîtier de commutation. Fil d'entrée chaud vers l'un des
fils du commutateur du berceau A. Le fil d'alimentation du
ventilateur est connecté au fil de l'interrupteur restant.
Connectez l'ensemble plaque murale / berceau A à la boîte de sortie
murale à l'aide du matériel fourni.
Enclenchez le couvercle de la plaque frontale sur le support mural.
L'émetteur à distance sera maintenu en place avec des aimants
intégrés.
1
2
3
4
5
6
Option 2. Pour une seule boîte de gang
Émettrice
Émettrice
Plaque
frontale
Plaque frontale
plaque
murale
plaque murale
Berceau B
Cradle A
Mur
l
Ancre en
plastique
Système de contrôle HIRO


