26
LOADING YOUR QUILT ONTO THE FRAME
Step 1.
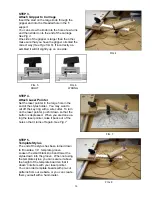
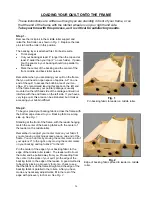
Remove the lock pins in the middle roller support and
raise the front roller, as shown in
Fig. 1
. Replace the lock
pins to hold the roller in this position.
The backing layer is attached first. For best results:
•
Trim selvages
•
Cut your backing at least 8” longer than the top and at
least 4” wider than your top (2” on each side). If possi-
ble, the seams in your backing should run parallel to
the rollers.
•
Mark the center of the backing and the center of the
front, middle, and back roller aprons.
Remember when you are placing your quilt on the frame,
that you will need an open space of approx. 6-8” on one
end of the quilt to access the bobbin area of your ma-
chine. We recommend leaving this space on the left end
of the frame because your pointer package is usually
mounted on the left hand side of the carriage and will not
interfere with the end frame on the left side. If you have a
very large quilt, this area can be eliminated, but it makes
accessing your bobbin difficult.
These instructions are written as though you are standing in front of your frame, or so
that the end of the frame with the ratchet wheels is on your right hand side.
Take your time with this process, as it is critical for satisfactory results.
Step 2.
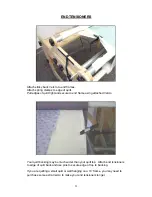
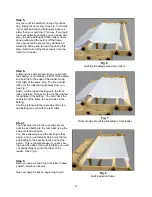
To begin, spread your backing fabric across the frame with
the bottom edge closest to you. Backing fabric is wrong
side up.
See Fig. 1
Standing at the front of the frame, with the leader hanging,
match the center of the backing fabric with the center of
the leader on the middle roller.
Remember to readjust your center mark on your fabric if
you are leaving a machine access area on one end of the
frame. You can do this by moving the center mark on all of
your aprons 8” to the right, or by moving the center marks
on your backing and top fabric 8” to the left.
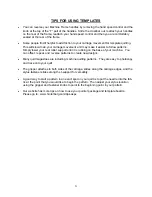
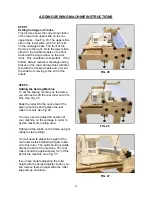
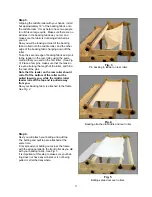
Pin the center of the edge of your backing fabric to the
edge of the middle roller leader. The leader will roll over
the roller and be pulled away from you. Proceeding from
the center to the sides of your quilt, pin the edge of the
backing fabric to the edge of the leader. A good method is
to begin by placing a pin every foot or so, check to see
that the fabric is on the frame straight and the edge of the
backing fabric is parallel to the rollers. After you have
made any necessary adjustments, fill in the rest of the
edge with pins every inch or so.
See Fig. 2
Fig. 1
Pin backing fabric to leader on middle roller.
Fig. 2
Edge of backing fabric pinned to leader on middle
roller.

