29
Machine Quilting Frame Disassembly
1. Unplug power source.
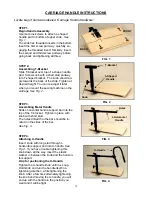
2. Remove the upper handle assembly from the machine carriage.
3. To remove the machine, loosen end knobs on the rear roller. Raise the left end (side without ratchet
wheel) of the rear roller enough to guide the machine out from under the roller. Lift out machine. Replace
roller into slot.
4. Remove machine carriage.
5. Remove template board.
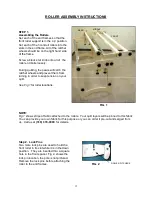
6. Put front roller into up position. Remove L-shaped lock pins from front roller and loosen knobs.
7. Lift and remove quilt rollers. You can leave the quilt on the rollers if desired.
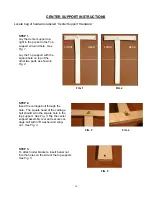
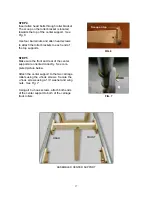
8. Remove center support brace.
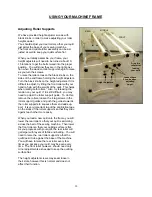
9. Remove angle brace knobs. They can remain attached to the rollers, or use wrench to loosen bolts. Re-
place the knobs with studs into the angle braces for storage.
10. Remove black knob and rear carriage track.
11. Remove remaining carriage track.
12. Replace all knobs onto roller ends for storage.
Tips for beginning to quilt on your Hinterberg Frame
•
Drop your feed dogs or apply tape over them so that they are inoperable.
•
Set your stitch length to 0.
•
You may need to adjust your presser foot pressure and try different presser feet.
•
Always bring your bobbin thread up through the quilt with each start.
•
Lock your threads with tiny stitches and finish in this same manner to ensure good results.
•
Any necessary height adjustments to the rollers should be made after installing your machine. Your ma-
chine should glide smoothly under the quilt, without raising the fabric as it moves from side to side.
•
When machine quilting, planning your stitching patterns ahead of time will make the job easier and more
rewarding. If this is your first try at machine quilting, start with a small quilt with a simple pattern, or even
printed fabric. Take some time to get the feel of the machine movement on the frame. Each machine will
have limitations depending on the length of the arm of your machine. Even if you have machine quilted be-
fore, the technique is different. Your quilt is stationary and you will be moving your machine. If your ma-
chine carriage does not move smoothly and easily, check all adjustments to be sure your frame is correctly
assembled. It should roll easily both front to back and left to right.
•
Begin quilting on the back edge of the quilt and work toward the front. The leaders on the front and middle
rollers should be long enough to allow the top edge of the quilt to advance to the quilting area between the
middle and rear rollers.
•
Use the ratchets to keep the tension of the top and backing even. If the tension is not even on the backing
and the top, when you take your quilt off the frame, you will see puckering of the fabric. You can check this
from time to time by loosening up the tension on all the rollers and checking the stitch quality.
•
With larger quilts, after you have stitched a large portion of the quilt, you may find that the quilting area is
limited and you can no longer quilt in the manner you desire. At this point, baste the remaining part of the
quilt. Once the quilt is basted, remove it from the frame, turn the quilt end to end (180 degrees) and re-
mount the basted quilt using only the middle and rear rollers. In this position you can continue quilting from
the area you stopped to the remaining end.
•
As with any technique, your stitches will become more even with practice.
•
Our website has more tips on how to use your Hinterberg frame. Please go to: www.hinterberg.com/
tips.aspx

