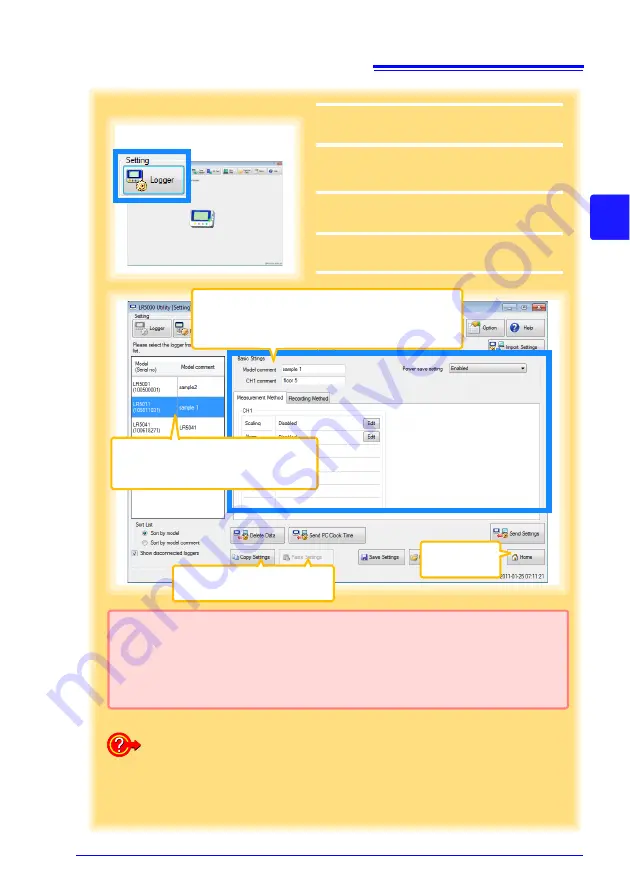
3.3 Making Settings from the LR5000 Utility Program
33
3
3
Chapter 3 Set
tings
2
For the
[Setting]
, click the
[Logger]
but-
ton.
The Logger Settings screen appears.
(If the logger is not connected, you are
prompted to connect it. Connect the logger.)
3
Select the logger from the device list*,
and edit the settings. ( p.34)
4
Click the
[Send Settings]
button.
4
How can current settings be imported from the connected logger?
1. Click the
[Import Settings]
button at the upper right of screen.
(A dialog appears.)
2. Click the
[Import Settings to Computer]
button. (The logger's settings
are now reflected in the program.)
2
Click to select.
The currently selected logger's back-
ground is a different color.
3
Setting Options
Note: The displayed settings are those previously made
from the LR5000 Utility Program, which may be differ-
ent from the current settings within the logger itself.
* About the Device List
• Up to ten loggers can be displayed when connected to the computer.
• When
[Show disconnected loggers]
is selected, disconnected loggers that had set-
tings previously saved appear in the list.
• The list can be sorted in ascending order (
[Sort List]
).
Returns to the
main screen.
Settings from other loggers can
be applied. ( p.34)
HIOKI LR5011B980-04
Summary of Contents for LR5011
Page 2: ...HIOKI LR5011B980 04...
Page 6: ...Contents iv HIOKI LR5011B980 04...
Page 66: ...4 8 Printing Recorded Data 60 HIOKI LR5011B980 04...
Page 82: ...6 4 Extracting Data 76 HIOKI LR5011B980 04...
Page 102: ...9 4 Error Displays 96 HIOKI LR5011B980 04...
Page 108: ...Index Index 4 HIOKI LR5011B980 04...
Page 109: ...HIOKI LR5011B980 04...
Page 110: ...HIOKI LR5011B980 04...
Page 111: ...HIOKI LR5011B980 04...
Page 112: ...HIOKI LR5011B980 04...


