4.2 Installing the Logger
41
3
4
Chapter 4 M
easure
ment a
n
d Analy
sis
Required Items: LR9901 (Option), 2 screws (supplied with the LR9901) screwdriver,
etc. (as needed)
Required Items: Z5004 (Option)
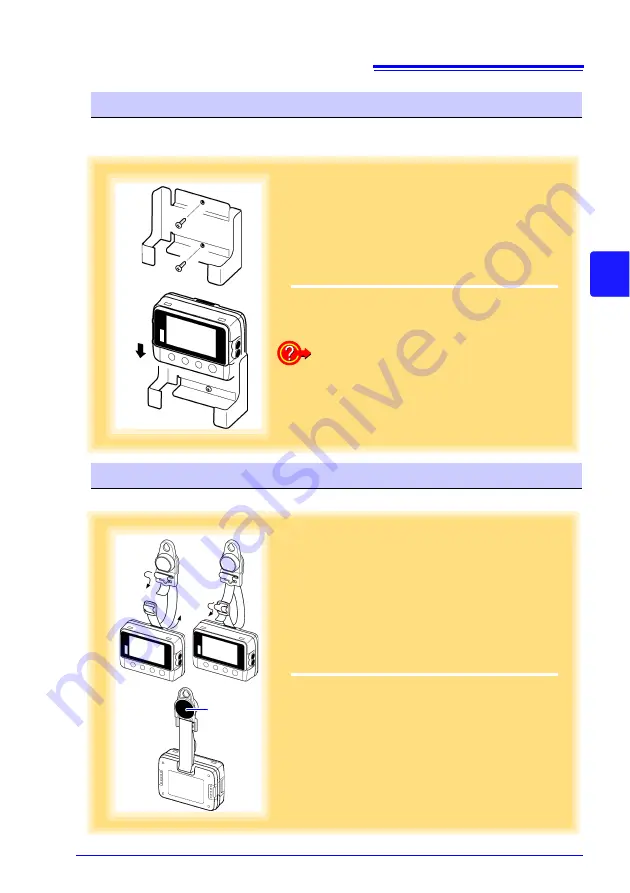
Wall Mounting with the LR9901 Wall-Mounted Holder
1
Mount the LR9901 to the wall using the two
screws.
2
Insert the logger into the LR9901.
1
2
The logger can also be attached to a wall or
other surface by hanging the strap or attach-
ment hole on a screw. (Supported screw head
dimensions: up to approx. 6.8 mm in diameter
and approx. 2.5 mm in thickness)
Wall Mounting with the Z5004 Magnetic Strap
1
Attach the Z5004 to the strap/stand attach-
ment hole.
(feed the strap through a, b, and c)
2
Attach the magnet to the wall (ferrous mate-
rial).
2
1
a
b
c
Magnet
HIOKI LR5011B980-04
Summary of Contents for LR5011
Page 2: ...HIOKI LR5011B980 04...
Page 6: ...Contents iv HIOKI LR5011B980 04...
Page 66: ...4 8 Printing Recorded Data 60 HIOKI LR5011B980 04...
Page 82: ...6 4 Extracting Data 76 HIOKI LR5011B980 04...
Page 102: ...9 4 Error Displays 96 HIOKI LR5011B980 04...
Page 108: ...Index Index 4 HIOKI LR5011B980 04...
Page 109: ...HIOKI LR5011B980 04...
Page 110: ...HIOKI LR5011B980 04...
Page 111: ...HIOKI LR5011B980 04...
Page 112: ...HIOKI LR5011B980 04...


