8
more than 20 tracks, the CD Track Display (#13) will revert to “01” and the old entry will be
overwritten by the current new entry.
6. Press the CD STOP Button (#12) to end programming and return to normal play mode.
7. To check the programmed tracks, press PROG Button (#11) continuous to show all the
programmed songs. The CD Track Display (#13) will display the program number first and
then followed by the flashing track number.
8. Press CD PLAY Button (#14) to begin programmed schedule. The first track in the program
will appear in the CD Track Display (#13) and the PROG Indicator will stay solid.
9. To cancel the programmed schedule, press the CD STOP Button (#12).
10. As long as the unit remains powered on and the CD Door (#2) is not opened, you can
resume programmed play any time by pressing the PROG. Button (#11) and then the CD
PLAY Button (#14) while stopped.
AUX IN (Audio in) FUNCTION – Connecting the device with an external audio
device
This device has an audio input function. Please connect the source with an audio cable (not
included ) to the AUX IN jack. The mode will jump to AUX IN automatically.
RADIO RECEPTION
1. Set the Function Selector (#7) to the "RADIO" position.
2. Set the Band Selector (#18) to either "AM", “FM” or “FM Stereo” for the desired radio band.
3.
Adjust the Tuning Knob (#17) to obtain the desired radio station.
4.
Adjust the Volume Control (#8) to obtain the desired sound level.
5.
You may need to adjust the telescopic antenna (#3) for better reception.
6.
When you wish to turn off the Radio, set the Function Selector (#7) to the "OFF" position.
TIPS FOR GOOD RADIO RECEPTION
1.
To insure maximum FM tuner sensitivity, the Telescopic Antenna (#3) should be fully
extended and rotated / adjusted to obtain the best possible reception. The FM Stereo
Indicator (#4) will stay solid when a stereo FM station is being received.
2.
When tuning in AM reception, be sure to place the telescopic antenna in a vertical position.
To insure the maximum AM sensitivity, try repositioning the unit until the best reception is
obtained.
CARE AND MAINTENANCE
1.
Clean your unit with a damp (never wet) cloth. Solvent or detergent should never be used.
2.
Avoid leaving your unit in direct sunlight or in hot, humid or dusty places.
3.
Keep your unit away from heating appliances and sources of electrical noise such as
fluorescent lamps or motors.
4.
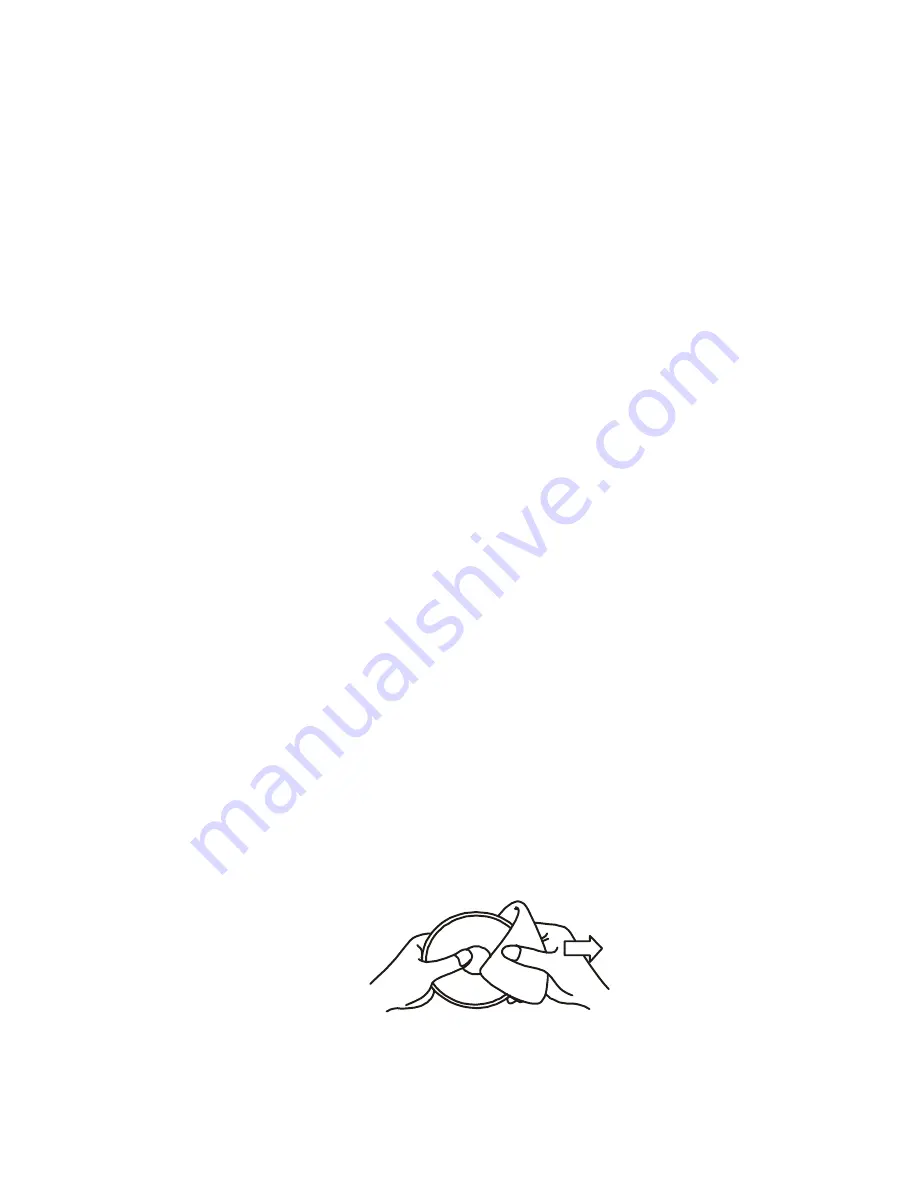
If interruptions occur in the music during CD play, or if the CD fails to play at all, its bottom
surface may require cleaning. Before playing, wipe the disc from the center outwards with
a good soft cleaning cloth.


