R X 2 5 0 0 D U A L A S S E M B L Y I N S T R U C T I O N S & M A N U A L
3 2 - 0 0 1 9 R E V . A
12
Product Assembly
– Pulley Assembly
STEP 5
Parts:
•
Assembly from STEP 4
•
RX2500 Pulley Assembly
– 2x
Hardware:
•
Socket Screw 3/8
”-16 x ¾” – 2x
•
3/8
”-16 Nut – 2x
Tools:
•
5
/16 Hex Key for 3/8” Socket Head Screws
•
9/16
” Hex Open Wrench
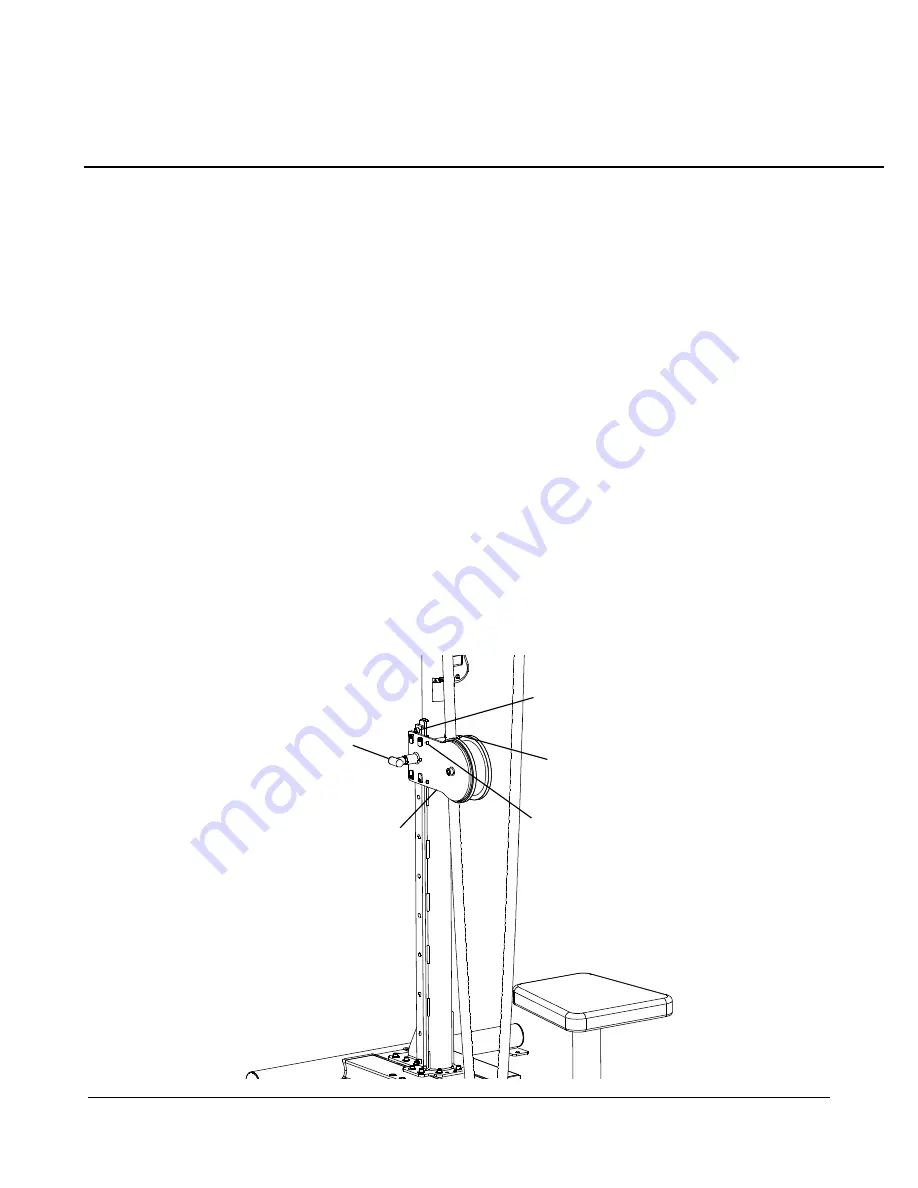
5-1 Attach Pulley Assembly to assembly from STEP 4 by sliding it from
top of the rail as shown below. Use pull pin to fix pulley in different positions.
5-2
Install “stop screw” as shown and tighten it with an appropriate hex key.
5-3
If installed, remove 2 nuts holding Pulley Bracket handle, remove the handle
and position rope inside the pulley track as shown. Reinstall the bracket
handle and tighten nuts (use washers).
Adjustable Pulley
Bracket Assembly
Pull Pin
Stop Screw 3/8
”-16 x ¾”
Pulley Bracket Handle
3/8
”-16 Nuts


