1
In operation the sanding belt is held in place on the
sanding drum by centrifugal force. It is very important
that the drum rubber and abrasive guides are
maintained in good condition at all times.
Store and transport the HT8 EX with a sanding belt in
place at all times to protect the drum rubber. If the
machine is stored for long periods, use a small wedge
under the main frame to keep the drum off the floor.
This will prevent the drum developing a flat spot.
1.
Check that power supply is disconnected. Tilt the
machine back and rest the handle on the floor.
Open the drum guard and remove the abrasive
belt if fitted. Inspect the condition of the drum
rubber. A damaged or worn drum rubber must
be replaced to maintain machine performance.
A damaged or worn drum rubber can result in
poor sanding performance with subsequent
damage to the floor surface and can be
dangerous in operation.
If the machine moves from side to side when
sanding or you are experiencing inconsistent
sanding performance this can indicate a worn or
damaged drum rubber. This is caused because
the drum rubber is not gripping the sanding belt.
2.
To replace the drum rubber contact your local
Hiretech Service Agent.
Hiretech operate a
simple exchange program to replace HT8 EX
Sanding Drums.
Please contact your local
service agent for information, service levels and
pricing. For further information visit.
http://www.hiretech.biz/products/ht8_ex_drum
_service.html
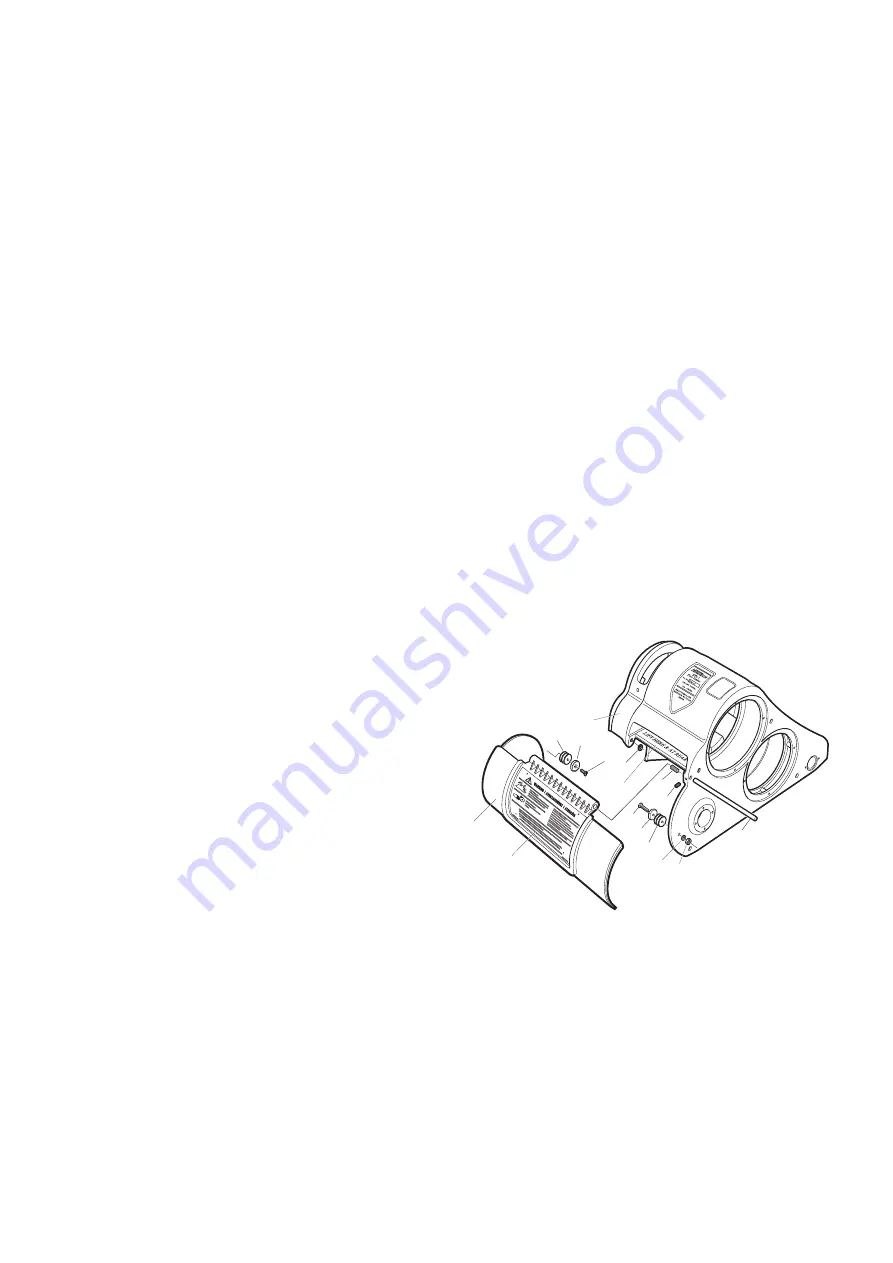
3. Check the condition of the Abrasive Guides
(Ref.142). It is very important that the Abrasive
Guides are maintained in good condition. The
Abrasive Guides ensure that the abrasive belt
runs evenly and centred on the sanding drum.
Worn Abrasive Guides will cause wear to the
drum rubber, result in poor sanding
performance and cause damage to the machine
and floor surface.
Worn guides will also
damage the abrasive belt and may cause it to
tear.
The Abrasive Guides should not be worn by more
than 3mm (1/8”). The thickness from new is
7mm (1/4”).
4.
When fitting new Abrasives Guides or when
replacing the Drum Guard (Ref. 35) ensure that
the correct gap is maintained between the edge
of th sanding drum and the Abrasive Guides .
Remove abrasive belt if fitted, using the Spacer
Guide Abrasive (Ref.143) adjust the gap
between the Abrasive Guide and the edge of the
sanding drum on both sides of the drum as
follows;
200mm wide abrasive - gap 1.5 to 2.5mm
8in wide abrasive - gap 3/32 to 5/32in
The Spacer Abrasive Guide are of various
thicknesses.
User the thicker guides first and
adjust the gap using the thinner spacers if
required.
5.
Check the condition of the rear wheels (Rollers
Ref.61). The wheels must be free from dirt and
rotate freely. Check the condition of the Shaft
Roller Ref.60, use a straight edge to make sure
the shaft is not bent.
For a detailed parts drawings, parts lists, service
bulletins and technical support visit Hiretech on the
web at http:// www.hiretech.biz
36
35
28
80
29
142
152
144
142
143
143
145 146
74
66
27
Drum Guard & Abrasive Guides


