18
10
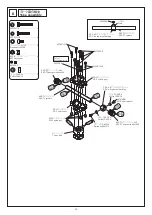
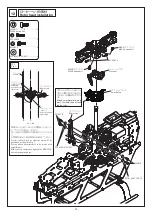
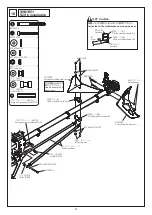
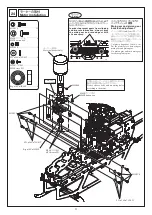
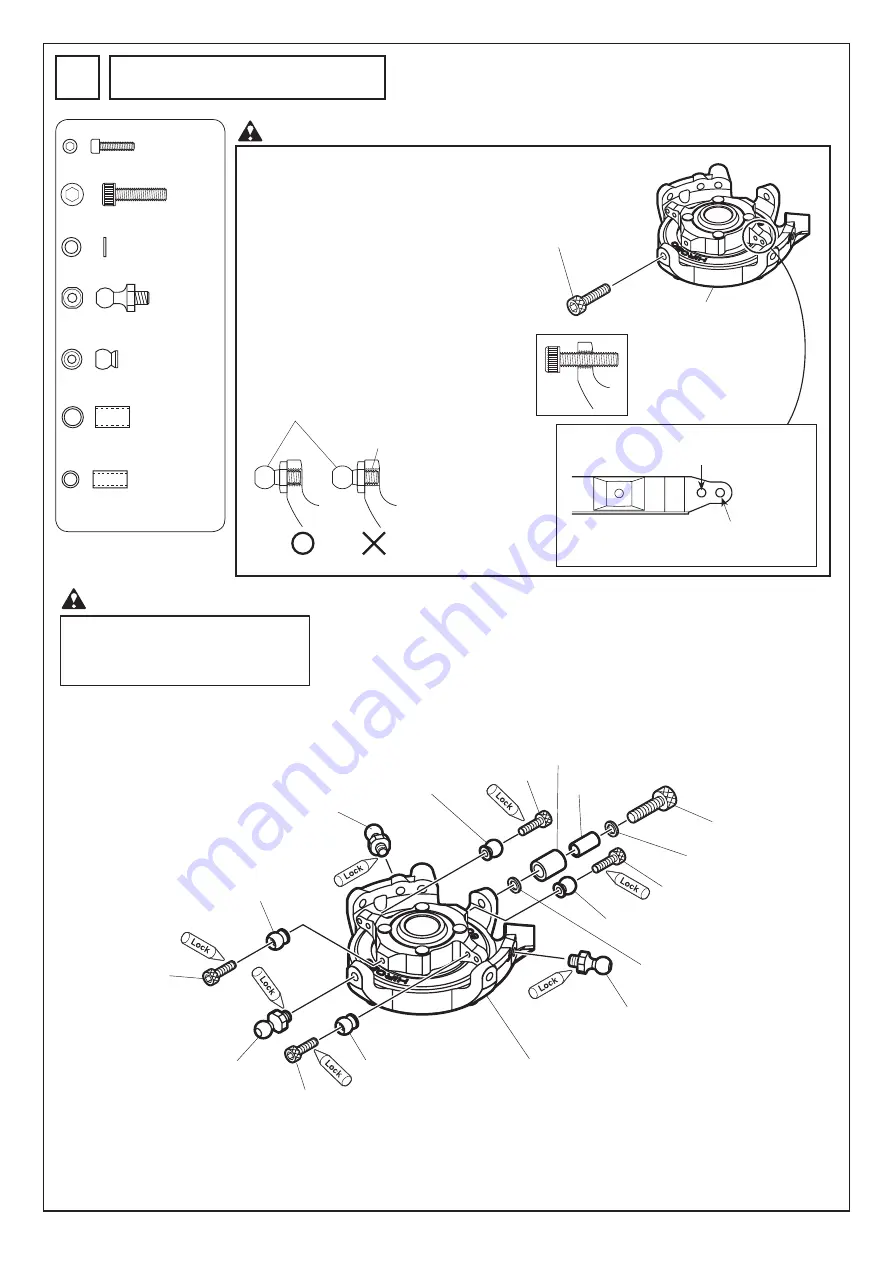
スワッシュプレートの組立
Swash plate assembly
カラー
3X4X8 ............................ 1
Collar 3X4X8
ラジアスピンカラー
.................. 1
Radius pin collar
EX ø5
ボール台付
..................... 4
EX ø5 ball with stand
締めすぎ
Tightened too much
ネジが効かない
The hole is too loose
ピボットボルト
Pivot bolt
ピボットボルト
E ........................ 3
Pivot bolt E
M2X8CS ................................... 4
M3X12CS ................................. 1
FW ø3Xø4.5X0.5T ................... 2
スワッシュプレートの組立方法
How to assemble the swash plate
樹脂製のスワッシュロアプレートにピボットボルトを
取付ける場合、はじめに
M3
キャップスクリューを使い、
ネジ山を切ってください。
その後、各ピボットボルトが確実に固定されるまで締
め込んでください。ただし、締めすぎるとネジが効かな
くなりますので注意してください。
When fixing pivot bolts on the resin swash
lower plate, use an M3 cap screw beforehand
to cut in threads.
Next, tighten the pivot bolts until they are
securely fixed. Please be careful not to tighten
them too much, as it scrapes off the threads
and enlarges the holes.
注
意
Caution
上級者向け(
3D
)
Experts (3D)
スタンダード(
F3C
)
Standard (F3C)
FW ø3Xø4.5X0.5T
FW ø3Xø4.5X0.5T
スワッシュプレート本体工場組立済
Swash plate assembly
(Pre-assembled into our factory)
Gigas 550E
は
120
°
リンケージのみ対応です。
135
°
リンケージは使用できません。
Gigas 550E is 120
°
SWM model.
This model cannot use 135
°
SWM.
注
意
Caution
カラー
3X4X8
Collar 3X4X8
ラジアスピンカラー
Radius pin collar
EX ø5
ボール台付
EX ø5 ball with stand
EX ø5
ボール台付
EX ø5 ball with stand
EX ø5
ボール台付
EX ø5 ball with stand
EX ø5
ボール台付
EX ø5 ball with stand
ピボットボルト
E
Pivot bolt E
ピボットボルト
E
Pivot bolt E
ピボットボルト
E
Pivot bolt E
M2X8CS
M3X12CS
M2X8CS
M2X8CS
M2X8CS
M3
キャップスクリュー
M3 cap screw
スワッシュロアプレート
Swash lower plate
※
穴に対してまっすぐに締め
込みます。
※
Make sure that the screw is
straight in the hole.


