Installation BXS
Release 01 04/2022
27
2
Installation
The devices have been developed for practical application in a harsh
industrial environment and in the rail sector.
On delivery, the device is ready for operation.
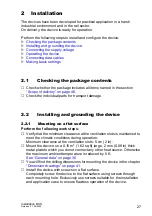
Perform the following steps to install and configure the device:
Installing and grounding the device
2.1
Checking the package contents
Check whether the package includes all items named in the section
“Scope of delivery” on page 46
Check the individual parts for transport damage.
2.2
Installing and grounding the device
2.2.1
Mounting on a flat surface
Perform the following work steps:
Verify that the minimum clearance at the ventilation slots is maintained to
meet the climatic conditions during operation:
Minimum clearance at the ventilation slots: 5 cm (2 in).
Mount the device on a 0.15 m² (1.62 sq ft) large, 2 mm (0.09 in) thick
metal plate to which you do not connect any other heat source. Otherwise
the maximum ambient temperature is reduced by 5 K.
See “General data” on page 36.
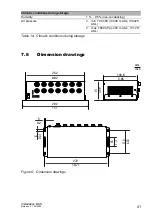
You will find the drilling dimensions for mounting the device in the chapter
“Dimension drawings” on page 41
.
Install the device with screws on a flat surface.
Completely screw the device to the flat surface using screws through
each mounting hole. Exclusively use screws suitable for the installation
and application case to ensure flawless operation of the device.
Summary of Contents for BXS
Page 50: ......


