background image

2

Shortcuts Instructions

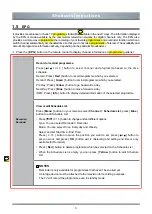
Viewing a channel list

•  After you have done an automatic channel scan (if you’re using an antenna) or receiving your channels 

through a cable provider, you can view your list of channels by pressing [ 

OK 

] button on your remote. You 

will see the channel list display on the right side of the screen.

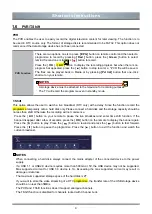
Creating a Favourite List

To quickly access your most-watched channels, you can create a Favourite List.
To create your Favourite List:
1.  Press the [ 

Menu

 ] button on your remote to enter the Settings menu.

2.  Select 

Channel


>


Programme Edit

.

3.  Using the [ 

v  / v 

] button on your remote, select a channel and press [

 FAV 

] button. Press [

 FAV 

] button 

can add or cancel favourite channel.

A heart-shaped indicator will appear beside the channel as confirmation that it has been successfully added.


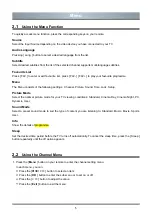
Viewing your Favourite List

To view channels that you’ve added to your Favourite List, press [ 

FAV

 ] button on your remote to call out the 

Favourite List Mode, then you can press [ 

OK

 ]  button to view favourite channel list.


NOTE:


Press [ 

FAV 

] button to switch between Programme Edit and Favourite List Mode.

1.4

    Using the Live


TV

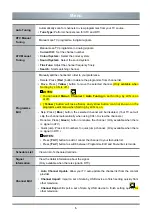
Channel search guide

1. Press the 

Source

 button to select DTV or ATV channel.

2. Press the 

Menu 

button to enter the channel search interface.

• 

Channel > Auto Tuning

 to search programme in TV source.

•  Press the [ 

 /   / < / > 

] and [ 

OK

 ] button to select Tune Type or Digital Type and scanning for channels.

•  Press [ 

Menu 

] button key can skip the scan.

Summary of Contents for 32E5100EE

Page 1: ...LED Backlight TV English Read the manual carefully and ensure you have fully understood its contents before operating this device for the first time RSAG2 025 6169SS 1 C...

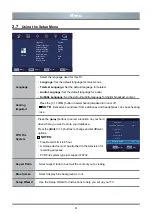
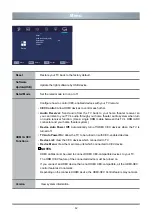
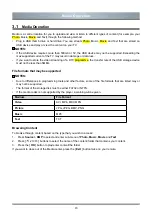
Page 2: ...Shift 4 2 Menu 5 2 1 Using the Menu Function 5 2 2 Using the Channel Menu 5 2 3 Using the Picture Menu 7 2 4 Using the Sound Menu 8 2 5 Using the Time Menu 9 2 6 Using the Lock Menu 10 2 7 Using the S...

Page 3: ...y fitness for a particular purpose accuracy quiet use and non violation of any third party s rights to the maximum extent permitted by applicable law Manufacturer gives no guarantee on the accuracy va...

Page 4: ...ed by unsuitable waste handling of this product The recycling of materials will help conserve natural resources Please do not therefore dispose of your old electrical and electronic equipment with you...

Page 5: ...as damage to the TV Use only a cart stand bracket or table recommended by the manufacturer or salesperson 7 Ventilation Slots and openings in the cabinet are provided for ventilation to ensure reliab...

Page 6: ...ervice personnel under the following conditions a When the power supply cord or plug is damaged b If liquid has been spilled or objects have fallen into the TV c If the TV has been exposed to rain or...

Page 7: ...al minutes it automatically goes into standby mode 1 2 First Time Installation Connect an outdoor VHF UHF antenna or cable to your TV Aerial socket Select Language 1 Press the and OK button to select...

Page 8: ...ess FAV button Press FAV button can add or cancel favourite channel A heart shaped indicator will appear beside the channel as confirmation that it has been successfully added Viewing your Favourite L...

Page 9: ...n button to remind programme which you selected Pre Day Press Yellow button to go backwards a day Next Day Press Blue button to move forwards a day INFO Press Info button to display detailed informati...

Page 10: ...ays connect the mains adapter of the connected device to the power supply If a USB 1 1 or USB2 0 device requires more than 500mA or 5V the USB device may not be supported Max supported current for USB...

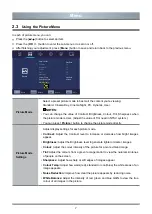
Page 11: ...Time Lock Setup Picture Mode Select the optimal picture mode for your TV viewing conditions Standard Cinema Day Cinema Night PC Dynamic User Sound Mode Select a preset sound mode to suit the type of...

Page 12: ...button icon not shown on the programme edit menu when Sorting by LCN is on Skip Press Blue button the selected channel will be disabled Your TV set will skip the channel automatically when using CH t...

Page 13: ...e Contrast Adjust the Contrast level to increase or decrease how bright images appear Brightness Adjust the Brightness level to generate lighter or darker images Colour Adjust the colour intensity of...

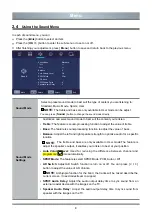
Page 14: ...gth to optimize audio for a specific location NOTE The treble and bass are only available in User mode The feature is adjust the speaker s output it enables you to listen to best at your position Auto...

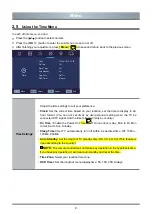
Page 15: ...et the time to display in 24 hour format You can not set times by using manual setting when the TV be connected DTV signal And the time format will vary by country On Time Enable the Power On Time to...

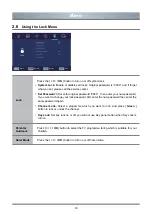
Page 16: ...t to change your lock password first enter the new password then enter the same password again Channel Lock Select a progamme which you want to lock and press Green button to lock or unlock the channe...

Page 17: ...re your database Press the buttons to change and set different options NOTES Free Record Limit is 6 hour A storage device must be attached to the television for recording purposes PVR File system type...

Page 18: ...ter system Device Auto Power Off Automatically turn off HDMI CEC devices when the TV is turned off TV Auto Power On Allow the TV to be turned on with CEC enabled devices Device List View the CEC devic...

Page 19: ...not be less than 5MB s File formats that may be supported NOTES Due to differences in programming tools and other factors some of the file formats that are listed may or may not be supported The form...

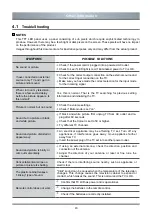
Page 20: ...g TV set Turn off any appliances if interference goes away move appliance farther away from TV Insert the power plug of the TV set into another power outlet Sound and picture is blurry or cuts out mom...

Reviews: