background image

10

 Switching on/off

Connect the power cord of the device to a 100V to 240V AC outlet.
Press the power switch [   ] of the device to [  ] (Some models have no power switch).
Press the standby button [ ] on the remote control in the power on state to switch the device to standby; 

to resume normal watch, simply press the standby button [ ] on the remote control again.
To turn off the device, press the power switch [   ] of the device to  [   ].


NOTES

When the AC power is turned off, wait at least 5 seconds before turning it on again in order to prevent 

problems of the device.

Initial Start

Basic Operation

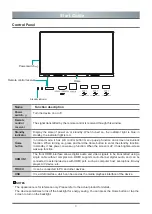
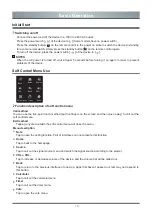
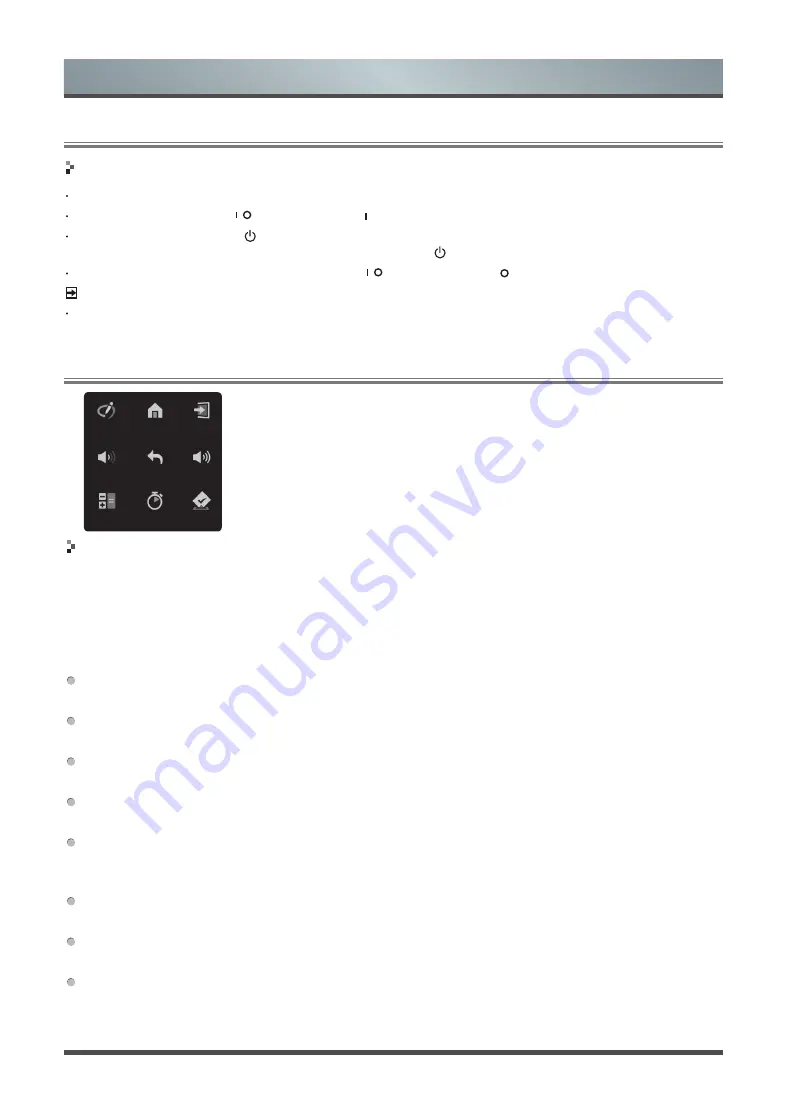
 Function description of soft control menu

Call method

You can use the five-point touch method (put five fingers on the screen and then move away) to call out the 

soft control menu.

Exit method

Tapping any area outside the soft control menu will close the menu.

Menu description

Note

Tap to open the noting function. Part of interfaces can not activate this function.

Home

Tap to back to the homepage.

Source

Tap to call out the signal source menu and switch the signal source according to the prompt.

VOL+, VOL-

Tap to increase or decrease volume of the device, and the volume bar will be called out.

Back

Tap to return to the previous interface of one App. Apps that haven’t passed our test may not respond to 

this button.

Calculator

Tap to call out the calculator menu.

Timer

Tap to call out the timer menu.

Vote

Tap to open the vote menu.

Soft Control Menu Use

Note

Home

Source

VOL-

VOL+

Back

Calculator Timer

Vote

Summary of Contents for 65WR60AE

Page 1: ...Bar code...

Page 2: ...RSAG2 025 6924SS Read the manual carefully and ensure you have fully understood its contents before operating this device for the first time English...

Page 3: ...evice or the fitness of such device content or service for your particular requirement or the protection from interruption and error during operation of such device content or service to the maximum e...

Page 4: ...point for the recycling of electrical electronic equipment waste By ensuring the correct disposal of this product you will help prevent potentially hazardous to the environment and to human health wh...

Page 5: ...rovided Leave a minimum 10cm gap all around the unit 6 Power Source This device should be operated only from the type of power source indicated on the marking label If you are not sure of the type of...

Page 6: ...re required be sure the service technician has used replacement parts specified by the manufacturer or have the same characteristics as the original part Unauthorized substitutions may result in fire...

Page 7: ...Start 10 Soft Control Menu Use 10 Settings 11 Settings Menu 11 Network 11 System 12 Serial Protocol 13 Troubleshooting 16 Specifications 17 Other Information 20 EU Declaration of Conformity DoC 21 The...

Page 8: ...w leave a ventilation space around the device Please leave this space around the device When mounted on the wall Do not install the device as shown below Hinder air circulation Insufficient ventilatio...

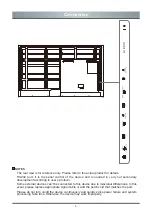
Page 9: ...tion In standby it has power on wake up function When the screen is off it has brighten screen wake up function HDMI IN 1 The front HDMI interface allows digital audio and video signals to be transmit...

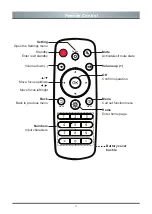
Page 10: ...revious menu Volume down Move focus up down Move focus left right Numbers Input characters OK Confirm operation Setting Open the Settings menu Mute Activate exit mute state Volume up Home Enter home p...

Page 11: ...ice please replace the batteries 2 If you do not use the remote control for a long time or the battery is exhausted remove the battery Waste battery pollute the environment and must be handled properl...

Page 12: ...dary development according to user s protocol Some external devices can t be connected to this device due to individual differences In this event please replace appropriate signal cable or add the pat...

Page 13: ...no displaying please try to use cables in latest version and high quality Part of input RGB signals may occur low quality situations in low or high brightness mode To adapt the picture quality you can...

Page 14: ...xternal PC Device port TOUCH USB PC Device port Connect power amplifier to speaker Power amplifier Speaker Coaxial port Connect to VGA This device has a D sub 15 pin RGB port for PC which allows conne...

Page 15: ...g unit and the touch screen can be used to perform touch operation on the unit On the home page the device is used as the touch unit In HDMI VGA and DP channel the device is used as the touch unit by...

Page 16: ...the five point touch method put five fingers on the screen and then move away to call out the soft control menu Exit method Tapping any area outside the soft control menu will close the menu Menu des...

Page 17: ...is automatically displayed when the WIFI is selected Select an available network enter the password and tap Connect If the selected network is not encrypted you can connect directly If the network you...

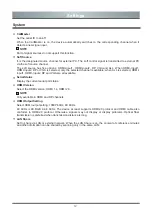
Page 18: ...able when ALL is selected HDMI Input1 HDMI Input2 DP and VGA are all available Serial Status Display the current serial port status HDMI Version Select the HDMI version HDMI 1 4 HDMI 2 0 NOTE Only ava...

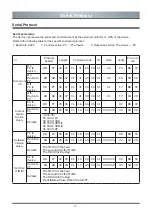
Page 19: ...S of the device Refer to the following table for the specific command protocol 1 Baud rate 9600 2 Control section PC The device 3 Response section The device PC Serial Protocol Protocol header Length...

Page 20: ...14 Protocol header Length Command code ID Data Verify Protocol tail Set Time H M S Reboot TV Signal Source Selection Screen on off Query...

Page 21: ...A1 00 00 00 CD CD are returned after the power on action is executed if the command is not received the power on command needs to be sent again After the TV is turned on the PC will receive AB AB 01...

Page 22: ...ume Sound and picture are disturbed Try to find the appliance that affects the LCD monitor and keep it away Try plugging the LCD monitor s power plug into another outlet Before preparing for repair ch...

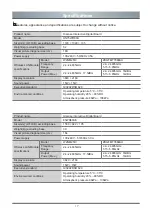
Page 23: ...cutive standard Q 0202RSR 620 Environmental conditions Operating temperature 5 C 35 C Operating humidity 20 80 RH Atmospheric pressure 86kPa 106kPa Product name Hisense Interactive Digital Board Model...

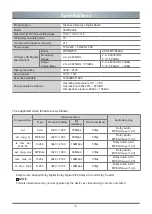
Page 24: ...Dolby Audio Support Dolby Digital Dolby Digital Plus Dolby AC4 and Dolby TrueHD NOTE Formats listed above may not all supported by the device as video making tools are not unified Product name Hisens...

Page 25: ...0Hz NOTE HDMI2 0 and HDMI1 4 are supported by the device HDMI1 4 is the default which only supports part of formats listed above HDMI2 0 supports all formats listed above except front facing port Fron...

Page 26: ...ur waste equipment for recycling please contact your local city office your household waste disposal service or the shop where you purchased the product Batteries In accordance with the Battery Direct...

Page 27: ...ds and or other normative documents Health Safety Art 3 1 a EN62311 2008 EN62368 1 2014 A11 2017 EMC Art 3 1 b EN55032 2015 EN55035 2017 EN61000 3 2 2014 EN61000 3 3 2013 EN301489 1 V2 2 0 2017 EN3014...

Page 28: ...ds and or other normative documents Health Safety Art 3 1 a EN62311 2008 EN62368 1 2014 A11 2017 EMC Art 3 1 b EN55032 2015 EN55035 2017 EN61000 3 2 2014 EN61000 3 3 2013 EN301489 1 V2 2 0 2017 EN3014...

Page 29: ...ds and or other normative documents Health Safety Art 3 1 a EN62311 2008 EN62368 1 2014 A11 2017 EMC Art 3 1 b EN55032 2015 EN55035 2017 EN61000 3 2 2014 EN61000 3 3 2013 EN301489 1 V2 2 0 2017 EN3014...

Reviews: