background image

14

Temperature

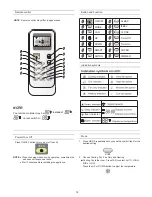
Press the UP button to raise the temperature. Press

the UP  button once to increase the set temperature

by 

.

1  (1 )

°F °C

Press the DOWN  button to lower the temperature.

Press the DOWN  button once to decrease the set

temperature by 

.

1°F(1°C)

NOTES:

In the Cooling and Heating  mode, the temperature can be

set between 61°F and 86°F(16°C and 30°C).

In Fan Only mode,the temperature cannot be set.

UP

DOWN

Sleep mode

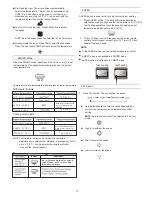
SLEEP mode can be set in Cooling, Heating or Dry operation

mode. This function gives you a more comfortable environment

for sleep.

In Heating mode, the set temperature will decrease by 6

at most,during 3 hours, then keeps steady. 

°F (3°C) 

1. Press MODE to select Cooling, Heating  or Dry.

NOTE: Sleep control cannot be selected when Fan Only

or SMART is selected.

2. Press the UP or DOWN button to set the temperature.

3. Press SLEEP. After 5 seconds, the lights on the control panel

display will dim.

The appliance will stop operation automatically after operating

for 8 hours.

In the Cooling mode, if the current room temperature is

below

, the temperature will automatically increase 

during the first hour after Sleep control is 

activated,then remain the same.

If room temperature is 

26 ) or above, set temperature will 

not change.

1°F(1°C)

79°F( °C

 79°F 

(

26°C

SLEEP

Fan speed is automatically set at low speed. 

NOTE

The air conditioner will return to previous settings after 

Sleep control is turned off.

4.To turn off Sleep control, press SLEEP, MODE, ON/OFF,FAN,

SUPER or wait 8 hours for Sleep control to turn off automatically.

           The temperature and airflow direction may be adjusted 

during Sleep control. The fan speed is automatically set to 

Low speed. After 5 seconds, the lights on the control 

panel display will dim again.

NOTE

NOTE

I FEEL

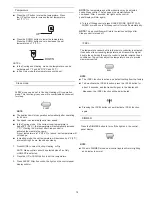
about  5 seconds, and the transmit signal  in the display will

disappear, the I FEEL function will be de-activated.

The I FEEL function is active, as a default setting from the factory.

To de-activate the I FEEL function, press the I FEEL button for

The temperature sensor built into the remote controller is activated.


It can sense its surrounding temperature, and transmit the signal 

back to the unit

,when the remote control is pointed towards the air 

conditioner

. The unit can adjust the temperature so as to provide 

maximum comfort.

NOTE

IFEEL

DIMMER

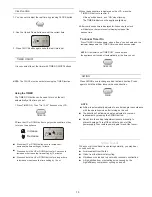
Press the DIMMER button to turn off the light and  the control 

panel display.

When in DIMMER mode, new control inputs will return lighting

NOTE

DIMMER

Pressing the I FEEL button once will activate I FEEL function

and display to normal.

again.

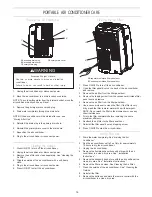
Summary of Contents for AP-08CR1SEJS

Page 1: ...ly before installing and using this appliance and keep this manual for future reference Para preguntas sobre las caracter sticas la operaci n el funcionamiento los componentes o el servicio del produc...

Page 2: ...iver harm NDICE DE CONTENIDOS 30 31 31 32 36 37 37 37 38 40 37 37 IDENTIFICACI N DE LAS PARTES MEDIDAS DE SEGURIDAD DEL AIRE ACONDICIONADO REQUISITOS PARA LA INSTALACI N INSTRUCCIONES PARA LA INSTALAC...

Page 3: ...Secondary drain port Power supply Primary drain port Front Back The figures in this manual are based on the external view of a standard model They may differ from that of the air conditioner you have...

Page 4: ...UNIT Please recycle or dispose of the packaging material for product in an environmentally responsible manner Never store or ship the air conditioner upside down or sideways to avoid damage to the co...

Page 5: ...placement of the air conditioner between 23 and 64 60 cm and 163 cm from window or door Confirm you are using the correct size air conditioner for the space to be cooled per sizing recommendations bel...

Page 6: ...N INSTRUCTIONS Unpack the Air Conditioner Remove packaging materials Remove and recycle packaging materials Remove tape and glue residue from surfaces before turning on the air conditioner Rub a small...

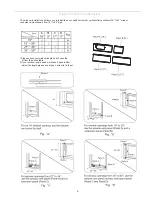
Page 7: ...ditioner in most vertical sliding windows 18 to 50 wide or casement style windows from 18 to 50 high 1 Please check your window length and choose the fit from the above table 2 If your window length n...

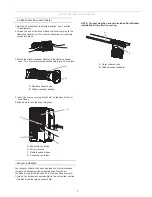
Page 8: ...l window applications Roll the air conditioner to selected location see Location Requirements 1 Attach the window exhaust adapter to the outer slider section the piece with the large exhaust hole A Ou...

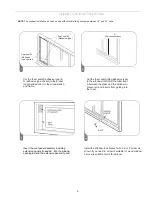
Page 9: ...roper length and attcah it to the window sash and frame Cut the foam seal A Non adhesive type to the window width Stuff the foam seal A between the glass and the window to prevent air and insects from...

Page 10: ...gth and attcah it to the window sash and frame Cut the foam seal A Non adhesive type to the window width Stuff the foam seal A between the glass and the window to prevent air and insects from getting...

Page 11: ...eats the room Press FAN to select High Mid or Low Press the PLUS or MINUS button to adjust the temperature NOTE Heating is NOT available for cooling To cool that Fan Speed Mid for normal fan speed Low...

Page 12: ...e the remote control How to Use To operate the room air conditioner aim the remote controller to the signal receptor The remote control will operate the air conditioner at a distance of up to 23 7m wh...

Page 13: ...MER ON Timer Off TIMER OFF CLOCK DIMMER IFEEL Power On or Off Press ON OFF button to turn on or off the unit NOTE When changing modes during operation sometimes the Wait 3 minutes before restarting th...

Page 14: ...models SUPER SUPER button is used to start or stop fast cooling or heating 1 Press SUPER button The air conditioner automatically sets the fan speed to High and the temperature to 61 F 16 C 2 To turn...

Page 15: ...If room temperature is 26 or above set temperature will not change 1 F 1 C 79 F C 79 F 26 C SLEEP Fan speed is automatically set at low speed NOTE The air conditioner will return to previous settings...

Page 16: ...noise due to poor wall or window construction A high pitched hum or pulsating noise caused by the high efficiency compressor cycling on and off 4 After your desired time is displayed for 5 seconds the...

Page 17: ...gent NOTE Do not wash the filter in the dishwasher or use any chemical cleaners 4 Remove the tapping screw from the condenser air intake filter panel door and remove 5 Remove the air filter from the f...

Page 18: ...r bathing and try not to use heat producing appliances during the hottest part of the day Portable air conditioners are designed as supplemental cooling to local areas within a room A higher capacity...

Page 19: ...f your portable air conditioner Portable air conditioners are designed as supplemental cooling to local areas within a room The filter is dirty or obstructed by debris Clean the filter There is excess...

Page 20: ...btained from entities other than Hisense authorized service companies TWO YEAR LIMITED MANUFACTURER S WARRANTY This Warranty provided by Hisense U S A Corporation hereinafter Hisense covers Portable A...

Page 21: ...IS THE SOLE AND EXCLUSIVE WARRANTY WITH RESPECT TO THE PRODUCT AND HISENSE IS THE EXCLUSIVE WARRANTY PROVIDER FOR THE PRODUCT REPAIR OR REFUND AT HISENSE S SOLE DISCRETION IS THE EXCLUSIVE REMEDY OF...

Page 22: ...vice companies Designated service technicians are trained to fulfill the product warranty and provide after warranty service anywhere in the United States and US territories For further assistance If...

Page 23: ...y notifications updates accessories or other product changes Proof of Ownership In the case of an insurance loss such as fire flood or theft your registration will serve as your proof of purchase Bett...

Page 24: ...completamente iguales que stas ON OF F MO DE FAN SW ING SLE EP SU PER SM AR T IFE EL DIM ME R TIM ER ON TIM ER OF F CLO CK ON OFF ON OFF 23 Panel de control Salida del aire fr o Receptor de se ales C...

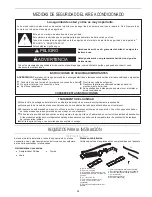
Page 25: ...E LA UNIDAD Que recicle o desh gase del material de embalaje del producto de manera ecol gicamente responsable Nunca guarde o translade el aire acondicionado con boca abajo o de lado para evitar da os...

Page 26: ...para su uso en la cocina NOTAS Para garantizar una buena ventilaci n mantener una distancia requerida entre la salida del aire y la pared o una distancia adecuada de otros obst culos al menos de 23 6...

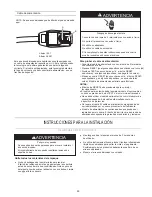
Page 27: ...toma de 3 terminales 2 Presione RESET en algunos dispositivos se enciende una luz verde 3 Presione TEST se escuchar un clic el bot n RESET se activar y en algunos dispositivos se apaga la luz verde 4...

Page 28: ...rriba 2 Si la longitud de su ventana necesita m s de 2 paneles hay que utilizar el tornillo de tipo Q para fijarlos despu s de ajustar la longitud Para una ventana abierta de 18 utilice el panel de ve...

Page 29: ...be ser usado en compa a del kit de instalaci n de la ventana de conducto para la refrigeraci n eficaz 1 Mueva el aire acondicionado para su mejor ubicaci n V a Requisitos de ubicaci n 2 Estirar el ext...

Page 30: ...A Tipo no adhesivo a la anchura de la ventana Rellene el sello de espuma A entre el vidrio y la ventana para impedir la entrada de aire e insectos Instale el soporte de ventana cierre con un tornillo...

Page 31: ...ndica si usted lo necesita El tornillo E es ideal para ventanas de madera El tornillo F es ideal para ventanas de metal Instalaci n En Ventanas Deslizantes Horizontales NOTA El kit de instalaci n de v...

Page 32: ...2 Elija ALTO MEDIO O BAJO El Autom tico controla la velocidad del ventilador seg n la temperatura actual de la habitaci n y los ajustes del control de la temperatura Alto para la velocidad m xima del...

Page 33: ...d para guardar el control remoto C mo utilizarlo Soporte NOTA En el Modo FR O la temperatura puede ajustarse entre 61 F y 86 F 16 C y 30 C En el Modo S LO VENTILADOR no se puede ajustar la Presione el...

Page 34: ...s durante su ON OFF Modo Presione el bot n MODE varias veces hasta que se vea que el s mbolo del par metro deseado parpadee Elija FR O SECO S LO VENTILADOR y CALOR FR O enfr a la habitaci n Presione F...

Page 35: ...lentamiento r pido funciona FAN SWING Button Alto para la velocidad m xima del ventilador Velocidad del ventilador 1 Presione el bot n FAN Elegir la velocidad del ventilador deseada Los controles auto...

Page 36: ...imer hora despu s de que el control de espera est activado luego se mantiene igual Si la temperatura de la habitaci n es de 79 F 26 C o m s la temperatura no cambiar SLEEP La velocidad del ventilador...

Page 37: ...ostrar en la pantalla de LCD del control remoto en lugar del tiempo deseado SWING NOTA El flujo de aire se ajusta autom ticamente al ngulo seg n el modo de funcionamiento despu s de encender la unidad...

Page 38: ...o suave y h medo 5 Enchufe el aire acondionado o reconecte la energ a 6 Presione ON OFF para encender el aire acondicionado 1 Presione ON OFF para apagar el aire acondicionado 2 Abra la puerta del pa...

Page 39: ...e eficiencia EER por sus siglas en NOTA No se debe arreglar el cable El cable de alimentaci n da ado debe ser reemplazado por uno nuevo ofrecido por elfabricante Cable de alimentaci n del aire acondic...

Page 40: ...les est n dise ados como refiregeraci n suplementaria para reas localizadas dentro El filtro est sucio u obstruido por residuos Limpie el filtro Hay excesivo calentamiento o humedad debido a la cocina...

Page 41: ...excluyendo cualquier accesorio y o complementos de terceros comprados por separado Esta garant a deber aplicar solamente cuando el Producto se compre almacene transporte maneje opere y mantenga seg n...

Page 42: ...cluido desde la cobertura de esta Garant a Esta Garant a s lo es v lida en EE UU las Islas V rgenes de EE UU Guam y Puerto Rico y s lo se aplica a los Productos comprados y servidos en estas regiones...

Page 43: ...io Eso puede ahorrar su costo de llamada de servicio Si todav a necesita ayudas siga las instrucciones siguientes Antes de llamarnos por favor recuerde la fecha de compra y el modelo completo y el n m...

Page 44: ...o con usted para las notificaciones de seguridad actualizaciones accesorios u otras modificaciones del Producto Comprobante de Posesi n En caso de cualquier p rdida causada por accidentes tales como e...

Reviews: