11
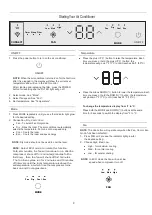
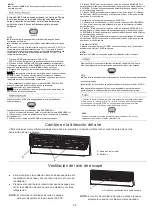
Filter
Changing
Air
Direction
U
se
the
Vertical Level Vane
to
direct
the
air
right
or
left
.
Use
the
whole
cartridge
to
direct
air up, down or straight ahead.
A
.
Vertical Level Vane
B. Cartridge
A
B
Exhaust
Air
Vent
■
Pull
out
the
exhaust
air
vent
control
to
Open
the
exhaust
air
vent
and
draw
stale
or
smoky
air
from
the
room
.
■
Push
in
the
exhaust
air
vent
control
to
close
the
exhaust
air
vent
for
maximum
continuous
cooling
.
NOTE
:
The
exhaust
air
vent
control
will
function
only
when
the
A
fan is running
.
The
exhaust
air
vent
control
is available only for
12K\14K models.
NOTE
:
A.
Exhaust
air
vent
control
Use the time function to turn the air conditioner ON/OFF automatically
.
NOTE
:
■
Airflow is automatically adjusted to a preset direction after turning on the unit.
■
The direction of airflow can be adjusted by pressing the Swing button.
■
Do not turn the airflow louvers manually,
to prevent damage,
turn off the unit
first and cut off the power supply. Then restore power again after adjustment.
1.
When the Filter indicator light is lit, remove, clean and replace
the air filter. See “Cleaning the
Air Filter”.
2.
Press Power
button
on the machine,
or FILTER button on
remote to
reset
the
filter,
after
cleaning and replacing the air
filter.
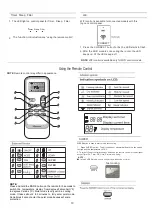
Setting the Air Conditioner to Turn ON:
1. Plug in the air conditioner and use the remote to power it ON.Use
2. the remote to set the desired mode, temperature, fan speed, etc.
3. Use the remote to power OFF the air conditioner.
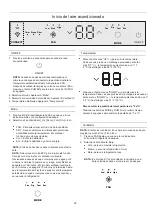
SLEEP
mode can only be set in Cooling or Drying mode. When in
sleep mode the unit will utilize lower,
quieter fan speeds
and automatic temperature adjustments offering 8
hours
of optimal sleeping conditions before shutting off.
FILTER
NOTE
:
When the light is on, it will remain on for 180 hours or until you
press Clean Filter button.
4.
Press TIMER on the remote and use UP, DOWN buttons to set the desire delay
time until the air conditioner turns ON. the delay time can be set from 0 to 24 hours in
one--hour increments.
5.
Press TIMER again to enter the delay time. The TIMER led on the air conditioner
illuminates, and the delay time appears on the remote.
Setting the Air Conditioner to Turn OFF:
1. Plug in the air conditioner and use the remote to power it ON.
2. Use the remote to set the desired mode, temperature, fan speed, etc.
3. Press TIMER on the remote and use UP, DOWN buttons to set the desire delay
time until the air conditioner turns ON. the delay time can be set from 0 to 24 hours
in one-hour increments.
4.
Press TIMER again to enter the delay time. The TIMER LED on the air conditioner
illuminates, and the delay time appears on the remote.
To cancel TIMER:
Press the TIMER button again, when a "beep" is heard and the indicator disappers,
the TIMER mode has been canceled.
NOTE:
■
The TIMER function can only be set using the remote.
NOTE:
■
The appliance will stop operation automatically after operating for 8 hours.
■
Fan speed is automatically set at low speed.
■
In the cooling mode, if the current room temperature is below 79°F(26°C),the
temperature will automatically increase 1°F(1°C) during the first hour after Sleep
mode is activated, and continue running at that temperature. If the
room
temperature is 79°F(26°C) or above, set temperature will not change.
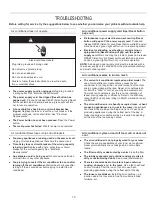
1. Press MODE to select COOL or DRY.
NOTE: Sleep control can not be selected in Fan mode.
2. Press the UP or DOWN button to set the temperature.
3. Press and hold the DIMMER button on the remote for 5 seconds to switch the
DIMMER mode to sleep mode.
4. After 5 seconds, the light on the control panel display will dim.
NOTE:
The temperature and airflow direction may be adjusted during Sleep control.
The fan speed is automatically set to low speed. After 5 seconds, thelights on the
control panel display will dim again.
5. To turn off Sleep control, press MODE, FAN,SLEEP or wait 8 hours for Sleep
control to turn off automatically.
NOTE:
The air conditioner will return to previous setting after Sleep mode is turn off.
Summary of Contents for AW-08TW1RAFUE20
Page 2: ......

