background image

Operation Instructions 


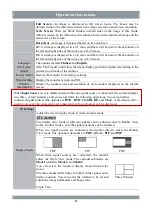
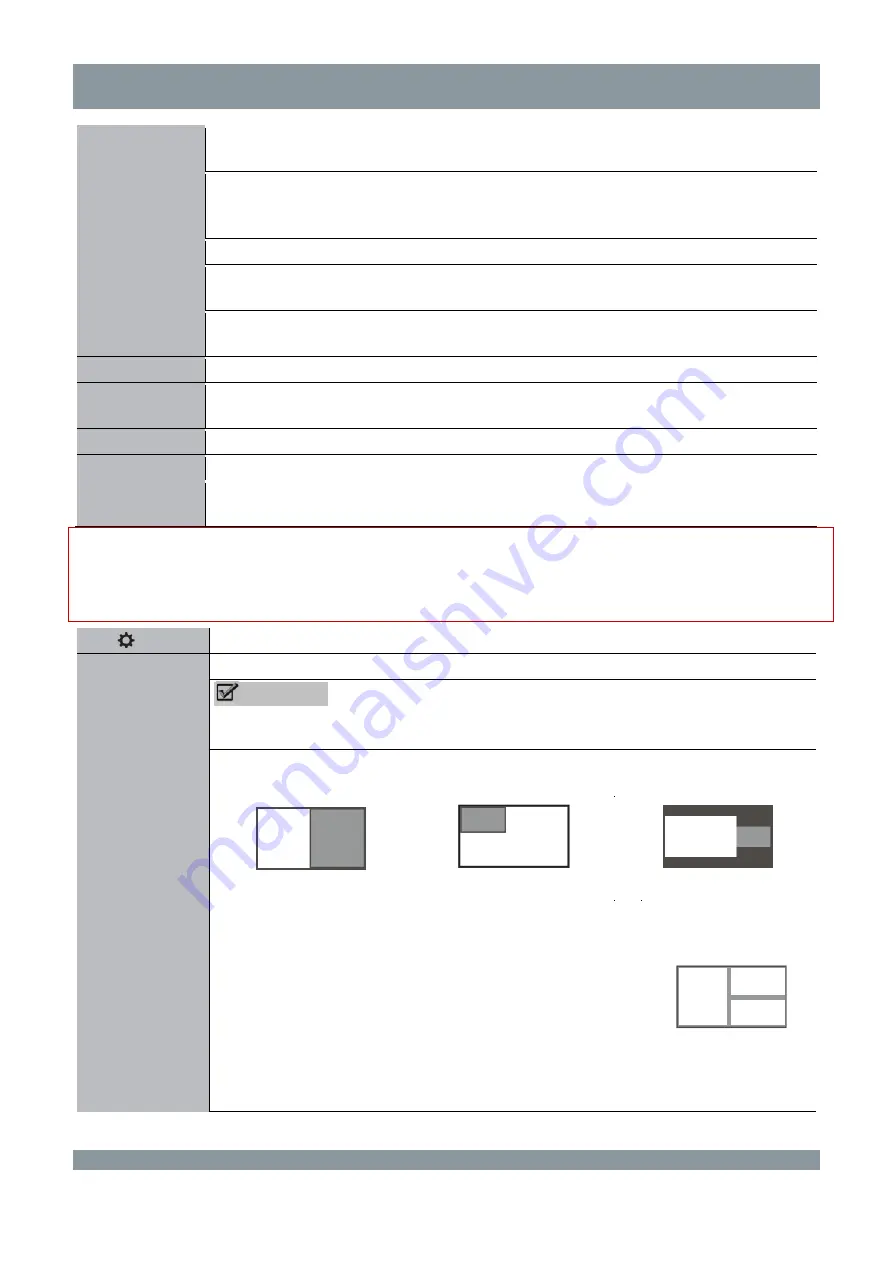
Full Screen

: An image is displayed in full screen mode. The image may be 

deformed due to the difference between the image resolution and screen resolution. 

Scale Screen

: There are black borders on both sides of the image in this mode, 

which is caused by the difference in resolution between the displayed image and the 
actual size of the screen. 

Dot to Dot

: An image is displayed based on its actual size. 

4:3

: An image is displayed in a 4:3 ratio, and there will be narrow black borders on 

the left and right sides of the image on a 16:9 screen. 

5:4

: An image is displayed in a 5:4 ratio, and there will be narrow black borders on 

the left and right sides of the image on a 16:9 screen. 

Language 

The options include

 Chinese

 and

 English

VGA Auto 

Adjust 

After VGA signal connection, the image display position is adjusted according to the 
current zoom mode of the monitor. 

Factory Reset  Restore the monitor to its factory settings. 

Monitor Info 

Display the monitor version and SN. 

Window 

information 

Display the signal source and resolution of each window displayed on the current 
screen. 

When 

Input Source

 is set to 

Auto

, and more than one signal source is connected, the system displays 

two, three, or four windows, and you can perform the following operations. You can prioritize 
connected signal sources (the options are 

DVI1

DVI2

3G-SDI

DP

, and 

VGA

). A maximum of five 

signal sources can be connected, and a maximum of four windows can be displayed. 


Settings


Display Mode 

Adjust the screen display mode in multi-window mode. 

 CAUTION 

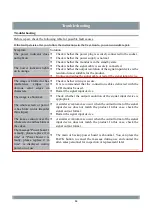
The display ratio mode of different signals can be adjusted only in Double View 
mode. In other modes, only the signal positions can be adjusted. 

When two signal sources are connected, the monitor directly enters the Double 
View mode. The optional submodes are 

PBP

 (default), 

PIP

, and 

POP


PBP 

PIP 

POP 

When three signal sources are connected, the monitor 
enters the Triple View mode. The optional submodes are 

Mode1

 (default), 

Mode2

, and 

Mode3

You can select the required display mode through the 
menu. 
The three modes differ from each other in the signal source 
display position. You can select the window to be set and 
adjust the image parameters and image ratio. 
 
Triple View 


Three Window 


12 

Summary of Contents for HME8C58

Page 1: ...Guide thoroughly before using Hisense LCD monitor and keep it properly for future reference RSAG2 025 4879SS G version You can download the latest user guide from Hisense website Hisense website www...

Page 2: ...violations of the safety precautions and use instructions of the User Guide Hisense Group Service Hotline 4006111111 Hisense Group Installation Hotline 4008011111 Hisense service quality supervision t...

Page 3: ...onitor power cable whenever possible Description and Maintenance of the LCD monitor Please maintain the monitor screen regularly because it is a key component of the product Do not squeeze the edges o...

Page 4: ...ea of mains disconnection devices such as the switch power plug and appliance coupler and that these devices are easy to operate Ensure that the socket in use is qualified and certified by a national...

Page 5: ...tion 5 Mounting and Installing the Monitor 5 Front View of the LCD Monitor and Buttons 6 Monitor Input and Output Interfaces 8 Connecting to Signal Sources 9 Operation Instructions 11 Main Menu Operat...

Page 6: ...nput from multiple signal sources and is designed to support automatic signal source identification With the built in Picture by Picture PBP Picture in Picture PIP and Picture Outside Picture POP func...

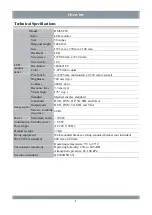
Page 7: ...nse time 9 5 ms typ Visual angle 176 typ Standard Medical display standard Image signal Input ports DVI1 DVI2 DP 3G SDI and VGA Output ports DVI1 DVI2 3G SDI and VGA Screen scanning frequency 60 Hz Po...

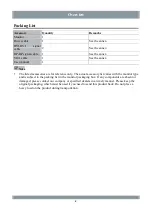
Page 8: ...ccessories are for reference only The actual accessory list varies with the monitor type and is subject to the packing list in the monitor packaging box If any components are absent or damaged please...

Page 9: ...vent it from falling or slipping off the bracket or support arm If the equipment is connected to a support arm do not use the equipment as a handle to move the equipment For instructions on how to mov...

Page 10: ...n the device is working off when the device is powered off and orange when the device is in the standby state MENU CONFIRM MENU button PREVIOUS INCREASE button When no menu is displayed you can press...

Page 11: ...nd hold the button for 3s again to unlock the screen It is used to enter and exit the standby mode Note When the monitor is in standby mode you can press any button to awake it If no operation is perf...

Page 12: ...interface DVI IN 1 and DVI IN 2 DVI OUT 1 and DVI OUT 2 DVI signal loopthrough input ports Note The external device must be a dual link device to ensure a resolution above 1080p for normal output DP s...

Page 13: ...ding DVI1 DVI2 3G SDI and DP based on the priorities of the signal sources To view the signal from a signal source in full screen mode you can press the BACK button to call out the signal source menu...

Page 14: ...coming with the monitor or other cables that meet the specifications must be used Signal Formats Supported by SDI Signal Format Resolution Refresh Frequency SD 480i 60 Hz SD 576i 50 Hz HD 720p 50 Hz a...

Page 15: ...quantity of displayed windows single two three and four When only one signal source is connected the system displays a single window and you can perform the operations listed in the following table Se...

Page 16: ...on Display the signal source and resolution of each window displayed on the current screen When Input Source is set to Auto and more than one signal source is connected the system displays two three o...

Page 17: ...dow Four windows Windows In Double Triple Quad View mode select the window to be set and adjust the image parameters and zoom scale Swap Available only in Double View mode The left and right windows d...

Page 18: ...ommended that the connection cables delivered with the LCD monitor be used Restart the signal input device The image is abnormal Check whether the output resolution of the signal input device is appro...

Page 19: ...signal I O complies with medical equipment standards The electromagnetic waves emitted by power supply equipment may affect the use of the LCD monitor and damage it Install the LCD monitor in an envir...

Page 20: ...a controlled way Environmental friendly service life The environmental friendly service life of the LCD monitor is 10 years The environmental friendly service life of the remote control batteries acce...

Page 21: ...ncorrect installation natural disasters or improper maintenance by a third party other than Hisense and authorized distributors The product ages because it has been used with brightness above the reco...

Page 22: ...Annex Display Size 18...
Page 23: ...nt Co Ltd Address North 3F Outsourcing Center of Software Park No 169 Songling Road Laoshan District Qingdao P R China Hisense national customer service hotline 4009940707 Hisense Group service superv...

Reviews: