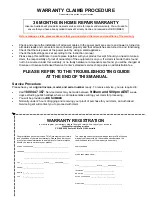
HISENSE WARRANTY
TERMS AND CONDITIONS
1. HISENSE Australia will provide parts and labour to you the Customer
as set out herein.
2. Nothing in the warranty, limits any rights you may have under the trade
practices act or any other Commonwealth or State Legislation. Such
rights cannot be changed by the conditions in this warranty. Subject to
the conditions below this appliance is warranted by Hisense and/or its
Agents to be free from defects in materials and workmanship for a
period of 36 months from the date of purchase (the “Warranty period”)
3. This warranty: -
a. covers products purchased as NEW, manufactured for use in
Mainland Australia and Tasmania;
b. commences from the date of purchase as listed on the Customers
invoice;
c. provides for the labour and replacement parts necessary to maintain
your product in good operating condition as specified in this warranty
however, if repair is needed because of product failure during normal
usage, Hisense has the option to repair or replace the defective
product or part of the product with a product or part of the product of
like kind and quality and a replacement part may be new or
reconditioned of like kind and quality and may cost less than the
original product purchased and no charges or refunds will be made
based on the replacement product cost difference;
d. applies only to the original purchaser and cannot be transferred;
e. is only applicable when your appliance is used in a domestic
environment;
f. covers products for commercial purposes for a period of 90 days
from the date of purchase.
4. Product Identification
a. Hisense reserves the right to reject claims for any services or work
where the Customer requesting such work or services from Hisense
and/or its agents cannot produce for verification the serial number
and the proof of purchase as per original purchase invoice.
b. The warranty will be voided if any Serial Number sticker provided to
be placed on the equipment is damaged, modified or removed.
c. In the event that a request for repair is made against a warranty
where the Serial Number sticker is not attached to the product or the
customer cannot produce for verification the original invoice, the
repairer will not affect any repairs on the product and the Customer
will be charged a service call-out fee.
5. What is covered by this warranty
a. The equipment is covered for faulty workmanship on parts that have
failed under normal use which are contained within the product.
b. Hisense and/or its Agents will decide if there are any defects in the
material and/or workmanship
c. This warranty is only applicable for repairs on declared equipment
carried out within Mainland Australia and Tasmania
6. What is not Covered by this warranty (excluded):-
a. Loss or damage to perishable items occasioned by:
i. Accidental removal of the plug from the power point, failure to
plug in the product to a properly connected power supply or
failure to switch on the power point;
ii. Switching off the power supply or power supply outages;
iii. Failure to keep the door or lid of the product closed;
iv. The introduction of abnormal heat loads to the product;
v. Failure to observe the operating and installation instructions
supplied with the product; and
vi. Failure to defrost the product at recommended intervals.
b. any damage or failure:
i. of equipment due to the product being inadequately serviced to
manufacturer’s recommendations;
ii. resulting from environmental conditions including and not
limited to dirt, dust, rodents, insects, rust, corrosion, salt built-
up, of any part of the product including its parts; or
iii. resulting from excessive use “fair wear and tear”;
iv. resulting from poor installation including and not limited to
positioning and externally fitted equipment such as plumbing
and drainage, cabling, antennae or due to Incompatibility of
connected equipment;
v. to the product caused by overheating as a result of siting or
positioning of the equipment, where there is not provision for
adequate ventilation or a dust free environment;
vi. caused if your appliance has been dismantled, repaired or
serviced by any person other than someone authorised by
Hisense;
vii. to a product or components, caused by power surges or spikes,
including and not limited to, mains power and
telecommunications connections, or to other unspecified
sources, incorrect power current, voltage fluctuation, amperage
fluctuation, rust or corrosion;
viii. due to a dropped product; collision with another object, use
of which is not designed, negligence, accident or deliberate
misuse, theft, abuse, vandalism, flood, fire, earthquake,
electrical storms or any other act of God or any war related
events;
c. costs of attendance and testing where no mechanical or electrical
failure is identified;
d. initial setup and installation of the product;
e.
Normal maintenance costs and costs incurred through the
installation of items listed as requiring periodic replacement;
f. products with removed or altered serial numbers;
g. consumables such as but not limited to bulbs/globes, batteries,
remote controls;
h. removal and reinstallation of an internal component not performed
by a factory authorised service centre;
i. cosmetic or structural items;
j. Any failures due to the interference from or to other products
and/or sources;
7.
The Warranty Ceases if: -
a. The product ceases to carry the original manufacturer’s serial
number or is sold at an auction;
b. The product is rented;
c. Damage to the product has occurred as listed in point 6b.
8. Neither Hisense nor its representatives provide loan equipment
under the terms of this warranty.
9.
Any unauthorised access to the internal hardware of the product will
void this warranty.
10. Replacement items are “Like for like” and is not “new for old” and
does not indicate in any way that a faulty product will be replaced
with a new part or unit.
11. If you reside outside of the service coverage area of your nearest
authorised service agent, this warranty does not cover the costs of
transportation or travel expenses to and from your home.
12. Hisense accepts no liability for items that are lost, damaged, or
stolen as a result of freight, transport or storage. If you are required
to transport the appliance to an authorised service centre, you must
ensure that it is securely packed and insured.
13. On Public Holidays or other periods when regular business and
wholesale operations are temporarily ceased, repairer availability
and warranty response times may extend beyond the standard
response times due to the availability of repairers and parts.
14. Any repair performed on a product under the warranty where no fault
can be found, or the item is deemed by Hisense, or an authorised
Hisense agent, to be not faulty under this warranty, or the repair or
fault is not covered under the warranty, a No Fault Found fee is
payable by the warranty holder of a minimum of $125 inc GST.
15. Any repairs or services required that are outside of the terms and
conditions of the warranty can be carried out at the request of the
customer or due to site attendance were fault is not covered under
warranty as the product not been installed or setup correctly; a credit
card may be required prior to the commencement of such services.
Summary of Contents for HTFF525AS
Page 19: ......


