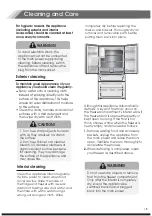
Ice & water dispenser with a filter is one
of the helpful features on your new
appliance. To help promote better health,
the water filter removes unwanted
particles from your water.
Please follow the below instructions
carefully for correct installation.
In order for the ice & water dispenser to
operate properly, a water line is required.
-the maximum inlet water pressure is
862
kPa;
-the minimum inlet water pressure is 207kPa.
Installing the water lines
1.
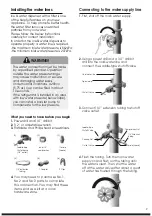
Power drill and 1/4’’ drill bit.
2.
1/2’’ or adjustable wrench.
3.
Flatblade and Philips head screwdrivers.
1 ferrule
(sleeve)
Saddle-type
Shut offvalve
(1/4” outlet)
one 1/4”
compression
1/4” extension
tubing
1 Coupler
2 Clips
WARNING!
Under normal conditions, a200cc
(5.75 oz.) cup can be filled in about
10 seconds.
If the refrigerator is installed in an area
with low water pressure (below 30psi),
you can install a booster pump to
compensate for the low pressure.
The water connection must be made
by a qualified plumber. Operation
outside the water pressure range
may cause
malfunction, or
severe
and damaging water leaks.
What you need to have before you begin
4.
You may need to purchase
No.1,
No.2 and No.3 parts to complete
this
connection.
You may find these
items sold as a kit
at a local
hardware store.
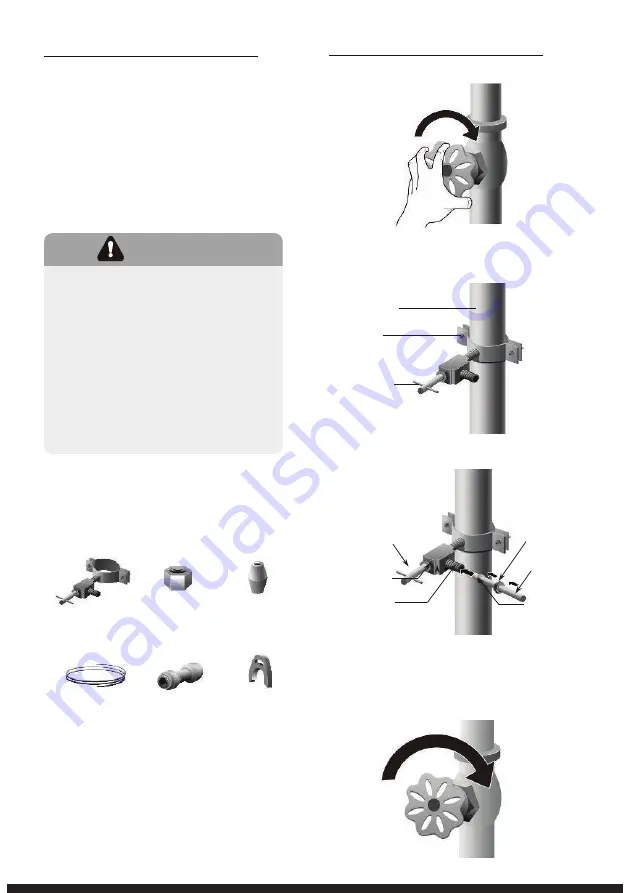
Connecting to the water supply line
1.
2.
3.
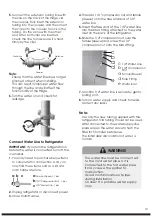
First, shut off the main water supply.
Cold water line
Pipe clamp
Shut off Valve
Using a power drill and a 1/4’’ drill bit
drill into the cold-water line and
connect the saddle-type shutoff valve.
Connect 1/4’’ extension tubing to shutoff
valve outlet.
Outllet Valve
Packing Nut
Saddle-Type
Shutoff Valve
Compression Nut
1/4” Extension
tubing
Ferrule(sleeve)
Flush the tubing. Turn the main water
supply on and flush out the tubing until
the water is clear. Then, shut the water
off at the water valve after about a quart
of water has flushed through the tubing.
4.
9
(1)
(2)
(3)
(6)
(5)
(4)
Summary of Contents for RF200D4CSE
Page 49: ......


