Hisense Refrigerator
8
①
②
③
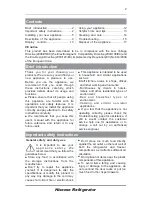
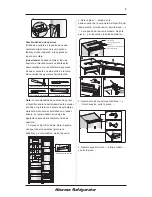
12.
Connect e
l
ectrica
l
connector
①
in
accordance wit
h
step
3
and t
h
en insta
ll
part
②(
w
h
ic
h
is in t
h
e p
l
astic ba
g).
②
upper hinge cover(left)
①
13.R
everse part
①
by
180
°and insta
ll
it
onto t
h
e ri
gh
t corner of t
h
e door
,
t
h
en
mount part
②.
(
bot
h
of w
h
ic
h
are taken
down in step
2)
1
2
1
4
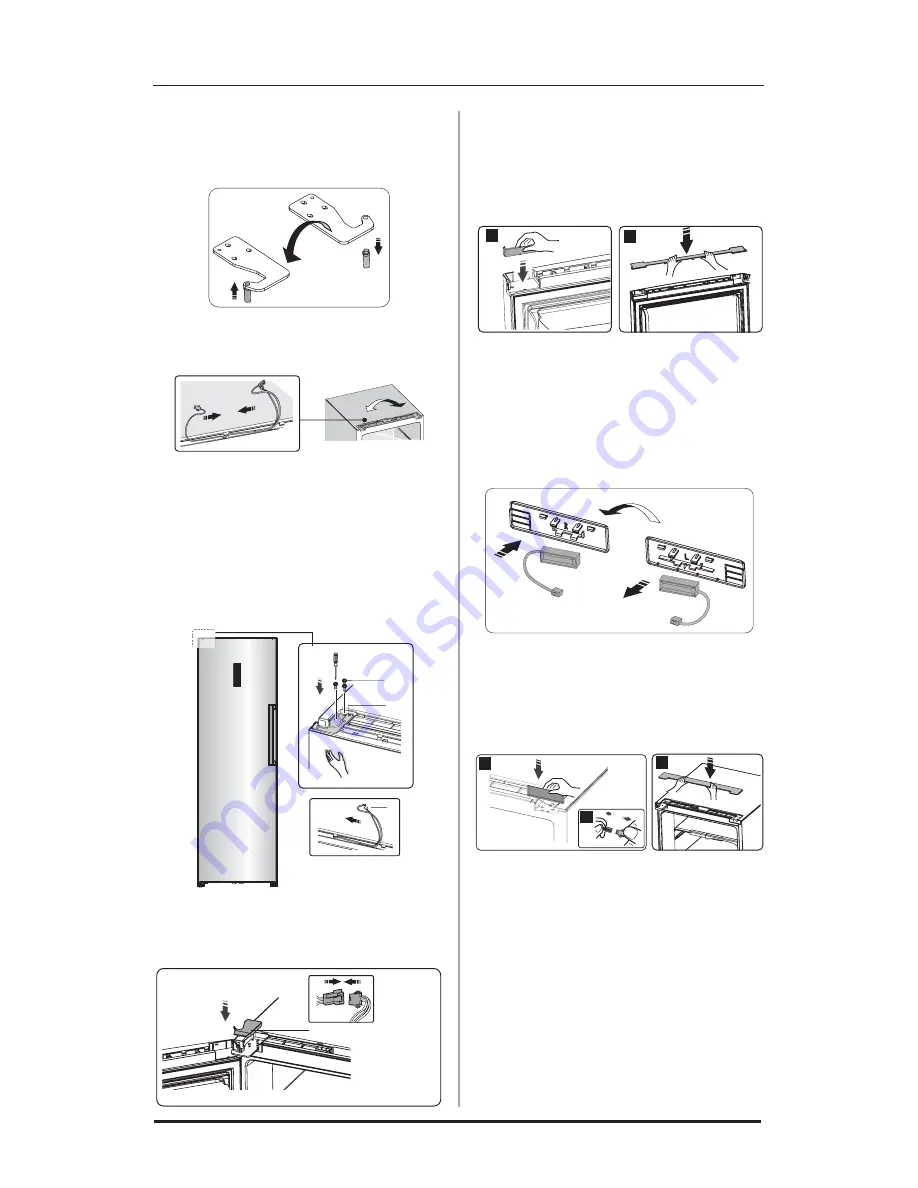
.
T
ake t
h
e reed switc
h
out of t
h
e
copin
g
b
l
ock
(
part
③
in step
3)
and mount
it on anot
h
er b
l
ock for use
(
w
h
ic
h
is
wit
h
mark “
R
” in t
h
e p
l
astic ba
g).
P
ut
t
h
e copin
g
b
l
ock just removed back to
t
h
e p
l
astic ba
g.
15.
,
connector
②
,
and t
h
en insta
ll
part
③ .
I
nsta
ll
part
①
connect t
h
e wire
16.
O
pen t
h
e door
,
mount door racks
and t
h
en c
l
ose it
.
Note
:
Be
sure
c
h
aracter
side
of
reed switc
h
fits we
ll
wit
h
copin
g
b
l
ock
.
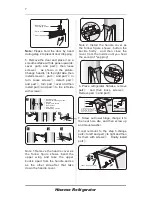
1
2
2
3
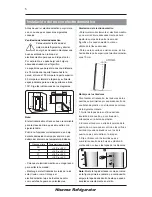
9.
S
crew out t
h
e upper
h
in
g
e axis
,
turn
t
h
e upper
h
in
g
e over and fix axis on it
.
Th
en p
l
ace it at side for use
.
10.
E
xc
h
an
g
e wires bot
h
in t
h
e
l
eft and
ri
gh
t s
l
ots of refri
g
erator body
.
11.
M
ove t
h
e door to appropriate
position
,
adjust part
①
and t
h
e door
,
M
ove t
h
e connectin
g
wire
②
in t
h
e s
l
ot
of t
h
e door from ri
gh
t to
l
eft
,
and t
h
en
fix part
①
and wire
②
by screws
③ .
(Pl
ease
h
o
l
d t
h
e door by
h
and w
h
en
insta
ll
in
g)


