5
WARNING
○
Prior to use, check the connecting USB cable for any
defect or damage.
Using a defective or damaged USB cable can cause
smoke emission or ignition.
○
When the product is not being used, cover the USB port
with the rubber cover.
Buildup of dust etc. in the USB port can cause smoke
emission or ignition.
NOTE
○
There may be an occasional pause during USB
recharging.
○
When a USB device is not being charged, remove the
USB device from the charger.
Failure to do so may not only reduce the battery life
of a USB device, but may also result in unexpected
accidents.
○
It may not be possible to charge some USB devices,
depending on the type of device.
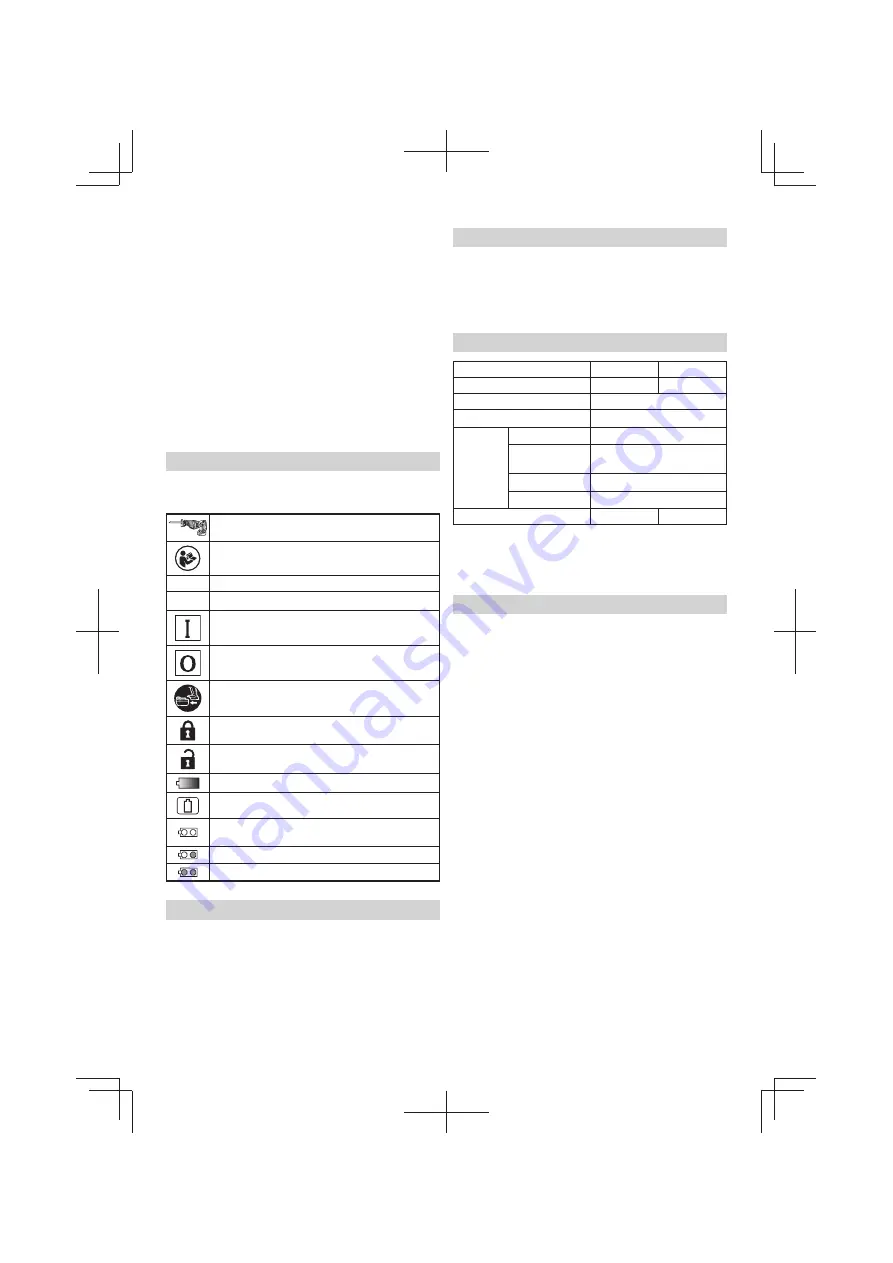
SYMBOLS
WARNING
The following show symbols used for the machine. Be
sure that you understand their meaning before use.
CR14DSL / CR18DSL:
Cordless Reciprocating Saw
Read all safety warnings and all instructions.
V
Rated voltage
n
0
No-load speed
Switching ON
Switching OFF
Disconnect the battery
Swtich lock
Switch unlock
Battery capacity
Remaining battery indicator switch
The battery remaining power is nearly empty.
Recharge the battery soonest possible
The battery remaining power is a half.
The battery remaining power is enough.
STANDARD ACCESSORIES
In addition to the main unit (1 unit), the package contains the
accessories listed on page 10.
Standard accessories are subject to change without notice.
APPLICATIONS
○
Cutting pipe and angle steel.
○
Cutting various lumbers.
○
Cutting mild steel plates, aluminum plates, and copper
plates.
○
Cutting synthetic resins, such as phenol resin and vinyl
chloride.
SPECIFICATIONS
Model
CR14DSL
CR18DSL
Voltage
14.4 V
18 V
No-Load Speed
0 – 2100 /min
Stroke
28 mm
Capacity
Mild Steel Pipe
O.D. 90 mm
Vinyl Chloride
Pipe
O.D. 90 mm
Wood
Depth 90 mm
Mild Steel Plate
Thickness 10 mm
Weight
3.3 kg
3.4 kg
NOTE
Due to HITACHI’s continuing program of research and
development, the speci
fi
cations herein are subject to
change without prior notice.
CHARGING
Before using the power tool, charge the battery as follows.
1. Connect the charger’s power cord to the receptacle.
(Fig. 2)
<UC18YFSL>
When connecting the plug of the charger to a receptacle,
the pilot lamp will blink in red (At 1-second intervals).
<UC18YSL3>
When connecting the plug of the charger to a receptacle,
the charge indicator lamp will blink in red (At 1-second
intervals).
CAUTION
Do not use the electrical cord if damaged. Have it
repaired immediately.
2. Insert the battery into the charger. (Fig. 2)
Firmly insert the battery into the charger.
3. Charging
<UC18YFSL>
When inserting a battery in the charger, the pilot lamp
will light up continuously in red.
When the battery becomes fully recharged, the pilot
lamp will blink in red (At 1-second intervals). (See
Table
1-a
)
●
Pilot lamp indication
The indications of the pilot lamp will be as shown in
Table 1-a
, according to the condition of the charger or
the rechargeable battery.
<UC18YSL3>
When inserting a battery in the charger, the charge
indicator lamp will blink in blue.
When the battery becomes fully recharged, the charge
indicator lamp will light up in green. (See
Table 1-b
)
●
Charge indicator lamp indication
The indications of the charge indicator lamp will be as
shown in
Table 1-b
, according to the condition of the
charger or the rechargeable battery.
0000Book̲CR14DSL.indb 5
0000Book̲CR14DSL.indb 5
2015/09/30 10:05:58
2015/09/30 10:05:58


