background image

Specifications 


40

Specifications 

Display 

Picture Tube:  


20 inch measured diagonal 90º deflection 

Picture Tube 

VCR 

Video Recording System:  2 rotary heads 
    helical 

scanning 

system 

Audio 

Track: 

  1 

track 

Tuner: 
Broadcast Channels: 


VHF 2~13, UHF 14~69 

CATV Channels: 


Midband A through I (14~22) 

    Superband 

through 

(23~36) 

    Hyperband 

AA~EEE 

(37~64) 

    Lowband 

A-5~A-1 

(95~99) 

    Special 

CATV 

channel 

5A 

(01) 

    Ultraband 

65~94, 

100~125 

General 

Power Source: 


120V AC, 60 Hz 

Power Consumption: 


Approx. 112 watts 

Television System:   

EIA Standard NTSC Color 

Speaker: 

  1 

Piece 

Operating Temperature: 

41ºF~104ºF (5ºC~40ºC) 

Operating Humidity:  

10%~75% 

Weight:  


52.8 lbs. (24Kg) 

Dimensions:   


21-1/8" (W) X 21-1/4" (H) X 19-1/8"(D) 


536(W) X 540 (H) X 486(D) mm 

Designs and specifications are subject to change without notice. 

HITACHI 
HITACHI HOME ELECTRONICS (AMERICA), INC. 

National Headquarters 
3890 Steve Reynolds Blvd., Norcross, GA 30093 
Tel. 404-279-5600 

HITACHI SALES CORPORATION OF HAWAII, INC. 

3219 Koapaka St., Honolulu, Hawaii 96819 Tel. 808-836-3621 


1

1994-95 model! 


Warranty:  2 year parts, 1 year labor, 10 years transistors 


Cannot record one channel and watch another!! 


Memory backup: 1 minute


Summary of Contents for 20VR2B

Page 1: ...aption System 13 Clock Adjustment 15 To Set the Clock 15 To Make Corrections 15 To Display the Date and Time 16 To Reset the Clock 16 Channel Memory 17 Automatic Setting 18 Using the Add Delete button 18 One Press Channel Search 18 Using the 100 key 18 To Watch TV 19 Audio Mute 19 Sleep Timer 19 Video Adjust Menu 19 How to Adjust 20 Special Playback Features 21 To Rapidly Locate a Particular Segme...

Page 2: ...n Progress 31 Re Recording Tape Duplication 32 Tape Operation 33 Rec End Search 33 Time Search 33 Auto Play with Repeat Function 34 Time Counter Control 34 Types of Video Cassettes 35 Erase Protection Record Tab 36 Cleaning Care for Video Heads 36 Helpful Notes On Operations 37 Before Requesting Service 38 Accessories 39 Specifications 40 ...

Page 3: ...intenance servicing instructions in the literature accompanying the TV VCR Combination WARNING TO PREVENT FIRE OR SHOCK HAZARD DO NOT EXPOSE THIS TV VCR COMBINATION TO RAIN OR MOISTURE There are no user serviceable parts inside the TV VCR Combination Never remove the back cover of the TV VCR Combination as this can expose you to a very high voltage and other hazards If the TV VCR Combination does ...

Page 4: ... Combination antenna is recommended for the best performance However if you are located in an exceptionally good signal area that is free from interference and multiple image ghosts the indoor antenna may be sufficient LOCATION Select an area where sunlight or bright indoor illumination will not fall directly on the picture screen Also be sure that the location selected allows a free flow of air t...

Page 5: ...Important 5 cause damage to the TV VCR Combination If something gets into the TV VCR Combination immediately unplug the TV VCR Combination and have it cleaned and inspected ...

Page 6: ...Getting Started 6 Getting Started Basic Antenna Connection A Combination VHF UHF System ...

Page 7: ... the building as close to the point of cable entry as practical B With a Converter Descrambler Box If your cable service supplies you with a converter box you can use the basic connection shown here With this connection you can record and view any channel including scrambled channels However channel selection must be made at the cable company converter box This means that channels cannot be change...

Page 8: ...of Controls 1 Insert a cassette The power will come on automatically If the record tab p 24 is removed playback will start automatically In this case skip step 2 If a cassette is already in the TV VCR Combination just press the power button ON 2 Press the Play button Playback starts 3 Press the Stop button Playback stops ...

Page 9: ...ack press this button to view a rapid forward search Repeat Indicator This indicator lights when the repeat function is selected Timer Indicator This indicator lights when the TV VCR Combination is set for unattended recording Rewind Search Button To rewind tapes Also during playback press this button to view the picture in rapid reverse Cassette Compartment Where the video cassette is inserted St...

Page 10: ...and timer recording Counter Memory Button Turns the memory stop feature on and off Clear Reset Button Clear Button Press this button to clear the setting for the displayed program contents Reset Button Resets the time counter when it is displayed Recall Button Press this button to display or clear the time counter date time function and channel number Standby Button Used along with the OTR button ...

Page 11: ...e Rec End Search Button To locate the beginning of a blank portion of tape for continuous recording Channel Search Button Press this button to start a scan of the channels assigned to the Channel Up Down keys When the desired channel appears press this button again to select it Tape Speed Selector SP LP SLP Set this selector to the desired recording speed Rec Button To record Play Button To play b...

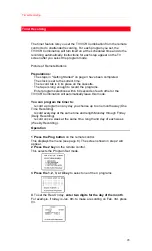
Page 12: ...uence of overlays shown below will be displayed as long as the arrow appears in the lower right for about the first 5 seconds After the arrow disappears the overlay displayed will remain on the TV screen until it is removed by the next press of the Recall button OSD Menu Screen You only need to press one of the Numeric keys on the remote control Each Numeric key is indicated next to the feature di...

Page 13: ...control The Set Caption Mode screen will appear 3 Press the 1 2 or 3 key to change the display to the desired mode see right 4 Press the 4 key to select CH1 or CH2 The closed caption signal may be broadcast over one or both of these channels Recording and Playing Back a Closed Caption Text Program Your TV VCR Combination will automatically record the Closed Caption Text signal of applicable progra...

Page 14: ... when the TV station broadcasts text such as program listings special information etc it will appear in this space This text block will remain on the screen until your remove it by changing the display in step 3 To change the Caption mode when a timer recording is set but not in progress you must first press the Timer button off Be sure to press the Timer button back on before a scheduled timer re...

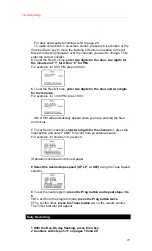
Page 15: ...se a to appear 3 To set the month date and year enter two digits for the month two digits for the date and two digits for the year For example for Feb 9 1993 press Numeric keys 02 09 93 4 To set the hour minute s AM or PM enter two digits for the hour two digits for the minute s and 1 for AM or 2 for PM For example for 10 30 PM press Numeric keys 10 30 2 5 Press the Prog button This starts the clo...

Page 16: ...on page 8 for details To Reset the Clock If you want to reset the clock at some later time press the Prog button while you are watching TV The menu screen see page 8 will appear press the 1 key and follow the clock set instructions to enter a completely new date and time Or you may skip over some entries to reset a particular item by using the Channel Up key ...

Page 17: ... set mode you can select CATV to receive cable channels or leave TV selected to receive broadcast channels The auto set feature assigns channels receivable from either band in your area to the Channel Up Down keys and skips the others With the Add Delete button you can add or delete any channel from the Channel Up Down keys operation in either band Picture of Remote Buttons ...

Page 18: ...nnel Up Down keys will appear on the TV screen Using the Add Delete button 1 Select the channel to be added or deleted using the Channel Up Down or Numeric keys 2 Press the Add Delete button A display will appear for a few seconds indicating that the channel has been added or deleted One Press Channel Search Use the Channel Search button on the remote control to scan every channel assigned to the ...

Page 19: ...n the TV VCR Combination off automatically at the end of a preset time period 30 60 or 90 minutes This feature is useful to turn the TV VCR Combination off when watching a late program otherwise you might doze off leaving the TV VCR Combination on 1 Press the Sleep Timer button on the remote control SLEEP TIMER 30 will appear as an On Screen Display 2 Press the Sleep Timer button repeatedly to inc...

Page 20: ...s of the picture How to Adjust 1 Press the Video button on the remote control to display the Video Adjust Menu Each additional press of the Video button will select a different control 2 Press or hold the Video Level or buttons on the remote control to adjust the control Adjustments scale and setting indicator number are displayed Use them to set the desired level Adjust each control to your desir...

Page 21: ...will be slowed down SLP mode 9 times Select a function within 8 second to locate the particular segment If a function is not selected within 8 seconds normal search speed with resume To View a Double Speed Playback Picture 1 During playback press the X2 button on the remote control 2 Press this button once more to release the tape from double speed playback To View an Instant Search 1 During playb...

Page 22: ...ind After a tape reaches the end during playback fast forward or manual record the TV VCR Combination will rewind it and go into Stop mode Rec Auto Stop After a tape reaches its end during recording the TV VCR Combination will rewind and eject it and go into Stop mode Playback Auto Eject After a tape without a record tab is played to its end the TV VCR Combination will rewind and then eject the ta...

Page 23: ...eck a TV program without missing any playback The TV VCR Combination goes into still and the current channel selection will appear with the overlay below Press the Monitor button again to continue playback You can change channels with the Channel Up Down or Numeric keys Blank Tape Indication If a blank section of tape is encountered in the play mode or the channel you select has no broadcast the s...

Page 24: ...ut button until INPUT SELECT TUNER appears on the TV screen 3 Press the Tape Speed selector until the desired tape speed SP LP SLP appears on the TV screen 4 Select a channel to be recorded using the Channel Up Down or Numeric keys 5 Hold the Rec button in and press the Play button on the TV VCR Combination When using the remote control just press the Rec button 6 To pause the recording press the ...

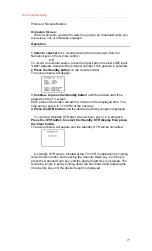
Page 25: ...just as easy to set up a delayed start time recording Standby OTR without programming the timer Picture of Remote Buttons Preparations The steps in Getting Started on page 3 have been completed The clock is set to the correct time The desired tape speed SP LP SLP is selected The record tab is not missing on the cassette The tape is long enough to record the programs ...

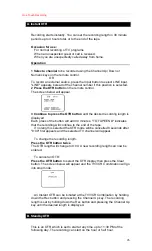
Page 26: ...e button will add 30 minutes TO TAPE END indicates that the recording will continue to the end of the tape If no length is selected the OTR mode will be cancelled 8 seconds after 0 00 first appears and the selected TV channel will appear To change the recording length Press the OTR button twice The OTR length will change to 0 00 A new recording length can now be entered To cancel an OTR Press the ...

Page 27: ...t time appears on the TV screen Each press of the button will add 30 minutes to the displayed time The time can be set up to 11 30 PM of the next day 4 Press the OTR button until the desired recording length is displayed To cancel a Standby OTR after one has been set or is in progress Press the OTR button to select the Standby OTR display then press the Clear button The screen below will appear an...

Page 28: ...r program selections within 60 seconds of each other or the TV VCR Combination will automatically leave this mode You can program the timer to record a program on any day you choose up to one month away One Time Recording record everyday at the same time and length Monday through Friday Daily Recording record once a week at the same time length and day of each week Weekly Recording Operation 1 Pre...

Page 29: ...s For example for 10 00 PM pres 10 00 AM or PM will automatically appear when you have entered the hour and minute 7 To set Rec On channel enter two digits for the channel or press the Input button and select LINE to record from an external source For example for channel 10 press 10 Operation continued on the next page 8 Select the desired tape speed SP LP or SLP using the Tape Speed selector 9 To...

Page 30: ...en a timer Recording has been set but is not yet in Progress Timer indicator is on 1 Press the Timer button off to release the timer set mode 2 Follow steps 1 to 3 on page 19 In step 3 check the program contents for each program number Make corrections and continue with steps 4 to 9 3 After you are sure that the programs in step 9 are set correctly press the Prog button three times to return to wa...

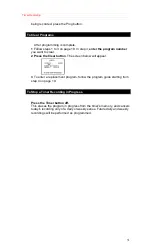
Page 31: ...ress the Clear button The screen below will appear 3 To enter a replacement program follow the program guide starting from step 4 on page 19 To Stop a Timer Recording in Progress Press the Timer button off This erases the program in progress from the timer s memory and cancels today s recording only of a daily or weekly series Future daily and weekly recordings will be performed as programmed ...

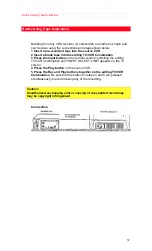
Page 32: ...bination 3 Press the Input button on the remote control controlling the editing TV VCR Combination until INPUT SELECT LINE appears on the TV screen 4 Press the Play button on the source VCR 5 Press the Rec and Play buttons together on the editing TV VCR Combination Be sure that the buttons in steps 4 and 5 are pressed simultaneously to avoid missing any of the recording Caution Unauthorized exchan...

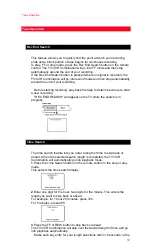
Page 33: ...e to start a new recording REC END SEARCH will appear on the TV while the search is in progress Time Search The time search feature lets you enter a length of time to skip back or ahead When the selected search length is completed the TV VCR Combination will automatically go into playback mode 1 Press the Time Search button on the remote control in the stop or play mode This selects the time searc...

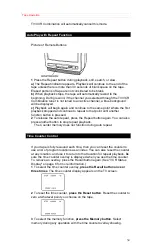
Page 34: ...sed 2 To release the auto repeat press the Repeat button again You can also press another button to stop repeat playback The Counter memory does not function during auto repeat Time Counter Control If your tape is fully rewound each time then you can reset the counter to use a list of program locations as an index You can also reset the counter at any location and use it to return to that location...

Page 35: ...op automatically wherever 0 00 00 was set Types of Video Cassettes Only use tapes with the mark in this unit Tape Speed Selector Maximum Record Playback Time Position T160 T120 T60 SP Standard Play 2 Hours 40 Minutes 2 Hours 1 Hour LP Long Play 5 Hours 20 Minutes 4 Hours 2 Hours SLP Super Long Play 8 Hours 6 Hours 3 Hours ...

Page 36: ...aying an old or damaged tape If the image on your screen resembles the photograph here during playback the heads may require cleaning b Cleaning the Heads It is recommended that head cleaning be performed by a qualified service technician Please contact your nearest dealer An alternate solution is to obtain a head cleaning cassette There are many types of cleaning cassettes so be sure to follow th...

Page 37: ... appear on the TV screen After the TV VCR Combination is in the still or slow mode for 3 minutes it will stop automatically to protect the tape and video head In search still or slow motion playback some amount of noise may appear for tapes recorded in SLP mode The picture may be completely snowy in search still or slow motion mode for tapes recorded in SP and LP speed To Record While it is possib...

Page 38: ...ACK OF THE CASSETTE IS STILL INTACT TIMER RECORDING CAN T BE PERFORMED SET THE RECORDING START STOP TIME CORRECTLY MAKE SURE THAT THE TIMER BUTTON IS SET TO ON TIMER RECORDING MAY NOT BE PERFORMED OR CONTINUED IF POWER INTERRUPTION OF MORE THAN ONE MINUTE OCCURES BEFORE OR DURING TIMER RECORDING EVEN IF POWER RESUMES THEREAFTER THERE IS NO PLAYBACK PICTURE OR THE PLAYBACK PICTURE IS NOISY OR CONTA...

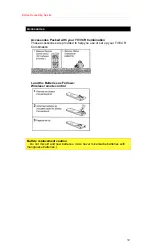
Page 39: ...V VCR Combination These accessories are provided to help you use or set up your TV VCR Combination Load the Batteries as Follows Wireless remote control Battery replacement caution Do not mix old and new batteries Also never mix alkaline batteries with manganese batteries ...

Page 40: ... Approx 112 watts Television System EIA Standard NTSC Color Speaker 1 Piece Operating Temperature 41ºF 104ºF 5ºC 40ºC Operating Humidity 10 75 Weight 52 8 lbs 24Kg Dimensions 21 1 8 W X 21 1 4 H X 19 1 8 D 536 W X 540 H X 486 D mm Designs and specifications are subject to change without notice HITACHI HITACHI HOME ELECTRONICS AMERICA INC National Headquarters 3890 Steve Reynolds Blvd Norcross GA 3...

Reviews: