THINGS TO KNOW IN THE DP-4X CHASSIS FOR DIGITAL CONVERGENCE
PAGE 08-18
The Digital Convergence Process is very
similar to the Previous chassis.
However, there are some difference that
need attention.
•
New Remote Controls. (CLU-3842WL or
CLU-4341UG2) The Remotes must be
placed into *DCAM (
See Note 2
). before
using them for Digital
Convergence adjustments.
•
New Control for the Adjustment Point
Marker. It can be turned on or off.
•
Last Channel (
LAST CH
) toggles from
Cross marker to old style of Cursor
blinking crosshair.
•
New Addition to the Adjustment process
that automatically moves the Adjustment
point Clockwise or Counter Clockwise
from the center outward in a spiral
fashion or for the outside back towards
the middle.
•
Channel Up
moves Clockwise and
Channel Down
moves Counter
Clockwise.
•
Using an Outside Signal in conjunction
with the Grid or by itself for fine tuning
adjustments.
•
Pressing the
MENU
key on the remote
during DCAM will toggle in the following
order, Normal DCU Grid, Turns of Color
or Colors not being adjusted (except
Green), Picture and DCU Grid, Picture
with cursor, Picture with square marker
at adjustment point, back to DCU Grid
normal.
•
New Sensor Error Messages.
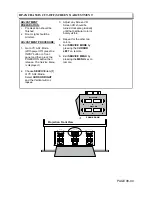
TO ENTER DIGITAL CONVERGENCE
ADJUSTMENT MODE WITHOUT
REMOVING THE SPEAKER GRILL:
1) Press the
Magic Focus
button on the
front control panel.
2) While Magic Focus is running, press the
Magic Focus
button again.
STOP
ap-
pears.
3) While
STOP
is still on the screen, press
the
INFO
button on the remote control.
4) This enters the DCAM. (Remember, re-
mote control must be placed in the
DCAM mode before adjusting the Con-
vergence. (CLU-3842WL or CLU-
4341UG2)
5) After adjustments
SAVE
the data.
6)
INITIALIZE
the Sensors.
7) Press
EXIT
8) Press the
POWER
button on the front
control panel.
Note: * DCAM means Digital Convergence
Adjustment Mode.
NOTE
2: To enter the Remote Control into
DCAM do the following;
FOR CLU-3842WL
1) Remote must be in the TV mode to
begin.
2) Press and hold down the
ENT
Key
3) Press the
MENU
and then
INFO
key.
4) Remote TV LED will blink 3 times to
indicate remote in the DCAM.
5) To Return the Remote Control to the
normal mode after convergence
adjustments are complete, press and
hold down the
ENT
key and enter
1345
to select Hitachi codes.
FOR CLU-4341UG2
1) Remote must be in the TV mode to
begin.
2) Press and hold down, “
TV
” Key.
3) Press all at one time, “
MENU, INFO
and
the (
-
)
DASH
Keys. Release all keys.
4) To Return the Remote Control to the
normal mode after convergence
adjustments are complete, press and
hold down the
TV
key and enter
“0”
then
“1”
Keys.
Note: * DCAM means Digital Convergence
Adjustment Mode.
Summary of Contents for 51F510
Page 2: ...DP 4X BLANK PAGE NOTES BLANK PAGE ...
Page 5: ...DP 4X CHASSIS INFORMATION POWER SUPPLY INFORMATION SECTION 1 ...
Page 6: ...DP 4X BLANK PAGE NOTES BLANK PAGE ...
Page 30: ...DP 4X BLANK PAGE NOTES BLANK PAGE ...
Page 31: ...DP 4X CHASSIS INFORMATION MICROPROCESSOR INFORMATION SECTION 2 ...
Page 32: ...DP 4X BLANK PAGE NOTES BLANK PAGE ...
Page 44: ...DP 4X BLANK PAGE NOTES BLANK PAGE ...
Page 45: ...DP 4X CHASSIS INFORMATION VIDEO INFORMATION SECTION 3 ...
Page 46: ...DP 4X BLANK PAGE NOTES BLANK PAGE ...
Page 61: ...DP 4X CHASSIS INFORMATION AUDIO INFORMATION SECTION 4 ...
Page 62: ...DP 4X BLANK PAGE NOTES BLANK PAGE ...
Page 66: ...DP 4X BLANK PAGE NOTES BLANK PAGE ...
Page 67: ...DP 4X CHASSIS INFORMATION DEFLECTION INFORMATION SECTION 5 ...
Page 68: ...DP 4X BLANK PAGE NOTES BLANK PAGE ...
Page 79: ...DP 4X CHASSIS INFORMATION DIGITAL CONVERGENCE INFORMATION SECTION 6 ...
Page 80: ...DP 4X BLANK PAGE NOTES BLANK PAGE ...
Page 94: ...DP 4X BLANK PAGE NOTES BLANK PAGE ...
Page 95: ...DP 4X CHASSIS INFORMATION CHASSIS PICTURES SECTION 07 ...
Page 96: ...DP 4X BLANK PAGE NOTES BLANK PAGE ...
Page 104: ...DP 4X BLANK PAGE NOTES BLANK PAGE ...
Page 105: ...DP 4X CHASSIS INFORMATION DP 4X CHASSIS ADJUSTMENTS SECTION 08 ...
Page 106: ...DP 4X BLANK PAGE NOTES BLANK PAGE ...
Page 108: ...DP 4X BLANK PAGE NOTES BLANK PAGE ...
Page 144: ...DP 4X BLANK PAGE NOTES BLANK PAGE ...
Page 146: ...DP 4X BLANK PAGE NOTES BLANK PAGE ...
Page 147: ...DP 4X CHASSIS INFORMATION SERVICE POLICY FOR THE DP 4X CHASSIS SECTION 10 ...
Page 148: ...DP 4X BLANK PAGE NOTES BLANK PAGE ...
Page 151: ...DP 4X BLANK PAGE NOTES BLANK PAGE ...
Page 152: ...DP 4X BLANK PAGE NOTES BLANK PAGE ...

