background image

2

Safety Warnings and Contents

Safety Warnings and Contents

Safety Warnings and Contents

Safety Warnings and Contents

Safety Warnings and Contents

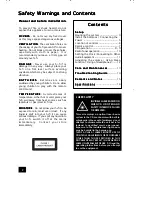
P l e a s e   r e a d   b e f o r e   i n s t a l l a t i o n .

P l e a s e   r e a d   b e f o r e   i n s t a l l a t i o n .

P l e a s e   r e a d   b e f o r e   i n s t a l l a t i o n .

P l e a s e   r e a d   b e f o r e   i n s t a l l a t i o n .

P l e a s e   r e a d   b e f o r e   i n s t a l l a t i o n .

To prevent fire or shock hazard, do not
expose this appliance to rain or moisture.

C O V E R S

C O V E R S

C O V E R S

C O V E R S

C O V E R S   -  Do  not  move  any  fixed  cover
as this may expose dangerous voltages.

V E N T I L A T I O N

V E N T I L A T I O N

V E N T I L A T I O N

V E N T I L A T I O N

V E N T I L A T I O N - The ventilation holes on
the casing of your hi-fi prevent it from over
heating.  Do not block or cover these holes,
especially with cloth or paper.  It is
recommended you leave a 10cm gap all
around your hi-fi.

D A M A G E

D A M A G E

D A M A G E

D A M A G E

D A M A G E - Never use your hi-fi if is
damaged in any way.  Always place your
hi-fi on a flat level surface avoiding
anywhere which may be subject to strong
vibration.

B A T T E R I E S

B A T T E R I E S

B A T T E R I E S

B A T T E R I E S

B A T T E R I E S - Batteries are easily
swallowed by young children.  Do no allow
young children to play with the remote
control unit.

T E M P E R A T U R E

T E M P E R A T U R E

T E M P E R A T U R E

T E M P E R A T U R E

T E M P E R A T U R E - Avoid extremes of
temperature, either hot or cold, place your
hi-fi well away from heat sources such as
radiators or gas/electric fires.

M O I S T U R E

M O I S T U R E

M O I S T U R E

M O I S T U R E

M O I S T U R E - Do not allow your hi-fi to be
exposed to rain, moisture or dust.  If any
liquid is spilt into your hi-fi it can cause
serious damage.  If you spill any liquid into
your hi-fi, switch it off at the mains
i m m e d i a t e l y .     C o n t a c t   y o u r   s t o r e
immediately.

Contents

Contents

Contents

Contents

Contents

S e t u p

S e t u p

S e t u p

S e t u p

S e t u p
Mounting the system ......................... 4
Install the batteries / Connecting the
Power  ............................................... 5
Location of controls ...........................6
Remote control ...................................7
CD operation ................................ 8 - 9
Radio Tuner operation ........................ 10
Setting the Clock /Connecting to Other
Audio Equipment ............................... 11
Adjusting the volume / Using Sleep
Function / Using of Headphones ....... 12

C a r e   a n d   M a i n t e n a n c e s

C a r e   a n d   M a i n t e n a n c e s

C a r e   a n d   M a i n t e n a n c e s

C a r e   a n d   M a i n t e n a n c e s

C a r e  a n d  M a i n t e n a n c e s ........... 13

T r o u b l e s h o o t i n g   G u i d e  

T r o u b l e s h o o t i n g   G u i d e  

T r o u b l e s h o o t i n g   G u i d e  

T r o u b l e s h o o t i n g   G u i d e  

T r o u b l e s h o o t i n g  G u i d e  ............ 14

R e m a r k s   a n d   N o t e s  

R e m a r k s   a n d   N o t e s  

R e m a r k s   a n d   N o t e s  

R e m a r k s   a n d   N o t e s  

R e m a r k s  a n d  N o t e s  .................. 15

S p e c i f i c a t i o n s

S p e c i f i c a t i o n s

S p e c i f i c a t i o n s

S p e c i f i c a t i o n s

S p e c i f i c a t i o n s ............................ 16


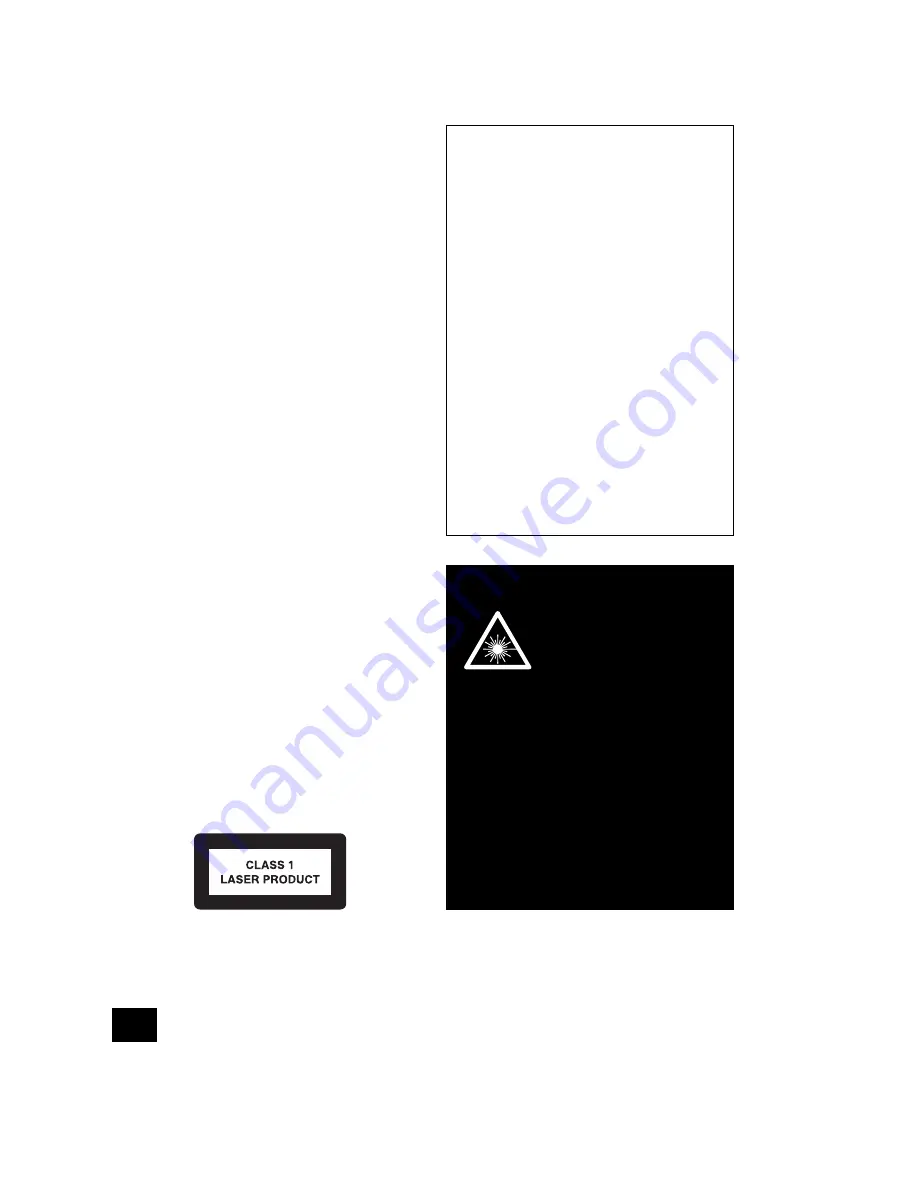
LASER SAFETY

INVISIBLE LASER RADIATION
WHEN CD LID OPEN AND
SAFETY INTERLOCK FAILED
OR DEFEATED.

This unit employs an optical laser beam
system in the CD mechanism with built-in
safeguards. In the event of problems, do not
attempt to disassemble the unit but refer
instead to qualified service personnel.
Exposure to the invisible laser light beam
may be harmful to the human eye.
THIS IS A CLASS-1 LASER PRODUCT. USE OF
CONTROLS, ADJUSTMENTS OR PROCEDURES
OTHER THAN THOSE SPECIFIED IN THIS
DOCUMENT MAY RESULT IN HAZARDOUS
LASER LIGHT BEAM EXPOSURE.  DO read the
operating instructions before you attempt
to use the equipment.

Summary of Contents for AX-M90

Page 1: ...AX M90 Desktop CD System Instruction Manual ...

Page 2: ... I S T U R E M O I S T U R E M O I S T U R E Do not allow your hi fi to be exposed to rain moisture or dust If any liquid is spilt into your hi fi it can cause serious damage If you spill any liquid into your hi fi switch it off at the mains immediately Contact your store immediately Contents Contents Contents Contents Contents S e t u p S e t u p S e t u p S e t u p S e t u p Mounting the system ...

Page 3: ...aked flame sources such as lighted candles or nightlights on or close to equipment High temperatures can melt plastic and lead to fires D O N T D O N T D O N T D O N T D O N T use makeshift stands and N E V E R N E V E R N E V E R N E V E R N E V E R fix legs with wood screws to ensure complete safety always fit the manufacturer s approved stand or legs with the fixings proided according to the in...

Page 4: ...ith the narrow part of the holes N o t e N o t e N o t e N o t e N o t e The wall onto which the system is attached should be capable of supporting 33lbs per screw Confirm that all screws are fastened tightly and are properly fitted into the holes Mounting the System to Its Base Mounting the System to Its Base Mounting the System to Its Base Mounting the System to Its Base Mounting the System to I...

Page 5: ... of the other functions on the unit To use the remote point it at the REMOTE SENSOR on the unit to control from your listening position N o t e N o t e N o t e N o t e N o t e Even if the remote is in range operation may be compromised by obstacles between the remote and unit If the remote is operated near other units which generate infrared rays or if other remote control devices using infrared r...

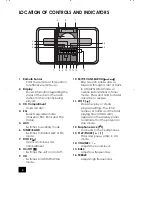
Page 6: ...es the unit on and off 9 CD Switches to CD MP3 WMA mode 10 SKIP SCAN SEARCH Skip search backwards or forwards through a disc or track in CD MP3 WMA mode or certain radio stations in Tuner mode Press and hold for faster advance or reverse 11 STOP Stops disc play or clears program setting The total number of tracks and the total playing time CDDA disc appears on the display panel to indicate that th...

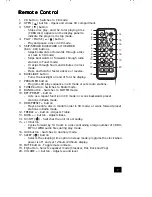
Page 7: ...in CD mode or sets radio stations 8 TUNER button Switches to Radio mode 9 BAND button Switches to MW FM mode 10 RPT PRESET button Acts as a repeat function in CD mode or scans backwards preset stations in Radio mode 11 RDM PRESET button Plays an entire disc in random order in CD mode or scans forward preset stations in Radio mode 12 TREBLE button Adjusts Treble 13 BASS button Adjusts Bass 14 On Of...

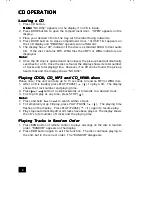
Page 8: ...3 and CD_WMA discs Playing CDDA CD_MP3 and CD_WMA discs Playing CDDA CD_MP3 and CD_WMA discs Playing CDDA CD_MP3 and CD_WMA discs Playing CDDA CD_MP3 and CD_WMA discs Please note The unit can take up to 15 seconds to read an MP3 or WMA disc 1 After a CD is loaded press PLAY PAUSE to play a CD The display shows the track number and playing time 2 Press button to skip backwards or forwards to a desi...

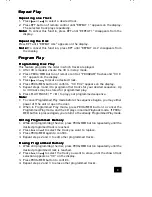
Page 9: ...splay 5 Repeat steps 3 and 4 to program other tracks for your desired sequence Up to 40 tracks may be stored for programmed play 6 Press PLAY PAUSE to play your programmed sequence N o t e N o t e N o t e N o t e N o t e To cancel Programmed Play mode before the sequence begins you may either power off the unit or open the door When in Programmed Play mode press PROG MEM button to cancel the Progr...

Page 10: ...You may store up to 20 FM stations and 20 MW stations in channel memory 1 Press TUNER BAND button to select FM or MW mode On the remote press BAND button to select FM or MW mode 2 Press or to select a radio station 3 Press PROG MEM button PROGRAM flashs on the display 4 Press PRESET or PRESET to selet program channel 5 Press PROG MEM button to save into memory If it has been previously set the for...

Page 11: ...necting to Other Audio Equipment Connecting to Other Audio Equipment Connecting to Other Audio Equipment Connecting to Other Audio Equipment Caution Turn off power and disconnect from the mains supply before connection AUX IN Connects to other audio equipment including a VCR video recorder MP3 to provide sound output for other audio equipment AUDIO OUT LINE OUT Connects to other audio equipment in...

Page 12: ...ng Sound Quality with EQ Changing Sound Quality with EQ Changing Sound Quality with EQ Changing Sound Quality with EQ During play press EQ button repeatedly to select the preferred equalizer mode N o t e N o t e N o t e N o t e N o t e There are 4 preset EQ levels Flat Rock Pop Classic Muting Sound Muting Sound Muting Sound Muting Sound Muting Sound 1 Press MUTE button from remote unit to silence ...

Page 13: ...eakers Wipe the speakers gently with a clean damp cloth To avoid damage do not use any cleaning agents or abrasive cleaners CD Lens CD Lens CD Lens CD Lens CD Lens When the lens gets dirty malfunctions may occur The lens should be cleaned using a commercially available camera lens cleaner CD Compartment CD Compartment CD Compartment CD Compartment CD Compartment Do not put anything except a compac...

Page 14: ...e unit will display the song title if that information is stored in the WMA file metatag RECOMMENDED WINDOWS MEDIA PLAYER SETTINGS ON YOUR PC RECOMMENDED WINDOWS MEDIA PLAYER SETTINGS ON YOUR PC RECOMMENDED WINDOWS MEDIA PLAYER SETTINGS ON YOUR PC RECOMMENDED WINDOWS MEDIA PLAYER SETTINGS ON YOUR PC RECOMMENDED WINDOWS MEDIA PLAYER SETTINGS ON YOUR PC When using Microsoft Windows Media Player on y...

Page 15: ...ubject to vibrations or physical shock Laser lens is dirty Disc is dirty Loose cable connections A C T I O N A C T I O N A C T I O N A C T I O N A C T I O N Insert power plug firmly into AC outlet Check fuse Check socket Reload disc with label facing towards the front Clean disc with a soft cloth Wipe in a straight motion from inside to outside of the disc Reload disc and wait ten seconds then swi...

Page 16: ...ntinually strive to improve our products specifications may change without prior notice Note Note Note Note Note This product is exclusively available through Dixons Stores Group In the unlikely event of a problem with your product please return to the store where your purchase was made Partmaster direct can provide accessories spares batteries and replacement parts with Next Day Delivery availabl...

Reviews: