39
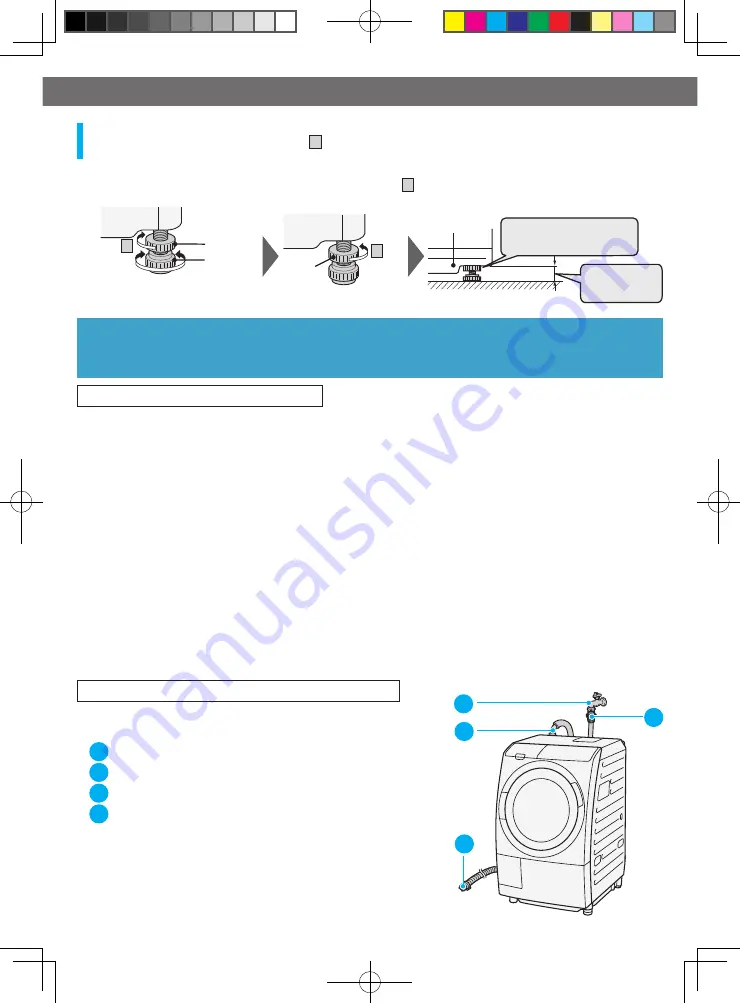
1. Loosen the
fi
xing nut by turning it in the direction indicated by the
arrow 1 , and turn the adjustable foot to eliminate wobble.
●
The maximum adjustment height is 14 mm.
2. After adjustment, tighten the
fi
xing nut by turning it in the direction
indicated by the arrow 2 .
Level
Adjustment
3
4
1
2
Loosen
1
Elevating
Lowering
Fixing nut
Adjustable
foot
2
Tighten
Fixing nut
Plastic base
48 mm or less
Tighten the fixing nut until it
comes in contact with the
plastic base.
The adjustment
range is 48 mm
or less.
TO THE INSTALLER: PLEASE PERFORM TRIAL OPERATION
After installation is completed, perform a trial operation following the procedure below and con
fi
rm
that there is no unusual sound or water leakage and that water drains smoothly.
Trial Operation Procedure
1
Make sure that the power is off and press the
Start/Pause
button.
Keep pressing
Start/Pause
button and press
Power
button together for 3 seconds.
"777" appears on the display.
2
Gradually turn on the tap.
You can thus prevent sudden rise in water pressure being applied to the washer dryer.
3
Press the
Start/Pause
button.
After the recommended amount of detergent is displayed, a trial operation cycle of water supply,
wash, drain, spin and dry which takes about 6 minutes in total, starts and
fi
nishes automatically.
4
As the operation continues, check that there is no water leakage, unusual sound or vibration,
and that water drains smoothly.
If any unusual sound or vibration is detected, check the leveling of the washer dryer.
5
Check that no air leaks from nearby pipes.
When the washer dryer is installed beside a washbasin, check if there is any air leakage at the pipes
underneath the washbasin.
If air leakage is found, change the dehumidi
fi
cation mode to "Water Cooling Mode"
(P.22)
.
Locations to be checked in the trial operation
■
Check if there is no any water leakage at the following
locations when performing the trial operation after installation.
1
Connection between the water tap and the one-touch joint
2
Connection between the one-touch joint and the water supply hose
3
Connection between the water supply hose and the washer dryer
4
Drain hose connections
BD-SG100CJ_OM&IM_EN.indd 39
BD-SG100CJ_OM&IM_EN.indd 39
2019/5/13 14:22:28
2019/5/13 14:22:28


