background image

A

B

C

D

E

F

G

5

4

3

2

1

6

6

5

4

3

2

1

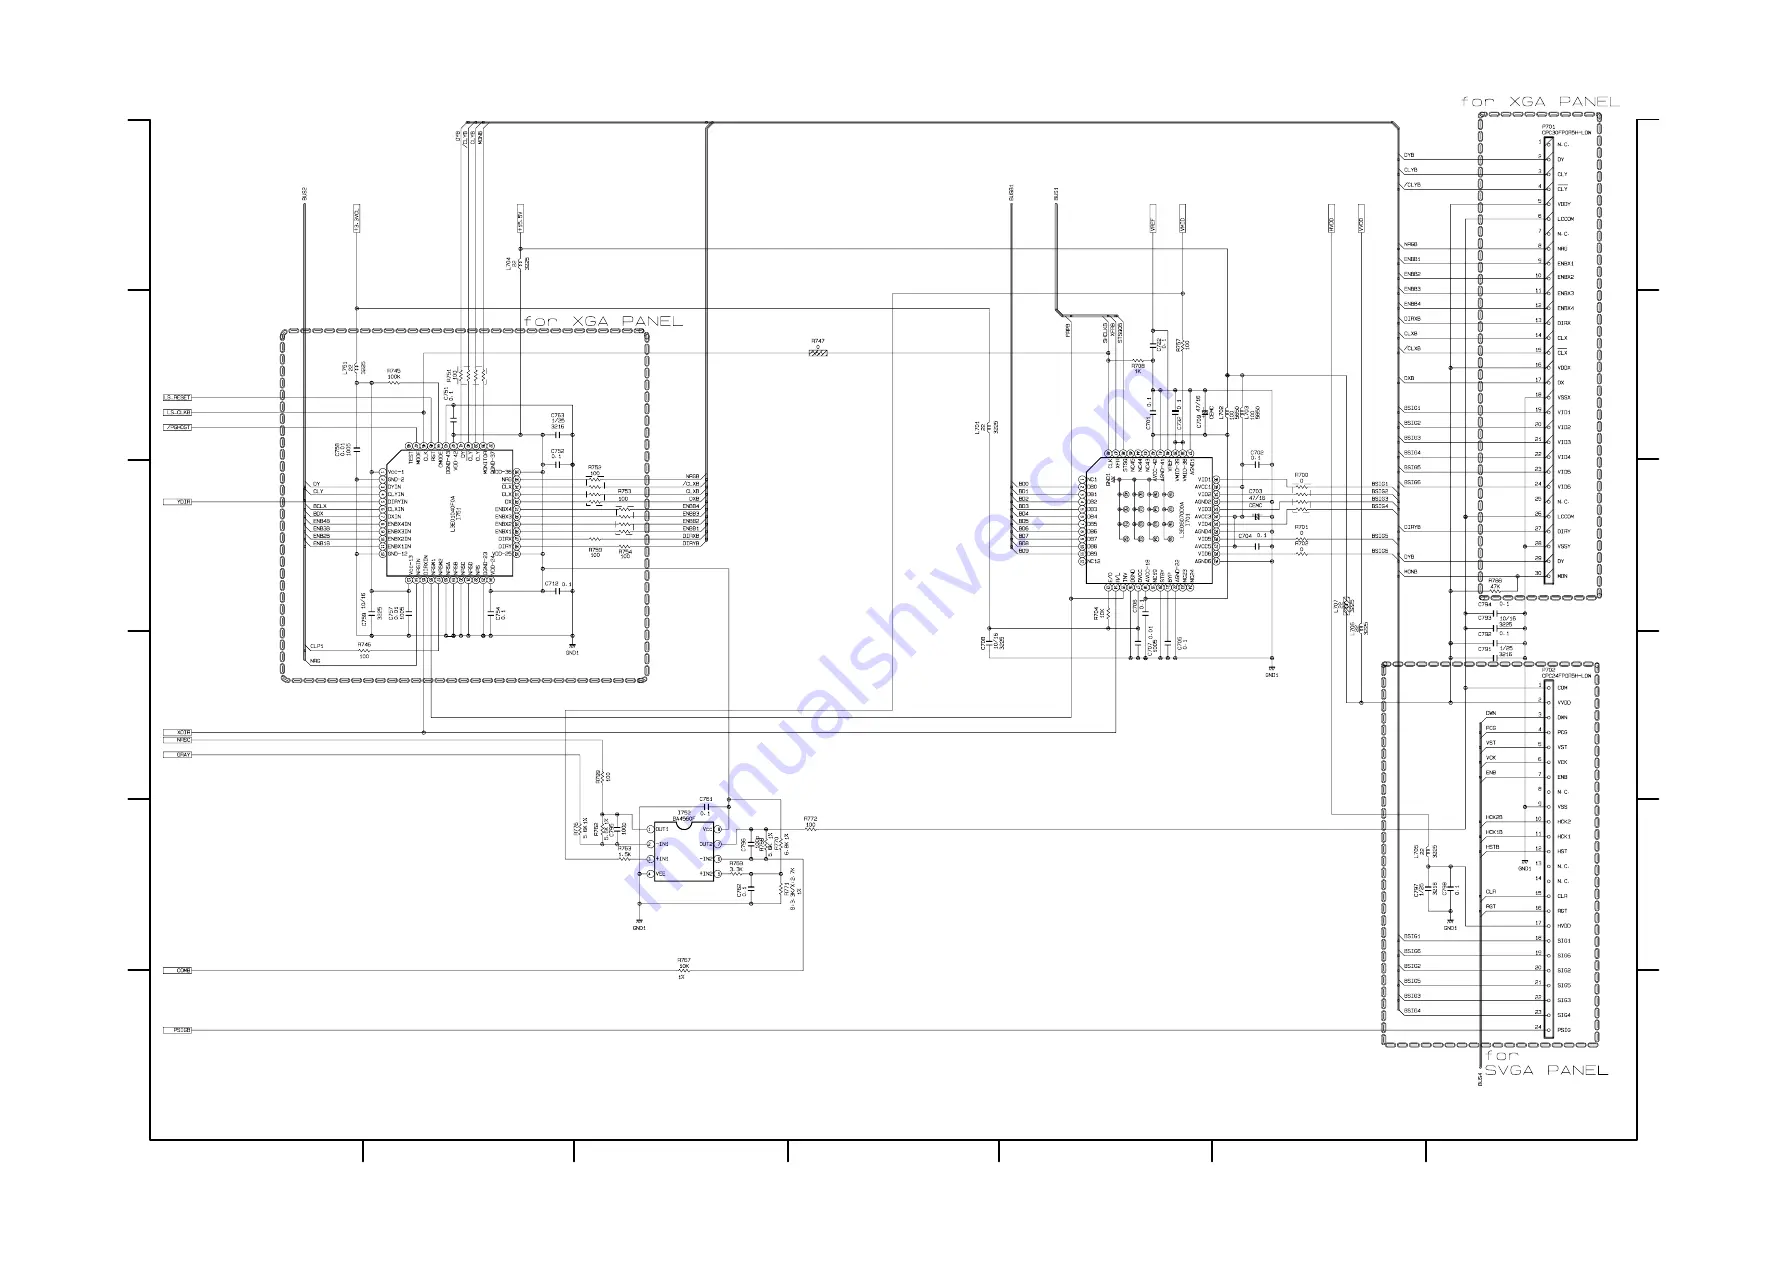
PWB assembly DRIVE 8 (C3S3/C3XM3)

50

Summary of Contents for C3S3

Page 1: ...hen turning on the projector 4 Do not touch the exhaust fan during operation 5 The LCD module assembly is likely to be damaged If replacing the LCD module assembly do not hold the FPC of the LCD module assembly 6 Use the cables which are included with the projector or specified Service Warning 1 Features 2 2 Specifications 2 3 Names of each part 5 4 Adjustment 7 5 Troubleshooting 13 6 Service poin...

Page 2: ...eo NTSC PAL BGDHI SECAM PAL M PAL N NTSC4 43 PAL60 Remote control transmitter 1 RGB cable 1 Video Audio cable 1 USB cable 1 0 7Vp p 75 termination TTL level 200mVrms 47k 200mVrms output impedance 1k 1 0W mono AC100 120V 2 7A AC220 240V 1 3A 240W 295 W 87 5 H 231 D mm 2 74kg 6 04lbs Operation 0 35 C Storage 20 60 C 1 0 0 1Vp p 75 termination 0 3 0 1Vp p PAL SECAM burst signal 75 termination Y 1 0 0...

Page 3: ...5 691 1 4 91 EDX3250AT 15 0 E 6476 1 1 6 46 65 963 9 5 41 9 E 3 E 1 6 16 3 E 3 E 7 7 9415 165 3 3 4 94 2 4 94 6 7 147 5 2 4656 B B E E 44 2 3 7 9 165 B D 69 B D 7 7 9415 165 7 7 9 1 5 3 9415 165 7 7 9415 165 7 7 9 1 5 3 9415 165 69 E 9 E 9C 4 5 3 1 0 5 9 165 E Features 2 EDX3280AT EDX3250AT Specification EDX3280AT 1 200 lumens 2 7kg 6lbs EDX3250AT ...

Page 4: ... 7 92 7 7 03 5 785 35 6685 HIRUH UHSODFLQJ WKH ODPS FKHFN WKH VHULDO QXPEHU RI WKH UHSODFHPHQW ODPS EXOE VROG VHSDUDWHO 7 IRU WKHQ FRQWDFW RXU ORFDO GHDOHU HIRUH UHSODFLQJ WKH ODPS WXUQ RII WKH SRZHU DQG XQSOXJ WKH SRZHU FRUG WKHQ ZDLW DW OHDVW PLQXWHV LQ RUGHU WR HQVXUH WKDW WKH ODPS LV SURSHUO FRROHG 5HPRYLQJ WKH ODPS EXOE ZKLOH LW LV VWLOO KRW FRXOG FDXVH EXUQV RU FDXVH WKH ODPS EXOE WR EXUVW D...

Page 5: ...sories Power cord 2 3 Parts list LCD LENS PRISM ASS Y UX09286 Others LCD LENS PRISM ASS Y UX09287 Others Only difference is described Please refer to a ED X3270A service guide except the above mentioned difference Lamp Option Lamp DT00521 ED X3250AT HIGH VOLTAGE HIGH TEMPERATURE HIGH PRESSURE Before replacing the lamp check the serial number of the replacement lamp bulb sold separately DT 00521 fo...

Page 6: ...tor button KEYSTONE button STANDBY ON button INPUT button RESET button STAN DBY O N INPUT KEYS TONE RESE T LAN P TEN P POW ER MENU button LAMP LED TEMP LED POWER LED Remote sensor AC power inlet S VIDEO IN port RGB IN 1 and 2 ports AUDIO IN R and L ports VIDEO IN port CONTROL port RGB OUT port USB port COMPONENT VIDEO port Power switch ...

Page 7: ...utton MUTE button KEYSTONE button ASPECT button AUTO button MAGNIFY button KEYBOARD buttons FREEZE button POSITION button ESC button Cursor buttons RESET button ENTER button VIDEO ASPECT HOME END MUTE PAGE DOWN KEYSTONE FREEZE OFF ON MENU POSITION ENTER ESC RESET PAGE UP VOLUME MAGNIFY AUTO BLANK RGB SEARCH STANDBY ON ...

Page 8: ...cs unit LCD LENS prism assembly PWB assembly drive Lamp unit assembly Adjustment means need for adjustment means not need for adjustment means recommended 4 1 2 Setting of condition before adjustment 1 Before starting adjustment warm up the projector for about 10 minutes Blank white 2 Set Zoom Wide to Max And project an image with more than 40 inches in diagonal size 3 Normalizing the video adjust...

Page 9: ... 2 Use DAC P PSIG B in the Adjustment menu to adjust so that the vertical streaks on the upper of window pattern CPS317 EDS3170 EDS3170A 4 3 Flicker adjustment V COM adjustment Signals for internal adjustment Adjustment procedure 1 Make this adjustment after completing the adjustment in 4 2 Ghost adjustment 2 Use DAC P V COM R in the Adjustment menu to adjust so that the flicker at the center of t...

Page 10: ...UB BRIGHT R and B in the Adjust menu so that low brigtness white balance is best 8 Adjust GAMMA SUB CONTRAST R and B in the Adjust menu so that middle brightness white balance is best 9 Repeat steps 7 to 8 above and adjust so that brightness white balance of 28 steps is best 4 4 NRSH adjustment vertical stripe adjustment Signals for internal adjustment 192 255 168 255 144 255 120 255 96 255 72 255...

Page 11: ...s starting in order from the low numbers 5 Adjustment point No 1 should not be adjusted because it controls the brightness of the entire screen 6 To temporarily turn correction off place the cursor on ON in the Adjust Tone menu and press the key To turn it on again place the cursor on OFF in the Adjust Tone menu and press the key 7 Although this adjustment can also be made using internal signals w...

Page 12: ... and B so that the coordinates are as follows x x1 0 005 y y1 0 010 9 Similarly measure adjustment points No 3 to No 17 and adjust their color coordinates starting in order from the small number points This completes adjustments required for MIN Note Since excessive correction may lead to a correction data overview during internal calculations use the following values for reference No 2 to No 5 40...

Page 13: ...ment point No 1 Adjustment technique First adjust B of the point whose color is to be adjusted so that it approximates that of No 1 If R is low at this time the image will have cyan cast in which case R is increased On the other hand if R is excessive the image will have a magenta cast in which case R is decreased Overall a cyan cast makes it easy to see color shading 7 Next view measurement point...

Page 14: ...E SENSOR TH950 PWB assembly SENSOR PWB assembly Drive TP116 TP115 TP104 TP106 TP1H TP118 E101 CHJ17 I256 E805 E302 E800 E807 11 20 10 70 36 1 1 1 2 14 1 4 1 2 TP117 TP114 TP05 TP03 TP06 TP04 TP02 TP01 TP108 TP109 TP101 TP10535 TP1101 TP103 TP102 PWB assembly Signal IS01 ...

Page 15: ...circuit And check TSW short or open PWB assembly Drive Short TSW Open What is the state of TEMP indicator Not light DC Fan Blinks What is the state of LAMP indicator Not light Blinks 2 2 3 4 5 3 4 5 Is the LAMP connection OK Set the LAMP again H More than 6V Measure voltage at the of E807 on the PWB assembly drive L OV PWB assembly SW PWB assembly Drive Is the LAMP COVER set OK Set the LAMP COVER ...

Page 16: ...s the state of TEMP indicator Not light Blinks PWB assembly Drive DC FAN INTAKE A B H 3 3V L 0V L OV 1 Is the voltage at the of E805 on the PWB assembly Drive fixed to L during warming up L 0V Measure sure voltage at the of I256 on the PWB assembly Drive 2 PWB assembly SENSOR Infinity about 10k Measure the resisitance of TH950 on the PWB assembly SENSOR at disconnecting E302 Is the voltage at the ...

Page 17: ...ut at pins of E800 on the PWB assembly Drive 2 3 4 5 5 66 3 68 1 70 8 2 3 4 5 63 7 64 14V 17V 6V 4 3V Power unit circuit NO YES Are voltage input at pins of E800 on the PWB assembly Drive 14V 17V 6V 4 3V PWB assembly Drive LCD module assembly Are signal input at these pins of E101 on the PWB assembly Drive NO YES PWB assembly Signal Check at operating mode 5 2 3 4 VIDEO Composit TP112 S VIDEO Y TP...

Page 18: ...assembly Input YES PWB assembly Drive The check after PWB change 1 PC power supply OFF 2 Connection of cable 3 Projector starting 4 PC starting When not operating PC set up change of cable NO Can not operate to Mouse Are the signals data at pins 52 of E101 TP114 RD on the PWB assembly Drive PWB assembly Input NO NO PWB assembly Drive The check after PWB change 1 PC power supply OFF 2 Connection of...

Page 19: ... all lead free solder from soldered joints when replacing components If leaded solder should be added to existing lead free joints mix in the leaded solder thoroughly after the lead free solder has been completely melted do not apply the soldering iron without solder Servicing soldering iron A soldering iron with a temperature setting capability temperature control function is recommended The melt...

Page 20: ...connect 5 cables lifting the PWB assembly Drive Cautions when removing the POWER UNIT BALLAST When removing the cable CNBAR connected to POWER UNIT BALLAST there is danger of damaging the small PWB connecting cables CNBAR J2 J1 Disconnect the CNBAR from connector J2 while pressing the sub board to prevent the stress on the sub board 219 4 70 6 56 Disconnect 6 cables Remove 3 screws PWB assembly Dr...

Page 21: ... Close the battery cover Replace the battery cover in the direction of the arrow and snap it back into place 2 3 CAUTION Precautions to observe in regards to the batteries Always handle the batteries with care and use them only as directed Improper use may result in battery cracking or leakage which could result in fire injury and or pollution of the surrounding environment Keep the battery away f...

Page 22: ... this is a cause of breakage If the lamp breaks soon after the first time it is used it is possible that there are electrical problems elsewhere besides the lamp If this happens contact your local dealer If the lamp should break it will make a loud bang when it does ventilate the room well and make sure not to breathe the gas that comes out of the projector vents or get it in your eyes or mouth If...

Page 23: ... the opposite side of the screwed side of the lamp into the unit 6 Replace the lamp cover and tighten the 2 screws firmly to lock it in place 7 Slowly turn the projector so that the top is facing up 2 After making sure that the projector has cooled adequately slowly flip over the projector so that the bottom is facing up 3 Unscrew the 2 screws and remove the lamp cover 4 Unscrew the 1 screw and sl...

Page 24: ...ing operation within ten minutes of switching power ON The power will be turned off automatically in over 10 minutes 1 Switch power ON and select the LAMP TIME on the OPTION menu 2 Depress the RESET button for at least 3 seconds while lamp time is being displayed The reset menu will then appear 3 Select RESET on the menu with the button and wait until the timer display is cleared NOTE Do not reset...

Page 25: ...ing To avoid such phenomena AUTO function should be used with the full size picture that has bright tone on its peripheral Note 1 The phenomenon at the failure of AUTO adjustment depends on resolution of input source scene of picture etc 2 There is no failure above in AUTO with video source through VIDEO S VIDEO or COMPONENT input The reason is why recognition of input signal s standard does not n...

Page 26: ...ress the button 3rd entry code Press the KEYSTONE button 4th entry code Press the button Note The Master PIN codes can be used up to 30 times The codes cannot be used thereafter If the Master PIN codes cannot be used see the paragraph of the PIN LOCK system inactivation The PIN LOCK System inactivation 1 When the PIN BOX menu is displayed press RESET for 3 seconds or more in order to get the ID In...

Page 27: ...mmended Note 2 When lamp usage reaches 2 000 hours the power will automatically be turned OFF Please change the lamp by referring to THE LAMP in Vol 1 Basic After you have changed the lamp please be sure to reset the lamp timer CHANGE THE LAMP AFTER REPLACING LAMP RESET THE LAMP TIMER THE POWER WILL TURN OFF AFTER 0 hr As lamp use has reached 2 000 hours the power will soon be automatically turned...

Page 28: ...er the main unit has sufficiently cooled down please make confirmation of the attachment state of the lamp and lamp cover After performing any needed maintenance turn the power ON again The red lamp is lighted or blink Turned OFF The cooling fan is not operating Turn the power OFF and wait approximately 20 minutes After the main unit has cooled down please make confirmation that no foreign matter ...

Page 29: ... 1 Display the menu by the MENU button 2 Select the OPT on the menu 3 Continue pressing the button MAGNIFY OFF for 3 seconds 2 Select the HIGH on the OSD using the button To reset this setup select the NORMAL using the button 3 The OSD will be ended by no operation for 10 seconds or change of input signal To end immediately use one of buttons except buttons NOTE The HIGH mode makes the fan noisy t...

Page 30: ...nge of input signal To end immediately use one of buttons except buttons EDS3170A EDX3270A Set operating time display method accumulated lamp time display method 1 Select Option from the Menu display then select Lamp Time 2 Press the Reset button once then press Keystone for 3 seconds or more to display the screen shown below The menu will close after 10 seconds if there are no further operations ...

Page 31: ...AL UNIT PROJECTION LENS DC POWER REGULATOR FAN FAN Lamp 1M SRAM EEPROM A D PLL CXA3506R DDC RS 232C S Video IR RECEIVER DAC P S SW PWB L3E7050B COLOR UNIFORMITY TIMING GENERATOR L3E1040 LEVEL SHIFTER AUDIO_ AMP VIDEO DECODER VPC3230Q TEMP SENSOR SEL COMP IR RECEIVER PWB FAN Audio L SW 6dB AMP REMOTE CONTROL MOUSE USB VOLUME CONTROL Audio R EXTEND PORT IN 16 OUT 16 PW265 10T Image_PROCESSOR ICS331 ...

Page 32: ...DC POWER REGULATOR Lamp 1M SRAM EEPROM A D CXA3506R DDC RS 232C S Video IR RECEIVER DAC P S SW PWB L3E7050B COLOR UNIFORMITY TIMING GENERATOR L3E1040 LEVEL SHIFTER AUDIO AMP VIDEO DECODER VPC3230Q TEMP SENSOR TEMP SENSOR SEL COMP IR RECEIVER PWB FAN Audio in video RGB IN2 6dB SW AMP REMOTE CONTROL MOUSE USB VOLUME CONTROL Audio out EXTEND PORT IN 16 OUT 16 RGB OUT PW265 10T Image_PROCESSOR ICS331 ...

Page 33: ...6 LCCOM 7 ENB 7 NC 8 NC 8 NRG 9 VSS 9 ENB1 10 HCK2 11 HCK1 12 HST 13 NC 14 NC 15 CLR 16 RGT 17 HVDD 18 SIG1 19 SIG6 20 SIG2 21 SIG5 22 SIG3 23 SIG4 24 PSIG 10 ENB2 11 ENB3 12 ENB4 13 DIRX 14 CLX 15 CLX 16 VDDX 17 DX 18 VSSX 19 VID1 20 VID2 21 VID3 22 VID4 23 VID5 24 VID6 25 LCCOM 26 NC 27 LCCOM 28 DIRY 29 VSSY 30 MON 1 TEMP 2 TEMP RETURN R C R 1 TO SW 2 COVER 1 FAN3_S 2 PANEL B 3 GND 1 OUT 2 GND Y...

Page 34: ...33 Connector connection diagram C3S3E C3XM3E ...

Page 35: ...VC sheet by bending it back and forth 2 or 3 times with your hand while holding down the double coated adhesive tape affixed to the igniter transformer so the tape cannot come off Perforation Igniter transformer Cut off the sheet by bending it back and forth 2 or 3 times Connect the FEB2 ferrite core to the CNPWR then move the CNPWR to the connector as illustrated below Install the sensor board af...

Page 36: ...10 Pass the CNTH lead through the hook on the ballast cover then apply the TAP10 to fix the lead as illustrated below Apply the TAP6 to the specified position on the lamp leads shown in the illustration Connect the CNPWR to connector CN101 then make sure that it is completely locked During power supply assembling 1 Wire and connect the CNPWR 2 Lay the lamp leads 3 Apply the TAP6 4 Hook the CNTH le...

Page 37: ...rated below so no lead can become entangled When connecting and detaching the connector hold the connector housing with your hand and take care not to stress where the A83 is soldered and the CNSP lead Fix the CNSP with the TAP4 For details see the assembly drawing Pass the CNSP lead behind the SP fixing rib so the lead cannot be caught between the rib and the input board CNTH CNPOW CNSP CNSP TAP4...

Page 38: ... SW board before installing the SW board E941 CNLC SW board Exhaust fan CNLC 3020 INP RC board assembly Wiring for Optical Unit Installation During optical unit installation 1 Connect the CNRM 2 Apply the TAP1 3 Connect the CNLC 4 Connect the lamp leads 5 Lay the SP lead A83 CNSP Arrange the lamp lead on the set s rear side so as it comes outside as illustrated This arrangement prevents the lamp l...

Page 39: ... prevent the leads from being caught when installing the upper case Make a loop when passing the TSW lead through the guide hole on the ballast cover Fan for panel B RC board Pass the 3020 lead through the guide hole on the ballast cover Apply the TAP7 to fix the cable guide Hold the lamp leads and the TSW however take care not to hold the solder spot on the TSW lead Solder spot holding the wires ...

Page 40: ...ng the upper case Procedure 1 Before installing the drive board connect the CNBAR and the 6222 while holding the drive board with your hand 2 Put the drive board in the position where you install it then connect the CNTH the CNPOW the 6220 and the 6221 while lifting the rear of the board 3 Connect the CNRM the CNLC the 3020 and the panel flexible cable SW board setscrew Put the connector CNRM lead...

Page 41: ...40 10 Basic circuit diagram Parts with hatching are not mounted 6 5 4 3 2 1 6 5 4 3 2 1 E D C B A PWB assembly REMOTE C3S3 C3XM3 PWB assembly SWITCH C3S3 C3XM3 PWB assembly SENSOR C3S3 C3XM3 ...

Page 42: ...41 6 5 4 3 2 1 6 5 4 3 2 1 A B C D E F G POWER UNIT BALLAST C3S3 C3XM3 ...

Page 43: ...42 6 5 4 3 2 1 6 5 4 3 2 1 A B C D E F G POWER UNIT CIRCUIT C3S3 C3XM3 ...

Page 44: ...A B C D E F G 5 4 3 2 1 6 6 5 4 3 2 1 PWB assembly DRIVE 1 C3S3 C3XM3 43 1 ...

Page 45: ...A B C D E F G 5 4 3 2 1 6 6 5 4 3 2 1 PWB assembly DRIVE 2 C3S3 C3XM3 44 ...

Page 46: ...A B C D E F G 5 4 3 2 1 6 6 5 4 3 2 1 PWB assembly DRIVE 3 C3S3 C3XM3 45 ...

Page 47: ...A B C D E F G 5 4 3 2 1 6 6 5 4 3 2 1 PWB assembly DRIVE 4 C3S3 C3XM3 46 ...

Page 48: ...A B C D E F G 5 4 3 2 1 6 6 5 4 3 2 1 PWB assembly DRIVE 5 C3S3 C3XM3 47 ...

Page 49: ...A B C D E F G 5 4 3 2 1 6 6 5 4 3 2 1 PWB assembly DRIVE 6 C3S3 C3XM3 48 ...

Page 50: ...A B C D E F G 5 4 3 2 1 6 6 5 4 3 2 1 PWB assembly DRIVE 7 C3S3 C3XM3 49 ...

Page 51: ...A B C D E F G 5 4 3 2 1 6 6 5 4 3 2 1 PWB assembly DRIVE 8 C3S3 C3XM3 50 ...

Page 52: ...A B C D E F G 5 4 3 2 1 6 6 5 4 3 2 1 PWB assembly DRIVE 9 C3S3 C3XM3 51 ...

Page 53: ...A B C D E F G 5 4 3 2 1 6 6 5 4 3 2 1 PWB assembly DRIVE 10 C3S3 C3XM3 52 ...

Page 54: ...A B C D E F G 5 4 3 2 1 6 6 5 4 3 2 1 PWB assembly SIGNAL 1 C3S3 C3XM3 53 ...

Page 55: ...A B C D E F G 5 4 3 2 1 6 6 5 4 3 2 1 PWB assembly SIGNAL 2 C3S3 C3XM3 54 ...

Page 56: ...A B C D E F G 5 4 3 2 1 6 6 5 4 3 2 1 PWB assembly SIGNAL 3 C3S3 C3XM3 55 ...

Page 57: ...A B C D E F G 5 4 3 2 1 6 6 5 4 3 2 1 PWB assembly INPUT 1 C3S3E C3XM3E 56 ...

Page 58: ...A B C D E F G 5 4 3 2 1 6 6 5 4 3 2 1 PWB assembly INPUT 2 C3S3E C3XM3E 57 ...

Page 59: ...A B C D E F G 5 4 3 2 1 6 6 5 4 3 2 1 PWB assembly INPUT 3 C3S3E C3XM3E 58 ...

Page 60: ...59 11 Disassembly diagram M Meter screw T Tapping screw M3X8 T3X12 T3X12 M3X8 DT M3X8 DT 11 18 28 24 10 9 26 6 13 12 8 25 M3X10 M3X10 A ...

Page 61: ...60 M3X10 M3X10 M3X8 M3X8 M3X8 M3X8 DT M3X8 M3X10 T2X5 M3X8 DT M3X8 T3X12 T3X12 T3X12 T3X12 M3X10 7 5 27 3 2 16 21 23 22 19 4 20 1 29 14 14 15 17 A M Meter screw T Tapping screw ...

Page 62: ...THE UPDATED PARTS LIST FOR THIS MODEL IS AVAILABLE ON ESTA ...

Page 63: ...in Projector Computer Communications setting 19200bps 8N1 1 Protocol Consist of header 7 bytes command data 6 bytes 2 Header BE EF 03 06 00 CRC_low CRC_high CRC_low Lower byte of CRC flag for command data CRC_high Upper byte of CRC flag for command data 3 Command data byte_0 byte_1 byte_2 byte_3 byte_4 byte_5 Action Type Setting code low high low high low high Command data chart Action byte_0 1 Ac...

Page 64: ...63 ...

Page 65: ...0 Get BE EF 03 06 00 38 D2 02 00 04 30 00 00 Language Set English BE EF 03 06 00 F7 D3 01 00 05 30 00 00 Français BE EF 03 06 00 67 D2 01 00 05 30 01 00 Deutsch BE EF 03 06 00 97 D2 01 00 05 30 02 00 Español BE EF 03 06 00 07 D3 01 00 05 30 03 00 Italiano BE EF 03 06 00 37 D1 01 00 05 30 04 00 Norsk BE EF 03 06 00 A7 D0 01 00 05 30 05 00 Nederlands BE EF 03 06 00 57 D0 01 00 05 30 06 00 Português ...

Page 66: ...6 00 C8 D8 02 00 20 30 00 00 Error Status Get BE EF 03 06 00 D9 D8 02 00 20 60 00 00 Example of Return 00 00 01 00 02 00 03 00 Normal Cover error Fan error Lamp error 04 00 05 00 06 00 07 00 08 Temp error Air flow error Lamp Time over Cool error Filter Error Power Set OFF BE EF 03 06 00 2A D3 01 00 00 60 00 00 ON BE EF 03 06 00 BA D2 01 00 00 60 01 00 Get BE EF 03 06 00 19 D3 02 00 00 60 00 00 Inp...

Page 67: ... 00 Get BE EF 03 06 00 AD D0 02 00 08 20 00 00 Picture Position at 16 9 or Small Set Default BE EF 03 06 00 62 D1 01 00 09 20 00 00 Bottom BE EF 03 06 00 F2 D0 01 00 09 20 01 00 Top BE EF 03 06 00 02 D0 01 00 09 20 02 00 Get BE EF 03 06 00 51 D1 02 00 09 20 00 00 V Position Get BE EF 03 06 00 0D 83 02 00 00 21 00 00 Increment BE EF 03 06 00 6B 83 04 00 00 21 00 00 Decrement BE EF 03 06 00 BA 82 05...

Page 68: ...D1 01 00 08 30 00 00 Get BE EF 03 06 00 68 D1 02 00 08 30 00 00 WHISPER Set NORMAL BE EF 03 06 00 3B 23 01 00 00 33 00 00 WHISPER BE EF 03 06 00 AB 22 01 00 00 33 01 00 Get BE EF 03 06 00 08 23 02 00 00 33 00 00 GAMMA Set NORMAL BE EF 03 06 00 C7 F0 01 00 A1 30 00 00 CINEMA BE EF 03 06 00 57 F1 01 00 A1 30 01 00 DYNAMIC BE EF 03 06 00 A7 F1 01 00 A1 30 02 00 Get BE EF 03 06 00 F4 F0 02 00 A1 30 00...

Page 69: ...47 Milano Italia ITALY Tel 39 02 487861 Tel 39 02 38073415 Servizio Clienti Fax 39 02 48786381 2 Email customerservice italy hitachi eu com HITACHI Europe AB Box 77 S 164 94 Kista SWEDEN Tel 46 0 8 562 711 00 Fax 46 0 8 562 711 13 Email csgswe hitachi eu com HITACHI EUROPE S A S Lyon Office B P 45 69671 BRON CEDEX FRANCE Tel 04 72 14 29 70 Fax 04 72 14 29 99 Email france consommateur hitachi eu co...

Reviews: