2
.
The flash drive in the expansion blade may not be indicated when the
data consistency check is in progress on the drive.
When the flash drive is not indicated, wait ten minutes, return to the
CBTP main menu, select Reboot, and then press Enter.
Restart CBTP, and then repeat from step 1.
3
.
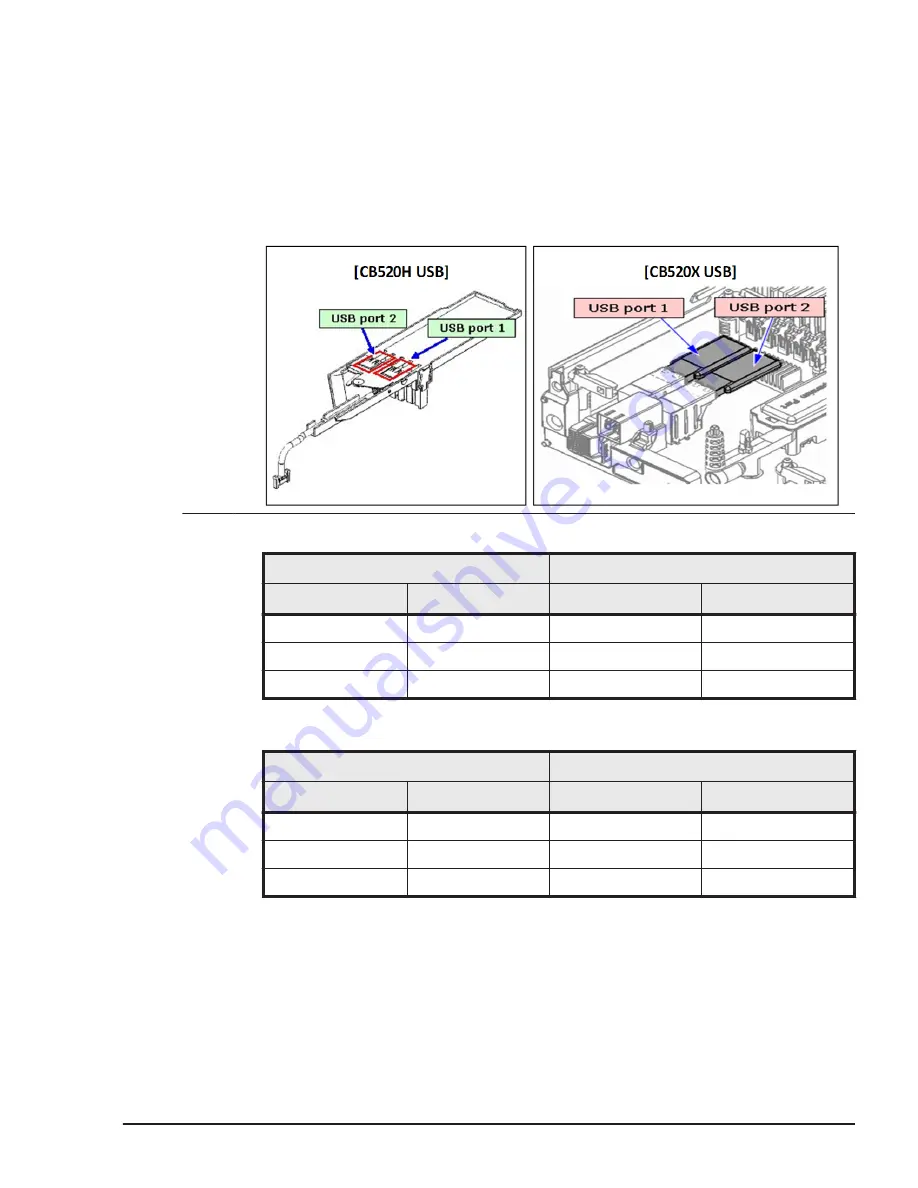
The indicator of the USB location varies depending on the number of
installed USBs.
Confirm the location of replaced USB depending on the following table.
[USB is not installed in the USB port on the front panel of the server blade]
USB port
Location indicator
port 1
port 2
port 1
port 2
Installed
N/A
/dev/sda
N/A
N/A
Installed
N/A
/dev/sda
Installed
Installed
/dev/sda
/dev/sdb
[USB is installed in the USB port on the front panel of the server blade]
USB port
Location indicator
port 1
port 2
port 1
port 2
Installed
N/A
/dev/sdb
N/A
N/A
Installed
N/A
/dev/sdb
Installed
Installed
/dev/sdb
/dev/sdc
Executing CBTP
1
.
Select TEST RUN, and then press Enter key.
2
.
Test Run Monitor is displayed. Using Tab key, select EXEC, and then
press Enter Key.
Diagnosing server blade
8-13
Hitachi Compute Blade 500 Series System Service Manual
Summary of Contents for CB 520A A1
Page 26: ...xxvi Preface Hitachi Compute Blade 500 Series System Service Manual ...
Page 152: ...4 64 Common process for replacement Hitachi Compute Blade 500 Series System Service Manual ...
Page 294: ...6 12 Identifying RAID rebuild status Hitachi Compute Blade 500 Series System Service Manual ...
Page 432: ...9 16 Updating firmware Hitachi Compute Blade 500 Series System Service Manual ...
Page 439: ...Change LOM configuration 10 7 Hitachi Compute Blade 500 Series System Service Manual ...
Page 442: ...10 10 Change LOM configuration Hitachi Compute Blade 500 Series System Service Manual ...
Page 450: ...10 18 Change LOM configuration Hitachi Compute Blade 500 Series System Service Manual ...
Page 464: ...11 14 Troubleshooting Hitachi Compute Blade 500 Series System Service Manual ...
Page 465: ...Hitachi Compute Blade 500 Series System Service Manual ...


