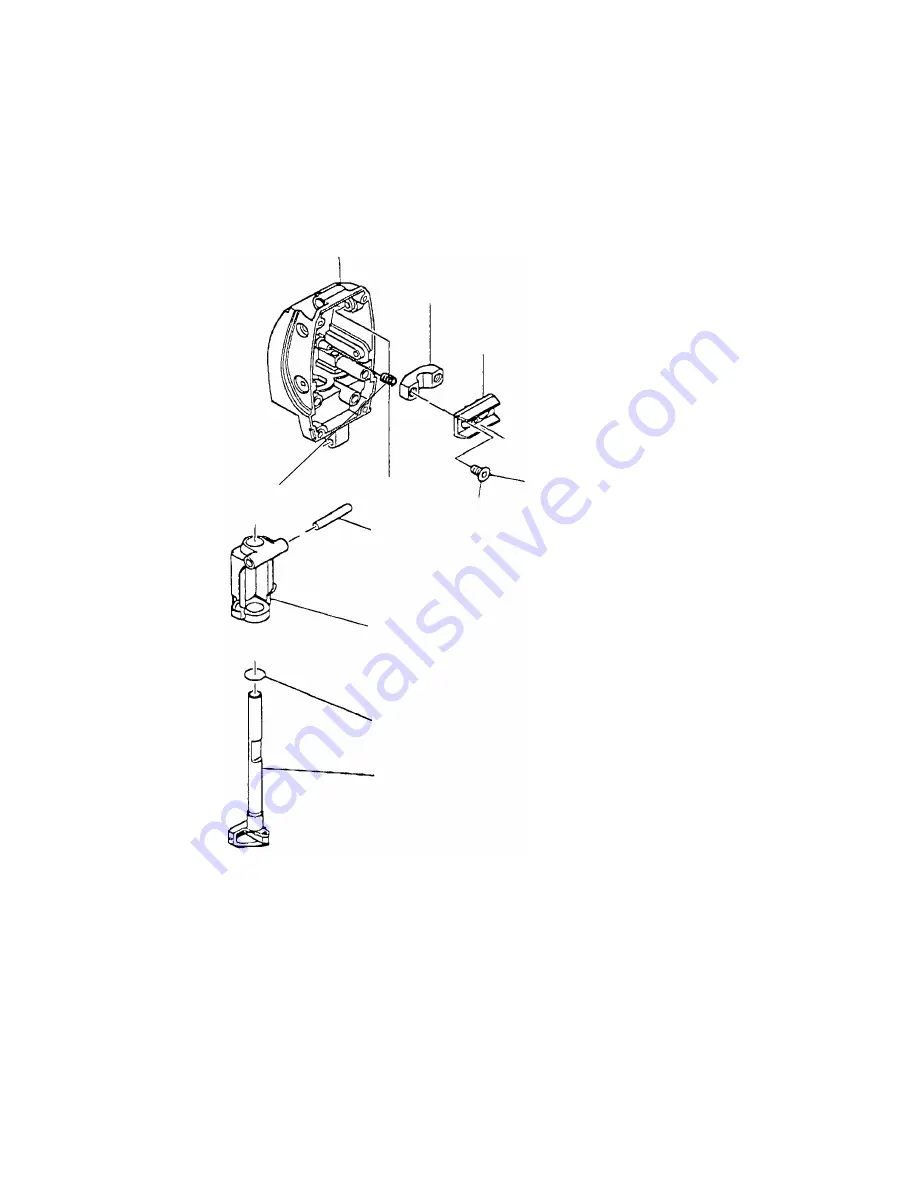
(5) Disassembly of the Plunger [67] ([70]) and the Plunger Holder Ass'y [65] ([68]) (Fig. 9)
Remove the two Seal Lock Flat Hd. Screws M5 x 10 [50] ([53]) and then remove the Connector [31] ([34]).
Pull out the Pin D6 [63] ([66]) from the Upper Cover [29] ([32]). Pull out the Plunger [67] ([70]) downward
from the Upper Cover [29] ([32]). Remove the Plunger Holder Ass'y [65] ([68]) together with the O-ring [66]
([69]) from the Upper Cover [29] ([32]). Remove the Connector Holder [30] ([33]) and two Springs [49] ([52])
from the Upper Cover [29] ([32]).
Fig. 9
Connector Holder [30] ([33])
Upper Cover [29] ([32])
Connector [31] ([34])
Seal Lock Flat Hd. Screw M5 x 10 [50]
([53])
Spring [49] ([52])
Pin D6 [63] ([66])
Plunger [67] ([70])
O-ring [66] ([69])
Plunger Holder Ass'y [65] ([68])
Summary of Contents for CJ 120V
Page 30: ......


