background image

19

ENGLISH

Menu item

Selected

characters

Adjustment

item

Setup hint

M

A

I

N

FUNCTION

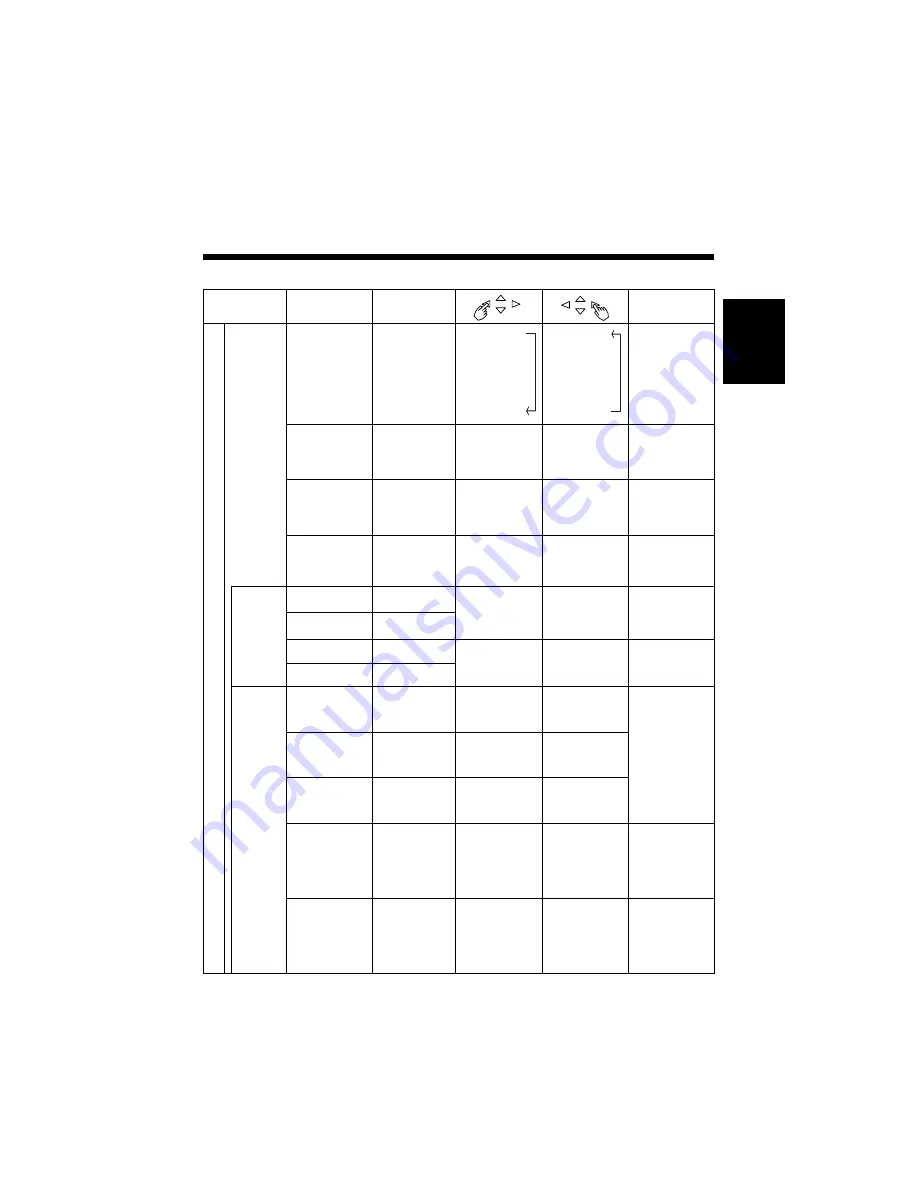
LANGUAGE

Language

selection

ENGLISH

DEUTSCH

ESPAÑOL

ITALIANO

FRANÇAIS

ENGLISH

DEUTSCH

ESPAÑOL

ITALIANO

FRANÇAIS

The default is
ENGLISH.

AUTO FREQ.

Input status

automatic display

Set to OFF The
frequency of a new
signal is not
displayed received.

Set to ON.
The frequency of a
new signal is
displayed as it is
received.

Set to OFF if you
find the  frequency
display appearing
upon signal change
embarrassing.

HALFTONE

Half tone

Set to OFF.
Half tone display is
not possible when the
Adjustment menu
screen is opened.

Set to ON.
Half tone display is
possible when the
Adjustment menu
screen is opened.

Set to OFF when
the border (half
tone) of the
Adjustment menu is
bothersome.

INTERPOLATION

Enlargement

Set to DOUBLE.

Set to LINEAR.

Set to DOUBLE to
see characters or
images crisp or to
LINEAR to view
them smooth.

INPUT

SELECT

RGB1 INPUT

RGB1 input
selection.

Sets to SKIP. Do
not select when
switching inputs.

Sets to SELECT.
Select when
switching inputs.

Setting an unused
jack to SKIP can
accelerate
switching speed.

RGB2 INPUT

RGB2 input
selection.

RGB1 SOUND

RGB1 audio

Sets to OFF.
There is no audio
output.

Sets to ON. There
is audio output.

Determination of
the RGB audio
signal input jack.

RGB2 SOUND

RGB2 audio

BURN

REDUCTION

SCREEN

SAVER

Burn-in reduction
function.

Sets to OFF.

Sets to ON.

The image will move
automatically to
reduce burn-in. The
amount of movement
is set with “Moving
Dots” and the move
time is set with
“Moving Timer” (1 - 60
min.). (Use zero (0) to
check the movement
range. The movement
time would be
approximately 1 sec.)

MOVING DOTS

Amount of screen
movement
selection.

Reduces the
amount of
movement.

Increases the
amount of
movement.

MOVING TIMER

Movement time
interval selection.

Reduces the time
interval.

Increases the
time interval.

INVERSE

Color inversion

Sets to OFF.
There is no color
inversion.

Sets to ON. There
is color inversion.

Panel burn-in is
reduced after
extended display of
still images by
displaying the same
images again with
the colors inverted.

WHITE

White

Sets to YES. The
display is all white and
the Pattern menu
returns. Key operation
is not possible during
all-white display (1
min.).

Sets to NO. The
Pattern menu
returns. The display
is not all white.

Reduces panel
residual images
when executed after
displaying still
images.

Adjustment Item List (continued)

Summary of Contents for CMP307XE

Page 1: ...ith a computer equipped with VESA DPMS The ENERGY STAR emblem does not represent EPA endorsement of any product or service As an ENERGY STAR Partner Hitachi Ltd has determined that this product meets the ENERGY STAR guidelines for energy efficiency with EasyMenu EasyMenu is HITACHI s On Screen Display function for easy operation USER MANUAL MANUEL UTILISATEUR BEDIENUNGSANLEITUNG MANUAL DE USUARIO ...

Page 2: ......
Page 3: ...w profile flat display Free from electromagnetic interferences from geomagnetic sources and ambient power lines the panel produces high quality display images free from color misconvergence and display distortion Multimedia input support The monitor comes complete with a mini D sub terminal and a BNC terminal for RGB input and even with stereo audio input terminals Multiscan converter The multisca...

Page 4: ... Selection 14 Volume Adjustment 14 Contrast Adjustment 15 Sound Mute 15 Input Signal Status Display 16 On Screen Display System EasyMenu 16 OTHER FEATURES 20 Automatic store 20 Reset Settings Initialization 20 Signal Check 21 Switching the Display Method 21 Power Save Mode 22 Sound Mode 22 TROUBLESHOOTING 23 Symptoms That Seemingly Appear to be Failures 23 Actions to Correct Abnormal Displays 24 P...

Page 5: ...t fails If you find something unusual If smoke comes out If there is a strange smell If water enters the case If you drop the monitor or damage the cabinet 1 Turn off the monitor 2 Disconnect the power plug from the mains 3 Request for repair Warning and Caution are indicated in this guide and monitor itself Fire or electric shock may cause death or serious injury unless you follow the instruction...

Page 6: ... electric shock Using the monitor beside a window when snowing or raining or by a seaside are not recommended Do not damage or modify the power cord If you put something heavy on the power cord or pull squeeze heat the cord it may be damaged and it may cause fire or electric shock If the power cord is damaged call service center Fire or electric shock may cause death or serious injury unless you f...

Page 7: ...hf f J 5hf 7 5 h g he e 7 e N Y e N L 3 h hf f 7 HhfJ H h g he e3 e 3 Hg 1 V h L heJ fJ 5 he W h g he eN 5 e N 5 g3 eV g 1 he7 f7 H he 7 5 h g he e H e 3 H gV Le N L f Lh J e J 5hf Y h g he e L J f N h N X e 1 f 3 K gO 5eW HhfJ H h g he e 3 1 7 5f 5he3 1 e3 Lf N 6K eO2 He7 hf7 5 he e N Hf 3 HheN LeV 1g3 5 e 5 he J H he f f N 5 he 1e N L fN H e H heW he f L J f 3 H he 3 f3 Xf 3 5e J 5hf7 5 he f3 1 ...

Page 8: ...rom a desk And it may cause injury Electric shock or other accidents may cause serious injury or damage to your property Caution You may have serious injury or your property may be damaged unless you follow the instruction below Caution Verify that the protective devices in the building installation meets the conditions in the table prior to installing the equipment Remove the power cord for compl...

Page 9: ...o receivers if you put this monitor close to them Precautions for the monitor Use the attached signal cable when you connect the monitor with PC equipment Do not use other signal cables Confirm the connector is fixed tightly when the signal cable is connected Also confirm the screws on the connector are tightened Plug the power cord of the monitor into a different socket from that for other equipm...

Page 10: ...ission regulations provided that following conditions are met Video inputs The input signal amplitude must not exceed the specified level CAUTION Changes or modifications not expressly approved by the party responsible for compliance could void the user s authority to operate the equipment Declaration of Conformity According to 47CFR Part 2 and 15 for Class B Personal Computers and Peripherals and...

Page 11: ...quate design can cause overturning or dropping and result in fire electrical shock or injury Please note that this company assumes absolutely no responsibility for personal injuries or property damage caused by use of other mount units or improper installation Installation of the wall mount unit and ceiling mount unit can be dangerous so do not attempt this work yourself Ask your dealer to provide...

Page 12: ...uture shipping or relocation Instruction manual this book Power cable READ THE INSTRUCTIONS INSIDE CAREFULLY KEEP THIS USER MANUAL FOR FUTURE REFERENCE For future reference record the serial number of your monitor SERIAL NO The serial number is located on the rear of the monitor This monitor is ENERGY STAR compliant when used with a computer equipped with VESA DPMS The ENERGY STAR emblem does not ...

Page 13: ...NU SELECT RGB VIDEO button VIDEO is not available 14 RGB input terminals 12 POWER button 14 RECALL button 15 MUTE button 15 MENU button 16 VOLUME button 14 SELECT button 15 RGB INPUT RS232C IN R L MONO V H B G R AUDIO D SUB BNC RGB2 RGB1 Main power switch Power cable connector 12 14 Component Names continued ...

Page 14: ...ay signal output terminal of the PC to each other using the signal cable included Optional cables are needed to connect to the RGB2 input and audio input terminals If the signal cable included does not match your PC consult your dealer after reading the section Signal Input Insert one end of the power cable included into the rear panel power cable connector and the other end into a mains Turn on t...

Page 15: ...ld batteries together The batteries could explode or leak resulting in fires physical injury or stains When loading batteries observe their correct polarities as marked on the product If loaded in the wrong direction the batteries could explode or leak resulting in fires physical injury or stains TIPS Do not drop or impact the remote controller Do not splash the remote controller with water or put...

Page 16: ...e POWER SAVE or OUT OF FRQENCY appears on the screen there is something unusual about the status of reception See Symptoms That Seemingly Appear to be Failures OPERATING INSTRUCTIONS To turn on the set power supply set the MAIN POWER switch of the main unit to ON and then press the SUB POWER button or the POWER button of the remote control To turn off the set power supply press the SUB POWER butto...

Page 17: ...e a MUTE button While the on screen display system EasyMenu is not on display press the remote controller SELECT button or to adjust the contrast When you press these buttons the status of contrast adjustment and the input horizontal H and vertical V frequencies of the input signal will be displayed in a guidance image While the guidance is on display press the key to narrow the difference between...

Page 18: ...to the original menu For information on adjusting and setting choices see to Press the MENU button once again to exit the adjustment menu The adjustment menu will close automatically when no keys are entered for 10 seconds PICTURE SOUND DISPLAY FUNCTION MAIN MENU MENU SELECT Remote controller CONTRAST 117 BRIGHTNESS 0 COLOR SELECT NORML COLOR BALANCE OPTIONS RETURN PICTURE MENU Pink Pink when brig...

Page 19: ...o the desired colors COLOR BALANCE R GAIN Red gain Red is weakened Red is strengthened Sets the color adjustment selected by the user with COLOR SELECT G GAIN Green gain Green is weakened Green is strengthened B GAIN Blue gain Blue is weakened Blue is strengthened OPTIONS PRESENTATION Presentation Sets to PUBLIC Sets to THEATER It can be selectd in 60 Hz vertical frequency or less Normally set to ...

Page 20: ...CENTER FULL UP LF UP RI DW LF DW RI CENTER FULL UP LF UP RI DW LF DW RI H POSITION Horizontal position Moves the horizontal position to left Moves the horizontal position to right Adjust the left side display position V POSITION Vertical position Moves down the vertical position Moves up the vertical position Adjust the vertical display position CLOCK Dot clock frequency Reduces the dot clock freq...

Page 21: ...witching speed RGB2 INPUT RGB2 input selection RGB1 SOUND RGB1 audio Sets to OFF There is no audio output Sets to ON There is audio output Determination of the RGB audio signal input jack RGB2 SOUND RGB2 audio BURN REDUCTION SCREEN SAVER Burn in reduction function Sets to OFF Sets to ON The image will move automatically to reduce burn in The amount of movement is set with Moving Dots and the move ...

Page 22: ...e signal RGB1 and RGB2 inputs have common elements that can be recorded for each signal mode Because of this when the contents are recorded with RGB1 or RGB2 there may be loss of adjustment during RGB2 or RGB1 reception in the same signal mode 16 Item Display Registration condition Reproduction condition Sound volume Sound balance Treble Bass Mute volume Input status automatic display Halftone Enl...

Page 23: ...changing the settings of the display area when the RGB input jack is selected or display size when the Video input jack is selected Switching when the RGB input jack is selected 1 The expanded processing method INTERPOLATION becomes effective 2 The display status and display area is changed each time the SELECT button is pressed or each time the or keys of the remote control are pressed Refer to D...

Page 24: ...ENU Remote controller POWER SAVE MENU Remote controller When the RGB input jack is selected This device conforms to the power saving of International Energy Program When this device is connected to a computer and used the power save standby suspend off mode will be set automatically when the computer is not being used so that the power consumption of this device can be reduced 1 Press the MENU or ...

Page 25: ...r higher contrast and brightness Check the way the signal cable is connected The display image appears flowing slantwise Text displayed across the screen appears vertically streaked with the characters in vertical columns blurred Adjust the dot clock frequency and phase Adjust the dot clock frequency first the dot clock phase next Text displayed across the screen appears blurred A fine pattern fli...

Page 26: ...om 2 Press or to make the text appear without flickering Symptom 2 Text displayed across the screen appears blurred in its entirety display 3 A fine pattern flickers when displayed on the screen display 4 Example Display 3 Display 4 Adjustment procedure Press MENU button to open the adjustment menu Press the key of the SELECT button 2 times and select DISPLAY Press to open the DISPLAY menu Press t...

Page 27: ...put RGB1 input terminal mD Sub 15 pin x 1 RGB2 input terminal BNC x 5 RGB audio input terminal RCA pin L R x 1 Video signals 0 7 V 1 0 Vp analog RGB Audio signals L R 470mV high impedance Sync signals H V separate TTL level H V composite TTL level Sync on green 0 3 Vp p Synchroni zing signal frequency Horizontal 24kHz 64kHz Vertical 50Hz 75Hz Video clock frequency 108MHz or less Color density at w...

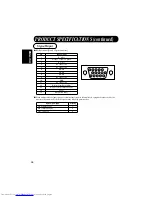
Page 28: ...e the monitor will automatically select the signals in the following priority order Pin Input signal 1 R video 2 G video or sync on green 3 B video 4 No connection 5 No connection 6 R GND 7 G GND 8 B GND 9 No connection 10 GND 11 No connection 12 Bi directional Data SDA 13 H sync or H V composite sync 14 V sync 15 Data Clock SCL Sync signal type Priority H V separate sync 1 H V composite sync 2 sy...

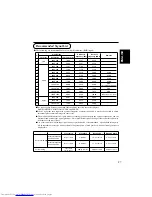
Page 29: ...ime No Signal mode Horizontal frequency kHz Dot clock frequency MHz Remarks Signal name Resolution Vertical frequency Hz 1 VGA 640 X 400 70 08 31 47 25 18 2 640 X 480 59 94 31 47 25 18 3 VESA 640 X 480 72 81 37 86 31 50 4 640 X 480 75 00 37 50 31 50 5 800 X 600 56 25 35 16 36 00 SVGA 6 800 X 600 60 32 37 88 40 00 SVGA 7 800 X 600 72 19 48 08 50 00 SVGA 8 800 X 600 75 00 46 88 49 50 SVGA 9 1024 X 7...

Page 30: ... ITALY Tel 39 02 487861 Tel 39 02 38073415 Servizio Clienti Fax 39 02 48786381 2 Email customerservice italy hitachi eu com HITACHI Europe AB Box 77 S 164 94 Kista SWEDEN Tel 46 0 8 562 711 00 Fax 46 0 8 562 711 13 Email csgswe hitachi eu com HITACHI EUROPE S A S Lyon Office B P 45 69671 BRON CEDEX FRANCE Tel 04 72 14 29 70 Fax 04 72 14 29 99 Email france consommateur hitachi eu com HITACHI EUROPE...

Reviews: