4 OPERATION
4-6
<Notes on installing in Windows® 7 (32-bit)>
Installing the Base System in Windows® 7 (32-bit) operating system requires prior logging onto
the operating system with an appropriate Administrator account, which is the Administrator
account first created in the initial condition of your personal computer. When you have so
logged on, you can then double-click “setup.exe” that is stored in the DISK 1 folder on the Base
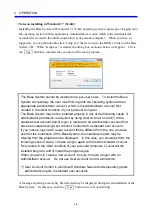
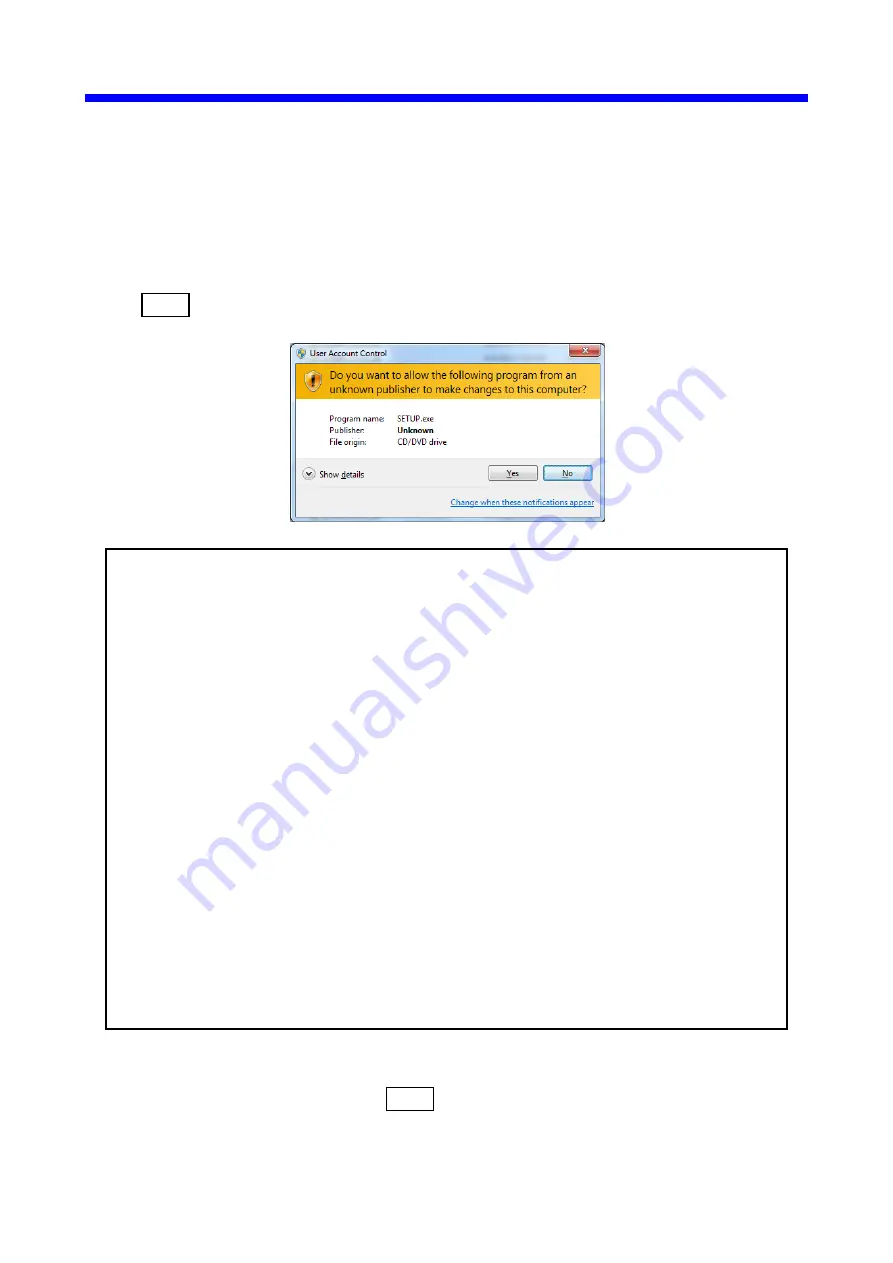
System CD. When “setup.exe” is started, the dialog box as shown below will appear. Click
the Yes button to continue the execution of the setup program.
The Base System cannot be installed on a per-user basis. To install the Base
System successfully, the user must first log onto the operating system with an
appropriate Administrator account, which is the Administrator account first
created in the initial condition of your personal computer.
The Base System may not be installed properly in any of the following cases: 1)
administrator permission is acquired by using User Account Control(*) with a
standard user account and 2) logon is made with an Administrator account that
has been created using User Account Control with a standard user account.
If you make a logon with a user account that is different from the one you have
used for the installation of the Base System, the installed program may be
missing from the program menu displayed. In this case, you should perform the
following series of steps: 1) make a logon again with the Administrator account
first created in the initial condition of your personal computer; 2) uninstall the
installed program; and 3) install the program again.
When you want to create a new account, be sure to make a logon with an
Administrator account. Do not use User Account Control at that time.
(*) User Account Control is a Microsoft Windows feature that temporarily grants
administrative rights to standard user accounts.
A message reporting a read-only file detected may be displayed during the reinstallation of the
Base System. In this case, click the Yes button to set off overwriting.
Summary of Contents for CMU LPQ520
Page 1: ......
Page 2: ......
Page 17: ...This Page Intentionally Left Blank ...
Page 19: ...This Page Intentionally Left Blank ...
Page 23: ...This Page Intentionally Left Blank ...
Page 28: ...v 6 4 Replacing the CMU Module 6 49 6 4 1 Replacing the module 6 49 6 5 Trouble Report 6 51 ...
Page 30: ...1 SPECIFICATIONS ...
Page 38: ...2 NAMES AND FUNCTIONS OF EACH PART ...
Page 43: ...This Page Intentionally Left Blank ...
Page 44: ...3 MOUNTING AND WIRING ...
Page 52: ...4 OPERATION ...
Page 85: ...This Page Intentionally Left Blank ...
Page 86: ...5 USER GUIDE ...
Page 101: ...This Page Intentionally Left Blank ...
Page 102: ...6 MAINTENANCE ...


