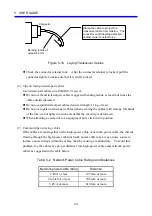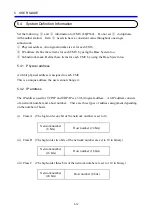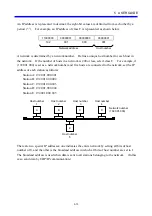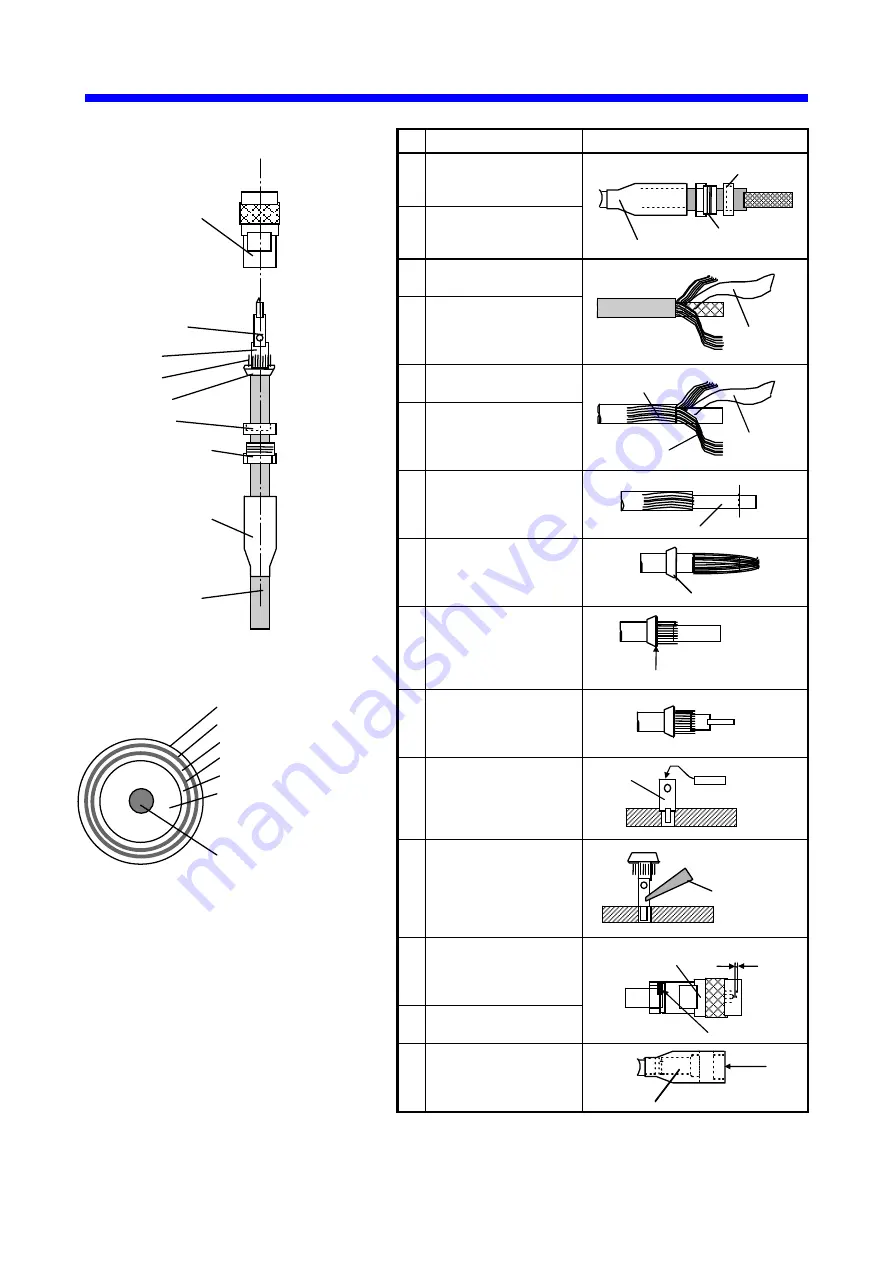
5 USER GUIDE
5-8
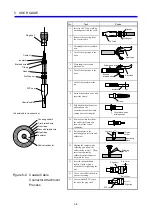
No.
Task Sketch
1
Insert the PVC cap, stuffing
nut and gasket into the cable.
2
Remove the covering from
the coaxial cable.
3
Disentangle the first braided
wire.
4
Cut off the alpet tape at the
base.
5
Disentangle the second
braided wire.
6
Cut off the alpet tape at the
base.
7
Cut off the insulator at the
tip.
8
Extend the braided wires and
insert the clamp.
9
Fold back the braided wires
uniformly on the
circumference of the clamp,
cutting out excess lengths.
10
Remove the insulator from
the end of the clamp and
then cut off the central
conductor.
11
Put the contact in the
insulating plate insert thread
solder in it.
12
Heating the contact with a
soldering gun, allow the
solder inside to melt. Then,
insert a preliminarily
soldered central conductor
deep into the base.
13
Insert the plug shell and
tighten it with a torque
wrench before tightening the
nut.
14
Give a coat of Reich Lock to
prevent loosening.
15
Cover with the PVC cap to
the tip of the plug shell.
Plug shell
Covering sheath
Contact
Insulator
Braided wire
Clamp
Gasket
PVC cap
Coaxial cable
First braided wire
Alpet tape
Second braided wire
Alpet tape
Insulator
Central conductor
<Coaxial cable cross section>
Stuffing nut
Figure 5-8 Coaxial Cable
Connector Attachment
Process
PVC cap
Gasket
Stuffing nut
Alpet tape
Alpet tape
First braided wire
Second
braided wire
Insulator
Cut
Clamp
Cut braided wires
at this position
Contact
Insulating
plate
Thread
solder
Soldering
gun tip
0 to 1 mm
Plug shell
Reich Lock
PVC cap
Align tips
Summary of Contents for CMU LPQ520
Page 1: ......
Page 2: ......
Page 17: ...This Page Intentionally Left Blank ...
Page 19: ...This Page Intentionally Left Blank ...
Page 23: ...This Page Intentionally Left Blank ...
Page 28: ...v 6 4 Replacing the CMU Module 6 49 6 4 1 Replacing the module 6 49 6 5 Trouble Report 6 51 ...
Page 30: ...1 SPECIFICATIONS ...
Page 38: ...2 NAMES AND FUNCTIONS OF EACH PART ...
Page 43: ...This Page Intentionally Left Blank ...
Page 44: ...3 MOUNTING AND WIRING ...
Page 52: ...4 OPERATION ...
Page 85: ...This Page Intentionally Left Blank ...
Page 86: ...5 USER GUIDE ...
Page 101: ...This Page Intentionally Left Blank ...
Page 102: ...6 MAINTENANCE ...


