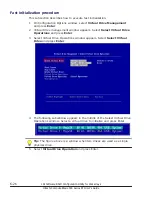
6
.
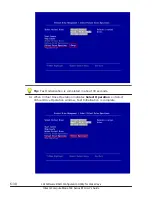
Virtual Drive Management > Select Virtual Drive Operations > Warning
message appears . Select Yes, and press Enter.
Tip: When you select No, the virtual drive is not deleted and the window
returns to Select Virtual Drive Operations.
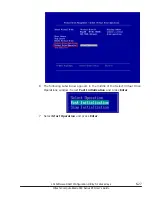
7
.
Virtual Drive Management > Select Virtual Drive Operations > Success
message appears . With OK selected, press Enter.
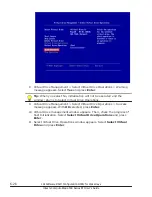
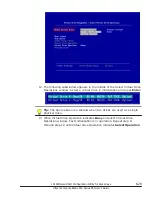
8
.
The virtual drive is deleted. Then, Configuration Options window appears.
To delete another virtual drive, repeat step 1 through step 7 again.
Changing boot priority in virtual drives
This subsection describes how to change boot priority in virtual drives. Top
priority is usually assigned to the first configured virtual drive. But you can
assign top priority to a virtual drive configured later.
Tip: With the procedure described in this section, you can change boot
priority of disk arrays with single physical drive configuration.
1
.
On Configuration Options window, select Controller Management and
press Enter.
2
.
Controller Management window appears. Select Change Controller
Properties and press Enter.
3
.
Change Controller Properties window appears. Select Set Boot Device
and press Enter.
6-40
LSI Software RAID Configuration Utility for disk arrays
Hitachi Compute Blade 500 Series EFI User's Guide
Summary of Contents for Compute Blade 500 Series
Page 8: ...viii Hitachi Compute Blade 500 Series EFI User s Guide ...
Page 14: ...xiv Preface Hitachi Compute Blade 500 Series EFI User s Guide ...
Page 445: ...SAS configuration utility 7 11 Hitachi Compute Blade 500 Series EFI User s Guide ...
Page 468: ...7 34 SAS configuration utility Hitachi Compute Blade 500 Series EFI User s Guide ...
Page 475: ...BIOS settings for PXE boot 8 7 Hitachi Compute Blade 500 Series EFI User s Guide ...
Page 476: ...8 8 BIOS settings for PXE boot Hitachi Compute Blade 500 Series EFI User s Guide ...
Page 504: ...10 12 Fibre channel over Ethernet FCoE Hitachi Compute Blade 500 Series EFI User s Guide ...
Page 505: ...Hitachi Compute Blade 500 Series EFI User s Guide ...

