TECHNICAL - 4
T
TE
EC
CH
HN
NIIC
CA
AL
L ((ccoonnttiinnuueedd))
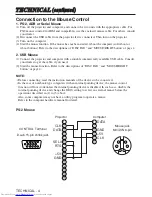
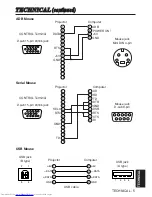
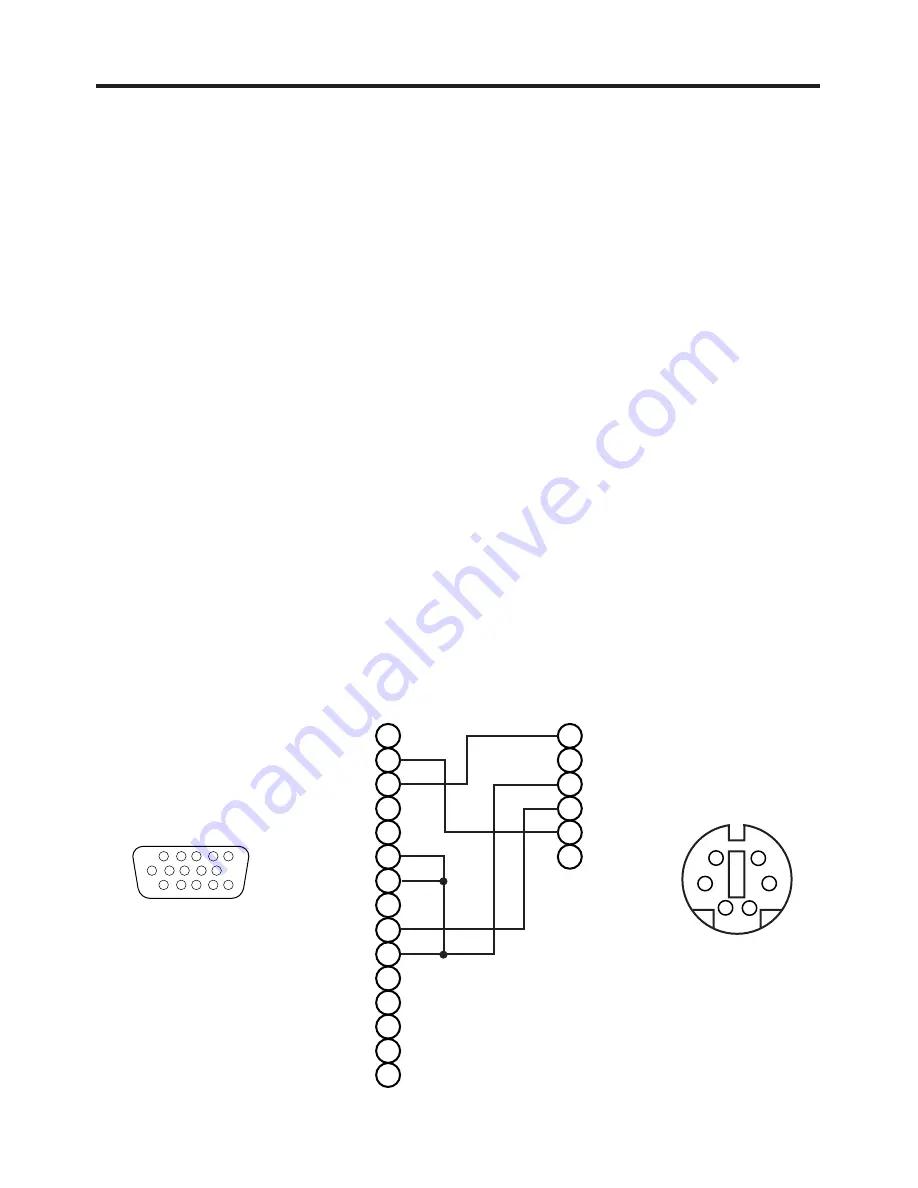
Connection to the Mouse Control
1. PS/2, ADB or Serial Mouse
(1) Turn off the projector and computer, and connect the two units with the appropriate cable. For
PS/2 mouse control (for IBM and compatible), use the enclosed mouse cable. For others, consult
your dealer.
(2) Disconnect the USB cable from the projector if it is connected. Then turn on the projector.
(3) Turn on the computer.
(4) Start the mouse function. If the mouse has not been started, reboot the computer (soft reboot or
reboot buttons). Refer to the descriptions of “DISC PAD” and “MOUSE/RIGHT button” of page 4.
2. USB Mouse
(1) Connect the projector and computer with a suitable commercially available USB cable. Consult
your dealer to get the cable, if you need.
(2) Start the mouse function. Refer to the descriptions of “DISC PAD” and “MOUSE/RIGHT
button” of page 4.
NOTE:
• Before connecting, read the instruction manuals of the devices to be connected.
• In the case of notebook type computers with an internal pointing device, the mouse control
function will not work unless the internal pointing device is disabled. In such case, disable the
internal pointing device and change the BIOS setting to select an external mouse before the
operations described in (1) to (5) above.
Also, some computers may not have a utility program to operate a mouse.
Refer to the computer hardware manual for detail.
PS/2 Mouse
2
1
4
3
6
5
2
1
4
3
6
5
8
7
10
9
12
11
14
13
15
CLK
DATA
SEL0
RTS
GND
+5V
DATA
GND
+5V
CLK
2
1
4
3
6
5
Mouse jack
Mini DIN 6-pin
Projector
Computer
1 2 3 4 5
6 7 8 9 10
11 12 13 14 15
CONTROL Terminal
D-sub 15-pin shrink jack

