background image

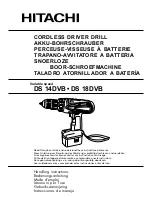
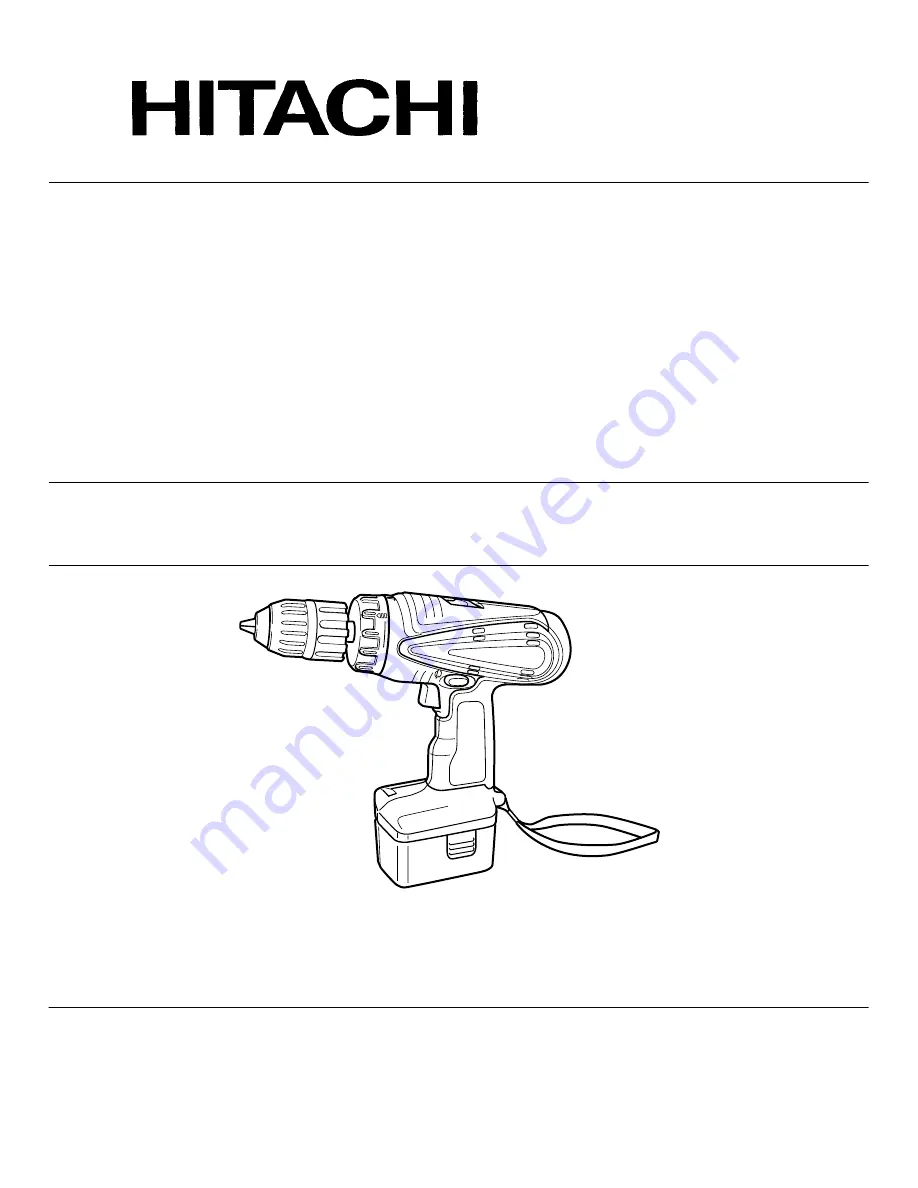
CORDLESS DRIVER DRILL
AKKU-BOHRSCHRAUBER
PERCEUSE-VISSEUSE À BATTERIE
TRAPANO-AVVITATORE A BATTERIA
SNOERLOZE

BOOR-SCHROEFMACHINE

TALADRO ATORNILLADOR A BATERÍA

Variable speed

DS 14DVB • DS 18DVB

Read through carefully and understand these instructions before use.
Diese Anleitung vor Benutzung des Werkzeugs sorgfältig durchlesen und verstehen.
Lire soigneusement et bien assimiler ces instructions avant usage.
Prima dell’uso leggere attentamente e comprendere queste instruzioni.
Deze gebruiksaanwijzing s.v.p. voor gebruik zorgvuldig doorlezen.
Leer cuidadosamente y comprender estas instrucciones antes del uso.

Handling instructions

Bedienungsanleitung

Mode d’emploi

Istruzioni per l’uso

Gebruiksaanwijzing

Instrucciones de manejo

Summary of Contents for DS 14DVB

Page 1: ...iese Anleitung vor Benutzung des Werkzeugs sorgfältig durchlesen und verstehen Lire soigneusement et bien assimiler ces instructions avant usage Prima dell uso leggere attentamente e comprendere queste instruzioni Deze gebruiksaanwijzing s v p voor gebruik zorgvuldig doorlezen Leer cuidadosamente y comprender estas instrucciones antes del uso Handling instructions Bedienungsanleitung Mode d emploi...

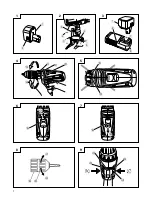
Page 2: ...1 1 2 5 7 9 4 6 2 1 4 6 1 7 8 3 3 2 1 A B C D E F N O L I J K 5 8 9 0 0 F M O G H ...

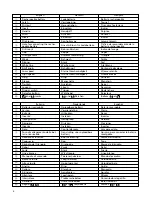
Page 3: ...o Selettore Omzetschakelaar Botón selector Segno R L R en L merktekens Marcas R y L English Deutsch Français Rechargeable battery Ladebatterie Batterie rechargeable Latch Verriegelung Taquet Pull out Herausziehen Tirer vers l extérieur Insert Einsetzen Insérer Handle Handgriff Poignée Push Drücken Pousser Insert Einsetzen Insérer Pilot lamp Kontrollampe Lampe témoin Hole for connecting the rechar ...

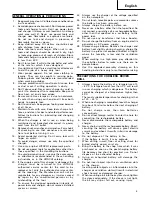
Page 4: ...e Manufacturer will not be responsible for any damages or injuries caused by repair by the unauthorized persons or by mishandling of the tool 21 To ensure the designed operational integrity of power tools and charger do not remove installed covers or screws 22 Always use the charger at the voltage specified on the nameplate 23 Do not touch movable parts or accessories unless the battery has been r...

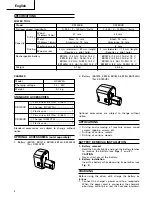
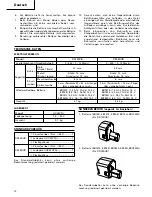
Page 5: ... Ni MH 18 V EB1430H 3 0 Ah Ni MH 14 4 V EB1830H 3 0 Ah Ni MH 18 V Weight 2 1 kg 2 4 kg Capacity 1 Plus driver bit No 2 55L 1 DS14DVB 2 Charger UC24YFA 1 3 Plastic case 1 1 Plus driver bit No 2 55L 1 DS18DVB 2 Charger UC24YFA 1 3 Plastic case 1 2 Battery EB1814 EB18B EB1820 EB18H EB1830H For DS18DVB Optional accessories are subject to change without notice APPLICATIONS 䡬 Driving and removing of mac...

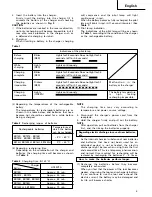
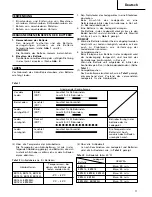
Page 6: ...ble below and batteries that have become hot should be cooled for a while before being recharged Table 2 Recharging ranges of batteries 3 Regarding recharging time Depending on the combination of the charger and batteries the charging time will become as shown in Table 3 Table 3 Charging time At 20 C Temperatures at Rechargeable batteries which the battery can be recharged EB14S EB1414 EB14B 5 C 6...

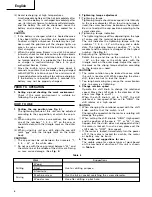
Page 7: ...nt 1 Tightening torque Tightening torque should correspond in its intensity to the screw diameter When too strong torque is used the screw head may be broken or be injured Be sure to adjust the cap position according to the screw diameter 2 Tightening torque indication The tightening torque differs depending on the type of screw and the material being tightened The unit indicates the tightening to...

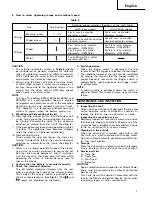
Page 8: ...e Fig 9 The L and R marks are provided on the body 9 Switch operation 䡬 When the trigger switch is depressed the tool rotates When the trigger is released the tool stops 䡬 The rotational speed of the drill can be controlled by varying the amount that the trigger switch is pulled Speed is low when the trigger switch is pulled slightly and increases as the trigger switch is pulled more NOTE 䡬 A buzz...

Page 9: ...ve As the colours of the wires in the mains lead of this tool may not correspond with the coloured markings identifying the terminals in your plug proceed as follows The wire coloured blue must be connected to the terminal marked with the letter N or coloured black The wire coloured brown must be connected to the terminal marked with the letter L or coloured red Neither core must be connected to t...

Page 10: ... verwenden Sie nur das vorgeschriebene Ladegerät 17 Nur Original HITACHI Ersatzteile verwenden 18 Das Werkzeug und Ladegerät nicht anders als in der Gebrauchsanweisung vorgeschrieben verwenden 19 Die Benutzung von Zubehör und Sonderzubehör die nicht im HITACHI Katalog oder in der Bedienungsanleitung aufgeführt sind erhöhen das Risiko von Verletzungen 20 Wenn das Stromkabel des Ladegerätes beschädi...

Page 11: ...kten Kabel usw vorhanden sind 8 Bringen Sie die Batterie zum Geschäft wo Sie ihn gekauft haben sobald die Lebensdauer der Batterie abrinnt Die erschöpfte Batterie nicht wegwerfen 9 Benutzung verbrauchter Batterie beschädigt den Auflader 10 Darauf achten daß keine Gegenstände durch Belüftungsschlitze des Aufladers in das Gerät eindringen Wenn Metallobjekte oder entzündliche Gegenstände durch die Be...

Page 12: ...h in Rot auf Wenn die Batterie voll aufgelader ist blinkt das Kontrollampe in Rot in Sekundenabständen Seihe Tafel 1 1 Anzeigelämpchen Das Kontrollampe leuchtet auf wie in Tafel 1 gezeigt entsprechend dem Zustand des verwendeten Ladegeräts für die Akkubatterie Tafel 1 Anzeigen der Kontrollampe Leuchtet für 0 5 Sekunden Loscht für 0 5 Sekunden Leuchtet kontinuierlich Leuchtet für 0 5 Sekunden Losch...

Page 13: ...mindestens 3 Sekunden bevor Sie die Batterie zum Fortsetzen des Aufladens einlegen Wenn die Batterie innerhalb von 3 Sekunden eingelegt wird kann es sein daß sie nicht richtig geladen wird VOR INBETRIEBNAHME 1 Aufstellung und überprüfung der Arbeitsumgebung Prüfen Sie ob die Arbeitsumgebung folgenden Vorsichtsbedingungen entspricht ANWENDUNG 1 Nachprüfen der Kappeneinstellung Siehe Abb 4 Das Anzie...

Page 14: ...rd wieder normal wenn sich die Batterie erwärmt 6 Anbringen und Abnehmen des Schrauberbits 1 Anbringen der Werkzeugspitze Nach dem Einsetzen einer Schraubenzieherspitze o Tafel 4 Arbeit Anweisung Holz Bohren Stahl Für bpjraibeot verwenden Aluminum Maschineschreube Bohrespitze oder Hülse dem Schraubendurchschnitt verwnden Einschrauben Holzschraube Nach bohren von Führungsloch verwenden Verwendung K...

Page 15: ... einem in Seifenwasser benetzten Tuch Kein Chlorsolvent Benzin oder Farbsolvent verwenden da sie plastik Material schmelzen 4 Lagern Den Bohrschrauber an einen Ort aufbewahren wo die Temperatur unter 40 C ist und außer Reichweite der Kinder 5 Liste der Wartungsteile A Punkt Nr B Code Nr C Verwendete Anzahl D Bemerkungen ACHTUNG Reparatur Modifikation und Inspektion von Hitachi Elektrowerkzeugen mü...

Page 16: ...ENERALES 1 Maintenir la zone de travail propre Des surfaces et des bancs de travail encombrés sont propices aux accidents 2 Eviter des alentours dangereux Ne pas exposer l outil et le chargeur à la pluie Ne pas utiliser l outil ou le chargeur en des endroits humides ou mouillés Maintenir la zone de travail bien éclairée Ne jamais utiliser d outils électro portatifs et de chargeur à proximité de ma...

Page 17: ...on Si ce dernier est trop lâche le foret ou la mèche risque de glisser ou de tomber et blesser quelqu un Capacité Modèle DS14DVB DS18DVB Vitesse à vide Basse Grande 0 350 0 1200min 1 0 400 0 1400min 1 Bois Perçage épaisseur 18mm 27 mm 38 mm Métal Acier 13 mm Acier 13 mm épaisseur 1 6mm Aluminum 13 mm Aluminum 13 mm Enfonce Vis mécanique 6 mm 6 mm ment Vis de bois 8 mm diamètre 50 mm Longueur 8 mm ...

Page 18: ...ion de la lampe témoin Les indications de la lampe témoin sont expliquées dans le Tableau 1 selon la condition du chargeur ou de la batterie rechargeable Tableau 1 Indications de la lampe témoin S allume pendant 0 5 seconde Ne s allume pas pendant 0 5 seconde Eteint pendant 0 5 seconde S allume sans interruption S allume pendant 0 5 seconde Ne s allume pas pendant 0 5 seconde Eteint pendant 0 5 se...

Page 19: ...éinsérer pour continuer le chargement Si la batterie est réinsérée dans les 3 seconds elle resque de ne pas être correctement rechargée AVANT LA MISE EN MARCHE 1 Installation et vérification de l environnement de travail Vérifier si l environnement de travail est adéquat en suivant les précautions UTILISATION 1 Vérification de la position du capuchon Voir Fig 4 Le couple de serrage de cet outil pe...

Page 20: ...s et montrés au Tableau 5 seront pris en tant qu exemples standard étant donné que différentes vis de serrages et différents matériels devant être serrés seront utilisés réellement et pour lesquels un réglage approprié sera évidemment requis 䡬 Si la machine est utilisée pour serrer une vis à métaux à grande vitesse HIGH la vis risque d être endommagée ou de se desserrer à cause de la trop grande f...

Page 21: ...au savoneuse N utilisez pas de solvant au chlore d essence ou de diluant car ils font fondre les matières plastiques 4 Rangement Rangez la perceuse visseuse dans un endroit où la température est inférieure à 40 C et hors de portée des enfants 5 Liste des pièces de rechange A No élément B No code C No utilisé D Remarques ATTENTION Les réparations modifications et inspections des outils électriques ...

Page 22: ...atterie d altro tipo 17 Usaresolo parti di ricambio originali HITACHI 18 Non usare gli utensili elettrici e il caricabatterie per impieghi diversi da quelli specificati nelle istruzioni per l uso 19 L uso di ogni altro accessorio o dispositivo di attacco raccomandato in queste istruzioni di impiego o nel catalogo HITACHI potrebbe causare 20 Se il cavo di alimentazione di questo caricatore è danneg...

Page 23: ...24YFA Votaggio di carica 7 2 24V Peso 0 7 kg Modello DS14DVB DS18DVB Velocità a vuoto Bassa Alta 0 350 0 1200min 1 0 400 0 1400min 1 Legno Perfora Spessore 18mm 27 mm 38 mm zione Metallo Acciaino 13 mm Acciaino 13 mm Spessore 1 6mm Alluminio 13 mm Alluminio 13 mm Avvita Vite di macchina 6 mm 6 mm mento Vite per legno 8 mm diametro 50 mm lunghezza 8 mm diametro 75 mm lunghezza Questo é un foro prel...

Page 24: ...ro la spia lampeggia in rosso A intervalli di un secondo 2 Inserire la batteria nel caricatore Inserire saldamente la batteria nel caricatore fino a che tocca il fondo del carificatore e controllare la polarità come mostrato nelle Fig 3 ATTENZIONE 䡬 Se le pile sono inseíte in direzione contaria non solo la carica diviene impassibile ma è possibile che si verifíchino problemi nel caricabatterie com...

Page 25: ... adatto seguendo le necessarie precauzioni OPERAZIONE 1 Controllare la posizione del tappo Ved Fig 4 La coppia di serraggio di questo utensile può essere regolata modificando la posizione del tappo 1 Quando si usa questo attrezzo come cacciavite allineare uno dei numeri 1 3 5 22 sul tappo o il punto bianco con il simbolo del triangolo sul corpo esterno 2 Quando si usa questo attrezzo come trapano ...

Page 26: ...assa velocità LOW quando si impiega una vite di macchina NOTA L uso della batteria EB14H EB1430H EB18H e EB1830H a basse temperature sotto 0 gradi centigradi può a volte risultare in una coppia di serraggio indebolita e una minore quantità di lavoro Questo è tuttavia un fenomeno temporaneo e il funzionamento torna alla normalità quando la batteria si scalda 6 Montaggio e smontaggio della punta 1 P...

Page 27: ...voce B N codice C N uso D Note CAUTELA Riparazioni modifiche e ispezioni di utensili elettrici Hitachi devono essere eseguite da un centro assistenza Hitachi autorizzato Questa lista dei pezzi torna utile se viene presentata con l utensile al centro assistenza Hitachi autorizzato quando si richiedono riparazioni o altri interventi di manutenzione Nell uso e nella manutenzione degli utensili elettr...

Page 28: ...wacht inschakelen vermijden Draag het toestel niet met de vinger aan de schakelaar 16 Gebruik uitsluitend de bijbehorende acculader Gebruik geen andere acculaders om gevaar te voorkomen 17 Alleen gebruik maken van originele HITACHI onderdelen 18 Gebruik de boor en de acculader uitsluitend voor doeleinden die in deze gebruiksaanwijzing beschreven zijn 19 Het gebruik van accessoires en toebehoren an...

Page 29: ...vig vast te zetten Als de spanbus niet stevig vastzit kan De standaard toebehoren kunnen zonder nadere aankondiging gewijzigd worden Model DS14DVB DS18DVB Onbelaste snelheid Laage Hoge 0 350 0 1200min 1 0 400 0 1400min 1 Hout Boren Dikte 18mm 27 mm 38 mm Metaal Staal 13 mm Staal 13 mm Dikte 1 6mm Aluminum 13 mm Aluminum 13 mm Drijven Kolomschroef 6 mm 6 mm Houtschroef 8 mm diameter 50 mm lengte 8 ...

Page 30: ... Wanneer een batterij in de acculader wordt aangebracht blijft het controlelampje kontinu rood branden Wanneer de batterij volledig is opgeladen gaat het controlelampje in rood knipperen met tussenpozen van 1 sekonde Zie Tabel 1 1 Aanduiding van de controlelampje De aanduidingen van het controlelampje zijn zoals aangegeven in tabel 1 al naar gelang de toestand van de oplaadbare batterij of het acc...

Page 31: ...are batterij of het oplaadapparaat Laat deze dan controleren door een bevoegde onderhoudsinstantie 䡬 Aangzien de ingebouwde micoprocessor van de UC24YFA een drietal sekonden nodig heeft om te reageren op het loskoppelen van de batterij dient u minimaal drie sekonden te wachten voordat u de batterij weer aansluit om het laden te vervolgen Als de batterij binnen de drie sekonden wordt aangesloten ba...

Page 32: ...k dan geen hoog toerental HIGH Dit zou kunnen leiden tot beschadiging van de schroefkop of van het bitje daar het aandraaikoppel te groot is Gebruik de boor met het lage toerental ingeschakeld LOW OPMERKING Het gebruik van de EB14H EB1430H EB18H en EB1830H batterij bij lage temperaturen onder nul kan soms een zwakker aantrekkoppel en slechtere Tabel 4 Werk Suggesties Hout Boren Staal Gebruik een b...

Page 33: ...even onmiddellijk vast Dit om ongelukken te voorkomen 3 Reiningen van de behuizing Gebruik een zachte droge doek of wat soppig water wanneer de behuizing bevuild is Gebruik geen vloeis toffen zoals terpentine of benzine om te voorkomen dat de afwerking beschadigd wordt 4 Opbergen Bewaar de slagboor op een plaats waar de temperatuur niet hoger is dan 40 C en buiten het bereik van kinderen 5 Lijst v...

Page 34: ...el pulsador 16 Usar siempre el cargador especificado Nunca usar otro cargador que lo especificado es para evitar riesgos 17 Usar sólo piezas de repuesto originales HITACHI 18 No utilizar herramientas ni el cargador para otras aplicaciones que difieran de las especificadas en el manual de instrucciones 19 El uso de cualquier recambio o accesorio que no venga recomendado en el manual de instruccione...

Page 35: ...ambio sin previo aviso CARGADOR Modelo UC24YFA Tensión de carga 7 2 24V Peso 0 7 kg Model DS14DVB DS18DVB Velocidad sin carga Baja Alta 0 350 0 1200min 1 0 400 0 1400min 1 Madera Taladrado Grosor 18mm 27 mm 38 mm Metal Acero 13 mm Acero 13 mm Grosor 1 6mm Aluminio 13 mm Aluminio 13 mm Apriete Tornillo para metales 6 mm 6 mm de Tornillo para madera 8 mm diámetro 50 mm longitud 8 mm diámetro 75mm lo...

Page 36: ...iloto parpadeará en rojo A intervalos de 1 segundo Vea las Tabla 1 1 Indicaciones de la lámpara piloto Las indicaciones de la lámpara piloto mostradas en la tabla 1 se producirán de acuerdo con la condición del cargador o de la batería Tabla 1 Indicaciones de la lámpara piloto Se encenderá durante 0 5 segundos No se encenderá durante 0 5 segundos Apagada durante 0 5 segundos Iluminación permanente...

Page 37: ...1 Instalación y comprobación del ambiente de trabajo Compruebe si el ambiente de trabajo es adecuado tomando las precauciones siguientes COMO SE USA 1 Confirmar la posición de la cubierta Ver la Fig 4 El par de apriete de esta unidad puede ajustarse de acuerdo ocon la posición de la cubierta 1 Cuando utilice esta unidad como destornillador alinee uno de los número 1 3 5 22 de la tapa o el punto bl...

Page 38: ...cha visto desde el frente Consulte la Fig 8 䡬 Si el manguito se afloja durante la operación apriételo La fuerza de apriete será más intensa cuando el manguito esté bien apretado 2 Desmontaje de la broca Utilizaciones Posición de Selección de la velocidad de rotación Posición del mando de cambio la cubierta LOW Baja velocidad HIGH Alta velocidad Apriete de Tornillo para 1 22 Para tornillos de 4 mm ...

Page 39: ...iones PRECAUCIÓN La reparación modificación e inspección de las herramientas eléctricas Hitachi deben ser realizadas por un Centro de Servicio Autorizado de Hitachi Esta lista de repuestos será de utilidad si es presentada junto con la herramienta al Centro de Servicio Autorizado de Hitachi para solicitar la reparación o cualquier otro tipo de mantenimiento En el manejo y el mantenimiento de las h...

Page 40: ... 3 16 312 704 1 17 319 748 1 18 312 712 4 D3 12 19 319 753 1 20 319 750 1 21 319 749 1 22 319 768 3 23 319 751 1 24 319 767 3 25 319 752 1 26 312 716 1 27 316 955 1 28 319 756 1 28 991 672 8 D3 16 30 1 31 317 333 2 M4 6 32 319 761 1 33 319 759 1 34 319 758 1 35 319 757 1 A B C D 36 319 760 1 37 318 247 1 38 318 234 1 39 1 40 315 141 1 41 306 952 1 42 1 EB1820 1 42 2 EB1830H 1 501 UC24YFA 1 502 318...

Page 41: ... 704 1 17 319 748 1 18 312 712 4 D3 12 19 319 753 1 20 319 750 1 21 319 749 1 22 319 768 3 23 319 751 1 24 319 767 3 25 319 752 1 26 312 716 1 27 316 955 1 28 319 756 1 28 991 672 8 D3 16 30 1 31 317 333 2 M4 6 32 319 785 1 33 319 759 1 34 319 758 1 35 319 786 1 A B C D 36 319 760 1 37 318 247 1 38 318 234 1 39 1 40 315 141 1 41 306 952 1 42 1 EB14B 1 42 2 EB1430H 1 501 UC24YFA 1 502 318 236 1 2 5...

Page 42: ...CE English EC DECLARATION OF CONFORMITY We declare under our sole responsibility that this product is in conformity with standards or standard ized documents EN50144 HD400 and or EN55014 2 in accordance with Council Directives 89 336 EEC and or 98 37 EEC This declaration is applicable to the product affixed CE marking Deutsch ERKLÄRUNG ZUR KONFORMITÄT MIT CE REGELN Wir erklären mit alleiniger Vera...

Reviews: