background image

English

12

NOTE

Due to HITACHI’s continuing program of reserch and
development, the specifications herein are subject to
change without prior notice

IMPORTANT
Correct connection of the plug

The wires of the mains lead are coloured in accordance
with the following code:

Blue:

–Neutral

Brown:

–Live

As the colours of the wires in the mains lead of this
tool may not correspond with the coloured markings
identifying the terminals in your plug proceed as fol-
lows:
The wire coloured blue must be connected to the
terminal marked with the letter N or coloured black.
The wire coloured brown must be connected to the
terminal marked with the letter L or coloured red.
Neither core must be connected to the earth terminal.

NOTE

This requirement is provided according to BRITISH
STANDARD 2769: 1984.
Therefore, the letter code and colour code may not be
applicable to other markets except United Kingdom.

Information concerning airborne noise and vibration

The measured values were determined according to
EN60745 and declared in accordance with ISO 4871.

Measured A-weighted sound power level: 112 dB (A).
Measured A-weighted sound pressure level: 101 dB (A).
Uncertainty KpA: 3 dB (A).

Wear hearing protection.

Vibration total values (triax vector sum) determined
according to EN60745.

Impact drilling into concrete:
Vibration emission value 

a

h, ID

 = 15.2 m/s

2

Uncertainty K = 2.1 m/s

2

WARNING

The vibration emission value during actual use of
the power tool can differ from the declared value
depending on the ways in which the tool is used.

To identify the safety measures to protect the
operator that are based on an estimation of exposure
in the actual conditions of use (taking account of
all parts of the operating cycle such as the times
when the tool is switched off and when it is running
idle in addition to the trigger time).

01Eng_DV24DV_WE

5/8/09, 16:05

12

Summary of Contents for DV 24DV

Page 1: ...anwijzing Instrucciones de manejo Read through carefully and understand these instructions before use Diese Anleitung vor Benutzung des Werkzeugs sorgfältig durchlesen und verstehen Lire soigneusement et bien assimiler ces instructions avant usage Prima dell uso leggere attentamente e comprendere queste instruzioni Deze gebruiksaanwijzing s v p voor gebruik zorgvuldig doorlezen Leer cuidadosamente...

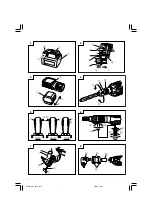
Page 2: ...1 4 1 2 5 6 7 8 2 1 3 N O 3 5 8 6 7 A 0 C B G E I D N O Q P S R T U 4 D D L M V a F b H c J 1 9 7 6 00Table_DV24DV_WE 5 8 09 16 04 1 ...

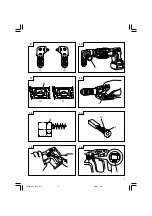
Page 3: ...2 12 9 10 13 14 15 16 W X 11 L Y b Z 11 5 mm 3 mm a 00Table_DV24DV_WE 5 8 09 16 04 2 ...

Page 4: ...griff Poignée latelale Handle joint Griffgelenk Joint de poignée Tighten Anziehen Serrer Loosen Lösen Desserrer Locking screw Feststellschraube Vis de verrouillage Loosen Lösen Desserrer Hex bar wrench Sechskant Stiftschlüssel Clef à six pans Angle unit Winkeleinheit Unité de perçage d angle Coupling Kupplung Couplage Joint sleeve Gelenkstulpe Manchon de raccord Clamping bolt Anzugsschraube Boulon...

Page 5: ...l Giunto maniglia Koppeling handgreep Unión del asa Stringere Aandraaien Apretar Allentare Losdraaien Aflojar Vite di blocca Vergrendelschroef Tornillo de fijación Allentare Losdraaien Aflojar Chiave a barra esagonale Inbussleutel Llave de barra hexagonal Elemento ad angolo Haakse gedeelte Unidad argulara Accoppiamento Koppelbus Acoplamiento Manicotto di collegamento Verbindingsmof Manguito de uni...

Page 6: ...Werfen Sie Elektrowerkzeuge nicht in den Hausmüll Gemäss Europäischer Richtlinie 2002 96 EG über Elektro und Elektronik Altgeräte und Umsetzung in nationales Recht müssen verbrauchte Elektrowerkzeuge getrennt gesammelt und einer umweltgerechten Wiederververtung zugeführt werden Pour les pays européens uniquement Ne pas jeter les appareils électriques dans les ordures ménagères Conformément à la di...

Page 7: ...ll reduce personal injuries c Prevent unintentional starting Ensure the switch is in the off position before connecting to power source and or battery pack picking up or carrying the tool Carrying power tools with your finger on the switch or energising power tools that have the switch on invites accidents d Remove any adjusting key or wrench before turning the power tool on A wrench or a key left...

Page 8: ...40 C The most suitable temperature for charging is that of 20 25 C 4 Do not use the charger continuously When one charging is completed leave the charger for about 15 minutes before the next charging of battery 5 Do not allow foreign matter to enter the hole for connecting the rechargeable battery 6 Never disassemble the rechargeable battery and charger 7 Never short circuit the rechargeable batte...

Page 9: ...r short circuit the battery 2 Battery installation Insert the battery aligning both guide rail of battery and body Make sure the battery is fixed firmly CHARGING Beforeusingtheimpactdrill chargethebatteryasfollows 1 Connect the charger s power cord to a receptacle When the power cord is connected the charger s pilot lamp will blink in red At 1 second intervals 2 Insert the battery into the charger...

Page 10: ...20 Approx 50 min EB2430HA Approx 70 min and normal time required for recharging will be restored by recharging the batteries 2 3 times How to make the batteries perform longer 1 Recharge the batteries before they become completely exhausted When you feel that the power of the tool becomes weaker stop using the tool and recharge its battery If you continue to use the tool and exhaust the electric c...

Page 11: ...hten the joint sleeve by clamping bolts Tighten two clamping bolts equally and gradually in turn with a torque of 686 784N cm 70 80kgf cm extent of force which can be subjected by only a wrist with the open end wrench provided to tight clamping bolts Fig 8 䡬 To operate the angle unit at low speed attach the keyless chuck to the angle unit spindle at the side marked LOW and secure the locking screw...

Page 12: ... consumable parts Since and excessively worn carbon brush can result in motor trouble replace the carbon brush with new ones when it becomes worn to or near the wear limit In addition always keep carbon brushes clean and ensure that they slide freely whthin the brush holders NOTE When replacing the carbon brush with a new one be sure to use the Hitachi Carbon Brush Code No 999058 5 Replacing carbo...

Page 13: ...olour code may not be applicable to other markets except United Kingdom Information concerning airborne noise and vibration The measured values were determined according to EN60745 and declared in accordance with ISO 4871 Measured A weighted sound power level 112 dB A Measured A weighted sound pressure level 101 dB A Uncertainty KpA 3 dB A Wear hearing protection Vibration total values triax vecto...

Page 14: ...a Bleiben Sie wachsam achten Sie auf das was Sie tun und setzen Sie Ihren Verstand ein wenn Sie mit Elektrowerkzeugen arbeiten Benutzen Sie keine Elektrowerkzeuge wenn Sie müde sind oder unter Einfluss von Drogen Alkohol oder Medikamenten stehen Bei der Arbeit mit Elektrowerkzeugen können bereits kurze Phasen der Unaufmerksamkeit zu schweren Verletzungen führen b Benutzen Sie eine persönliche Schu...

Page 15: ...ginalteile warten Dies sorgt dafür dass die Sicherheit des Elektrowerkzeugs nicht beeinträchtigt wird VORSICHT Von Kindern und gebrechlichen Personen fernhalten Werkzeuge sollten bei Nichtgebrauch außerhalb der Reichweite von Kindern und gebrechlichen Personen aufbewahrt werden SICHERHEITSHINWEISE FÜR DIE BENUTZUNG DES AKKU SCHLAGBOHRMASCHINE 1 Tragen Sie bei der Arbeit mit Schlagbohrmaschinen ein...

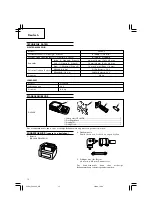
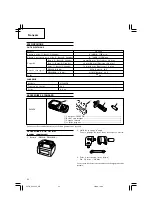
Page 16: ... Batterie 24 V EB2430HA 3 0 Ah Ni MH Batterie 24 V Gewicht 4 0 kg LADEGERÄT Modell UC24YFB Ladespannung 24 V Gewicht 0 6 kg STANDARDZUBEHÖR DV24DV 1 Ladegerät UC24YFB 1 2 Plastikgehäuse 1 3 Handgriff 1 4 Griffgelenk 1 Das Standardzubehör kann ohne vorherige Bekanntmachung jederzeit geändert werden SONDERZUBEHÖR separat zu beziehen 1 Batterie EB2420 EB2430HA 2 Winkeleinheit Zum Bohren von Löchern a...

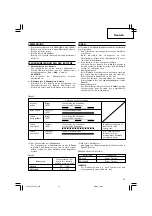
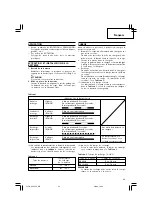
Page 17: ...mulator herauszunehmen Siehe Abb 1 und 2 ACHTUNG Die Kontakte des Akkumulators niemals kurzschließen 2 Einsetzen des Akkumulators Batterie Schieben Sie die Batterie unter Ausrichtung der Führungsschienen von Batterie und Körper ein Stellen Sie sicher daß die Batterie sicher fixiert ist Tafel 1 Anzeigen der Kontrollampe Leuchtet für 0 5 Sekunden Loscht für 0 5 Sekunden Leuchtet kontinuierlich Leuch...

Page 18: ...greifen und die Bohrhülse durch Drehung nach rechts im Uhrzeigersinn von vorne gesehen festdrehen Siehe Abb 4 䡬 Sollte sich die Manschette während des Betriebs lockern ist diese wieder festzudrehen Eine fest zugedrehte gewährleistet erhöhte Spannkraft 2 Abnehmen der Werkzeugspitze Den Ring fest greifen und die Manschette durch Drehung nach links gegen den Uhrzeigersinn von vorne gesehen lösen Sieh...

Page 19: ...n Sie nicht kräftig auf den Schlüssel sondern schicken Sie den Schlagbohrer an ein autorisiertes Kundendienstzentrum von Hitachi ein 7 Umstellung von SCHLAGBOHRFUNKTION auf BOHREN Abb 11 Der Schlagbohrer kann durch Drehen des Umschalthebels von Schlagbohren IMPACT auf Bohren ROTATION umgestellt werden Zum Bohren von Beton Ziegeln und ähnlichen harten Materialien den Umschalthebel auf IMPACT stelle...

Page 20: ...ie in Abb 16 gezeigt mit dem Finger einschieben und schließlich die Bürstenkappe anbringen ACHTUNG Stellen Sie unbedingt sicher daß die Klaue der Kohlebürste in den Kontaktteil außerhalb des Bürstenrohrs eingeschoben wird Eine der beiden vorhandenen Klauen muß eingeschoben werden Vorsicht ist erforderlich da Fehler bei dieser Tätigkeit zu einer verformten Klaue der Kohlebürste und frühzeitigen Mot...

Page 21: ...ssionswert ah ID 15 2 m s2 Messunsicherheit K 2 1 m s2 WARNUNG 䡬 Der Vibrationsemissionswert während der tatsächlichen Benutzung des Elektrowerkzeugs kann von dem deklarierten Wert abweichen abhängig davon wie das Werkzeug verwendet wird 䡬 Zur Festlegung der Sicherheitsmaßnahmen zum Schutz des Bedieners die auf einer Expositionseinschätzung unter den tatsächlichen Benutzungsbedingungen beruhen unt...

Page 22: ...er d outil électrique si vous êtes sous l influence de drogues d alcool ou de médicaments Pendant l utilisation d outils électrique un instant d inattention peut entraîner des blessures graves b Utiliser un équipement de protection individuelle Toujours porter des verres de protection L utilisation d équipements de protection tels que les masques anti poussière les chaussures de sécurité anti déra...

Page 23: ... PRECAUTIONS Maintenir les enfants et les personnes infirmes éloignés Lorsque les outils ne sont pas utilisés ils doivent être rangéshorsdeportéedesenfantsetdespersonnesinfirmes AVERTISSEMENTS DE SÉCURITÉ RELATIFS À LA PERÇEUSE À PERCUSSION À BATTERIE 1 Portez des bouchons avec les perceuses à percussion L exposition au bruit peut engendrer une perte de l audition 2 Utilisez les poignées auxiliair...

Page 24: ...4 V EB2430HA 3 0 Ah Ni MH Batterie 24 V Poids 4 0 kg CHARGEUR Modèle UC24YFB Tension de charge 24 V Poids 0 6 kg ACCESSOIRES STANDARD DV24DV 1 Chargeur UC24YFB 1 2 Boîtier en plastique 1 3 Poignée laterale 1 4 Joint de poignée 1 ACCESSOIRES SUR OPTION vendus séparément 1 Batterie EB2420 EB2430HA Les accessoires standard sont sujets à changement sans préavis 2 3 4 2 Unité de perçage d angle Pour le...

Page 25: ...e de la batterie Insérer la batterie en alignant le rail de guidage de la batterie sur celui du corps Bien s assurer que la batterie est solidement fixée CHARGE Avant d utiliser la perceuse à percussion chargez la batterie comme suit 1 Brancher le cordon d alimentation du chargeur sur une prise secteur Quand vous raccordez la fiche du chargeur à une prise murale la lampe témoin clignote en rouge 2...

Page 26: ...e desserre pendant le fonctionnement le resserrer La force de serrage augmente lorsque le manchon est resserré Maintenir fermement l anneau et desserrer le manchon en le tournant vers la gauche dans le sens contraire des aiguilles d une montre vu de l avant Voir en Fig 4 2 Choix du foret de perçage correct 䡬 Pour perçage dans béton ou briques Utiliser les forets spécifiés à la partie Accessoires à...

Page 27: ...ATTENTION 䡬 Ne pas utiliser la perceuse en fonctionnement PERCUSSION avec des matériaux comme du bois ou du métal Ce fonctionnement réduirait d une part l efficacité de perçage et abîmerait aussi la pointe de perçage 䡬 Lorsque l on passe du mode de perceuse à percus sion au mode de perceuse Fig 11 il se peut que le levier de changement ne tourne pas aisément Dans ce cas faire fonctionner l outil p...

Page 28: ...z la perceuse à percussion dans un endroit où la température est inférieure à 40 C et hors de portée des enfants 8 Liste des pièces de rechange A No élément B No code C No utilisé D Remarques ATTENTION Les réparations modifications et inspections des outils électriques Hitachi doivent être confiées à un service après vente Hitachi agréé Il sera utile de présenter cette liste de pièces au service a...

Page 29: ... mediche Anche un attimo di disattenzione durante l uso degli elettroutensili potrebbe essere causa di gravi lesioni personali b Indossate l attrezzatura di protezione personale Indossate sempre le protezioni oculari L attrezzatura protettiva quali maschera facciale calzature antiscivolo caschi o protezioni oculari ridurrà il rischio di lesioni personali c Impedite le accensioni involontarie Prima...

Page 30: ...tiche Ciò garantirà il mantenimento della sicurezza dell elettroutensile PRECAUZIONI Tenere lontano dalla portata di bambini e invalidi Quando non utilizzati gli strumenti dovranno essere deposti lontano dalla portata di bambini e invalidi AVVERTIMENTI DI SICUREZZA PER IL TRAPANO A PERCUSSIONE A BATTERIA 1 Indossare protezioni per le orecchie con le sonde a percussione L esposizione al rumore può ...

Page 31: ... EB2430HA 3 0 Ah Ni MH batteria 24 V Peso 4 0 kg CARICATORE Modello UC24YFB Voltaggio di carica 24 V Peso 0 6 kg ACCESSORI STANDARD DV24DV 1 Caricatore UC24YFB 1 2 Custodia in plastica 1 3 Impugnatura laterale 1 4 Giunto maniglia 1 Gli accessori standard possono essere cambiati senza preavviso ACCESSORI FACOLTATIVI venduti a parte 1 Batteria EB2420 EB2430HA 2 Elemento ad angolo Per trapanare fori ...

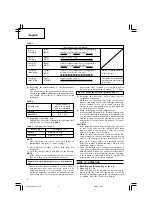
Page 32: ...pia lampeggia in rosso A intervalli di un secondo Vedere le Tabella 1 1 Indicazioni della spia Le indicazioni della spia sono come indicato nella tabella 1 a seconda delle condizioni del caricabatterie o della batteria ricaricabile Tabella 1 Indicazioni della spie Si illumina per 0 5 secondi Non si illumina per 0 5 secondi Spento per 0 5 secondi Si illumina stabilmente Si illumina per 0 5 secondi ...

Page 33: ...ione dell unità angolare 䡬 Dopo aver rimosso il mandrino autoserrante agganciare l accoppiamento all alberino del trapano a impatto Applicare il collare di giunzione sul NOTA Il tempo di carica può variare a seconda della temperatura e della tensione della fonte di alimentazione 4 Scollegare il cavo di alimentazione del caricatore dalla presa CA 5 Tenere saldamente il caricatore e estrarre la batt...

Page 34: ... trapano variabile battente gira cosi come un comune trapano elettrico CAUTELA 䡬 Non usare il trapano variabile battente nella posizione IMPACT per materiali come legno o metallo Un tale fatto non solo diminuirá l efficacia del trapano ma danneggerá anche la punta 䡬 Leva del cambio può non girare con facilitá quando si passa dal modo di trapanatura a percussione a quello di trapanatura normale Fig...

Page 35: ... 7 Conservazione Conservare il trapano a percussione ad una temperatura inferiore ai 40 C e non a portata di mano di bambini 8 Lista dei pezzi di ricambio A N voce B N codice C N uso D Note CAUTELA Riparazioni modifiche e ispezioni di utensili elettrici Hitachi devono essere eseguite da un centro assistenza Hitachi autorizzato Questa lista dei pezzi torna utile se viene presentata con l utensile a...

Page 36: ...n een RCD vermindert de kans op een elektrische schok 3 Persoonlijke veiligheid a Blijf waakzaam let voortdurend op uw werk en gebruik uw gezond verstand wanneer u elektrisch gereedschap gebruikt Gebruik geen elektrisch gereedschap wanneer u moe bent of onder invloed van drugs alcohol of medicijnen Eén moment van onoplettendheid kan in ernstig lichamelijk letsel resulteren b Gebruik persoonlijke b...

Page 37: ...kt kan irritatie en brandwonden veroorzaken 6 Onderhoudsbeurt a Het gereedschap mag uitsluitend door bevoegd onderhoudspersoneel worden onderhouden die authentieke onderdelen gebruikt Hierdoor kunt u erop aan dat de veiligheid van het elektrisch gereedschap behouden blijft VOORZORGMAATREGELEN Houd kinderen en kwetsbare personen op een afstand Het gereedschap moet na gebruik buiten het bereik van k...

Page 38: ...houding 1 Laage 2 Hoge 0 7200 0 31500 min Beton 1 Laage 2 Hoge 20 mm 10 mm Diepte 30 mm Kapaciteit Hout 1 Laage 2 Hoge 38 mm 20 mm Dikte 40 mm Staal 1 Laage 2 Hoge 13 mm 8 mm Dikte 1 6 mm Oplaadbare batterij EB2420 2 0 Ah Ni Cd batterij 24 V EB2430HA 3 0 Ah Ni MH batterij 24 V Gewicht 4 0 kg ACCULADER Model UC24YFB Oplaadspanning 24 V Gewicht 0 6 kg 2 Haakse gedeelte Voor gebruik bij boren in een ...

Page 39: ...opboormachinedientdebatterij als volgt opgeladen te worden 1 Sluit het netsnoer van het oplaadapparaat op het stopcontact aan Wanneer de stekker van de acculader in het stop contact wordt gestoken zal het controlelampje in rood knipperen met tussenpozen van 1 seconde 2 Steek de batterij in het acculader Steek de accu in de oplader zoals aangegeven op Afb 3 Zorg ervoor dat accu op de juiste manier ...

Page 40: ...eer aansluit om het laden te vervolgen Soort batterij Laadtijd EB2420 Circa 50 min EB2430HA Circa 70 min Als de batterij binnen de drie seconden wordt aangesloten bestaat de kans dat deze niet goed wordt opgeladen VOOR HET GEBRUIK 1 Monteren en verwijderen van de boren 1 Monteren van een boor draaistuk Steek de boor of het draaistuk enz in de sleutelloze boorhouder pak de ring stevig vast en houd ...

Page 41: ...ng van de tandwielen in het binnenwerk van de slagboor Gebruik de meegeleverde open steeksleutel om de as van de hoek eenheid vast te houden voor u probeert de sletelloze boorhouder los te maken VOORZICHTIG Als de sleutelloze boorhouder niet los komt nadat u de sleutel met een hamer geslagen heeft mag u niet de sleutel nog eens extra hard slaan maar dient u de machine naar een ERKEND HITACHI SERVI...

Page 42: ...oolborstel installeert moet u de richting zo kiezen dat de nagel van de koolborstel overeenkomt met het contact gedeelte buiten de borstelbuis Duw de koolborstel vervolgens naar binnen met uw vinger zoals te zien is in Afb 16 Doe vervolgens de kap van de borstel weer terug VOORZEICHTIG U moet echt de nagel van de koolborstel in het contact gedeelte buiten de borstelbuis passen U mag om het even we...

Page 43: ...15 2 m s2 Onzekerheid K 2 1 m s2 WAARSCHUWING 䡬 De trillingsemissiewaarde tijdens het feitelijke gebruik van het elektrisch gereedschap kan afwijken van de opgegeven waarde afhankelijk van de manieren waarop het gereedschap wordt gebruikt 䡬 Neem kennis van de veiligheidsmaatregelen voor de bescherming van de operator welke gebaseerd zijn op een schatting van blootstelling onder feitelijke gebruiks...

Page 44: ...eléctricas personas no familiarizadas con las mismas o con estas instrucciones Las herramientas eléctricas son peligrosas si son utilizadas por usuarios sin formación ADVERTENCIAS DE SEGURIDAD GENERAL DE LA HERRAMIENTA ELÉCTRICA ADVERTENCIA Lea todas las instrucciones y advertencias de seguridad Si no se siguen las advertencias e instrucciones podría producirse una descarga eléctrica un incendio y...

Page 45: ...as de repuesto idénticas Esto garantizará el mantenimiento de la seguridad de la herramienta eléctrica PRECAUCIÓN Mantenga a los niños y a las personas enfermas alejadas Cuandonoseutilicen lasherramientasdebenalmacenarse fuera del alcance de los niños y de las personas enfermas ADVERTENCIAS DE SEGURIDAD DEL TALADRO DE PERCUSIÓN A BATERÍA 1 Utilice protección de oídos con taladros de impacto La exp...

Page 46: ... Ni Cd Batteríe 24 V EB2430HA 3 0 Ah Ni MH Batteríe 24 V Peso 4 0 kg CARGADOR Modelo UC24YFB Tensión de carga 24 V Peso 0 6 kg DV24DV 1 Cargador UC24YFB 1 2 Caja de plástico 1 3 Mango lateral 1 4 Unión del asa 1 Los accesorios estándar están sujetos a cambio sin previo aviso ACCESORIOS OPCIONALES de venta por separado 1 Batería EB2420 EB2430HA 2 Unidad argulara Para taladrar agujeros en lugares an...

Page 47: ...ero y presionar los cierres de la batería para desmontarla Ver las Figs 1 y 2 PRECAUCION No cortocircuitar nunca la batería 2 Instalación de la batería Inserte la batería alineando el riel de guía de la batería y del cuerpo Asegúrese de que la batería quede firmemente instalada Se encenderá durante 0 5 segundos No se encenderá durante 0 5 segundos Apagada durante 0 5 segundos Iluminación permanent...

Page 48: ...rena en el portabrocas sin llave sujete firmemente el anillo y apriete el manguito girándolo hacia la derecha visto desde el frente Consulte la Fig 4 䡬 Si el manguito se afloja durante la operación apriételo La fuerza de apriete será más intensa cuando el manguito esté bien apretado 2 Desmontaje de la broca Sujete firmemente el anillo y afloje el manguito girándolo hacia la izquierda visto desde e...

Page 49: ...ra baldosa o meteriales de dureza similar gire la palanca de cambio hasta IMPACT La cabeza del taladro da impactos contra el material mientras continúa girando Cuando se perfora metal madera o plástico gire la palanca de cambio a la posición ROTATION para poder usar el taladro de impacto como un taladro eléctrico común PRECAUCION 䡬 No use la función IMPACT para materiales tales como la madera o lo...

Page 50: ...a de las dos uñas suministradas Tenga cuidado porque un error en esta operación podría deformar la uña de la escobilla y dañar prematuramente el motor 6 Limpieza del exterior Cuando el taladro de impacto esté sucio limpiarlo con un paño mojado en agua jabonosa No utilizar disolventes clóricos gasolina o disol ventes para pinturas ya que éstos funden los materiales plásticos 7 Almacenamiento Guarda...

Page 51: ...s de utilización de la herramienta 䡬 Para identificar las medidas seguras para proteger al operario basadas en una estimación de exposición en las condiciones reales de uso teniendo en cuenta todas las partes del ciclo de funcionamiento como tiempos cuando la herramienta está apagada y cuando funciona lentamente además del tiempo de activación 06Spa_DV24DV_WE 5 8 09 16 07 50 ...

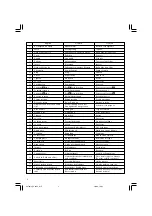
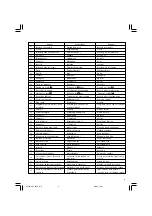
Page 52: ...1 16 319 787 1 17 316 271 1 D2 5x25 8 18 319 803 4 D5x65 19 319 955 1 M4x14 20 319 799 1 21 319 800 1 22 319 798 1 23 608 VVM 2 608VVC2PS2L 24 360 553 1 23 25 319 788 1 26 960 108 2 D4x60 A B C D 27 319 956 2 28 319 808 1 29 1 30 319 789 1 31 1 32 319 791 2 33 999 058 2 34 319 813 1 35 319 814 1 36 318 247 1 37 319 809 1 38 319 760 1 39 319 811 1 40 305 490 4 D4x30 41 319 790 1 42 304 035 2 D4x25 ...

Page 53: ...e und Anschrift des Händlers Bitte mit Namen und Anschrift des Handlers abstempeln GARANTIEBEWIJS 1 Modelnummer 2 Serienummer 3 Datum van aankoop 4 Naam en adres van de gebruiker 5 Naam en adres van de handelaar Stempel a u b naam en adres vande de handelaar CERTIFICAT DE GARANTIE 1 No de modèle 2 No de série 3 Date d achat 4 Nom et adresse du client 5 Nom et adresse du revendeur Cachet portant le...

Page 54: ...53 1 2 3 4 5 07Back_DV24DV_WE 5 8 09 16 08 53 ...

Page 55: ...C E 1541 91015 EVRY CEDEX France Tel 33 1 69474949 Fax 33 1 60861416 URL http www hitachi powertools fr Hitachi Power Tools Belgium N V S A Koningin Astridlaan 51 1780 Wemmel Belgium Tel 32 2 460 1720 Fax 32 2 460 2542 URL http www hitachi powertools be Hitachi Fercad Power Tools Italia S p A Via Retrone 49 36077 Altavilla Vicentina VI Italy Tel 39 0444 548111 Fax 39 0444 548110 URL http www hitac...

Page 56: ...004 108 CE 2006 95 CE y 98 37 CE Este producto también cumple con los requisitos esenciales de 2006 42 CE aplicables desde el 29 de diciembre de 2009 en lugar de 98 37 CE Esta declaración se aplica a los productos con marcas de la CE English EC DECLARATION OF CONFORMITY We declare under our sole responsibility that this product is in conformity with standards or standardized documents EN60745 EN60...

Reviews: