

46
Español
CARGA
Antes de usar el taladro de impacto, cargar la batería del
modo siguiente.
1. Enchufe el cable de alimentación del cargador a un
tomacorriente de CA.
Cuando haya conectado el enchufe del cargador a
una toma de la red, la lámpara piloto se encendrá
en rojo. (A intervalos de 1 segundo.)
2. Inserte la batería en el cargador
Inserte la batería en el cargador, tal como se observa
en la
Fig.3
. Asegúrese de que la batería quede
completamente apoyada en el cargador.
3. Carga
Cuando inserte una batería en el cargador, la carga
comenzará y la lámpara piloto permanecerá
continuamente encendida en rojo.
Cuando la bateria se haya cargado completamente,
la lámpara piloto parpadeará en rojo. (A intervalos
de 1 segundo.) (Vea las
Tabla 1
)
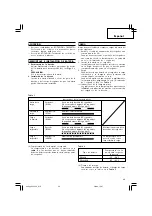
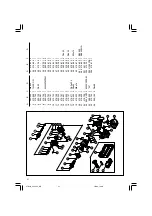
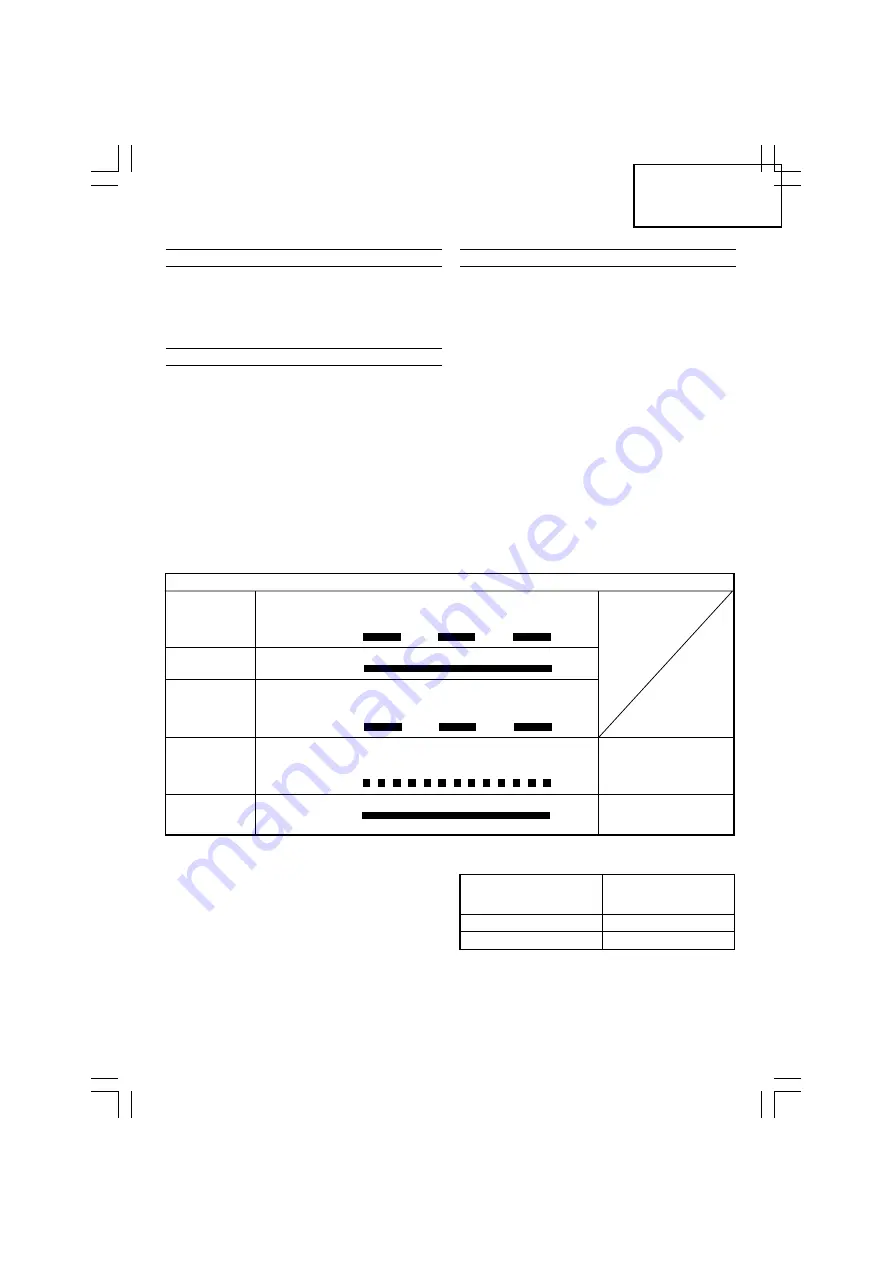
(1) Indicaciones de la lámpara piloto
Las indicaciones de la lámpara piloto mostradas en
la
Tabla 1
, se producirán de acuerdo con la condición
del cargador o de la batería.
APLICACION
䡬
Acciones combinadas de ROTACION e IMPACTO:
Perforación de orificios en materiales duros
(concreto, ladrillo, baldosas, etc.)
䡬
Acción de ROTACION: Taladrado de orificios en
acero, madera y plástico.
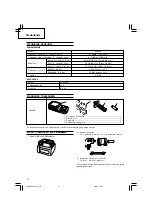
DESMONTAJE E INSTALACION DE BATERIA
1. Desmontaje de la batería
Sujetar firmemente el asidero y presionar los cierres
de la batería para desmontarla (Ver las
Figs. 1
y
2
).
PRECAUCION
No cortocircuitar nunca la batería.
2. Instalación de la batería
Inserte la batería alineando el riel de guía de la
batería y del cuerpo. Asegúrese de que la batería
quede firmemente instalada.
Se encenderá durante 0,5 segundos.
No se encenderá durante 0,5 segundos.
(Apagada durante 0,5 segundos)
Iluminación permanente
Se encenderá durante 0,5 segundos.
No se encenderá durante 0,5 segundos.
(Apagada durante 0,5 segundos)
Se encenderá durante 0,1 segundos.
No se encenderá durante 0,1 segundos.
(Apagada durante 0,1 segundos)
Illuminación permanente
Parpadeo
(ROJA)
Durante la
carga
Carga
completa
Iluminación
(ROJA)
Parpadeo
(ROJA)
Antes de la
carga
Carga
imposible
Iluminación
(VERDE)
Carga
imposible
Destello
(ROJA)
Mal funcionamento de la
battería o del cargador
La temperatura de la
batería es alta, lo que
imposibilita la carga.
Tabla 1
Indicaciones de la lámpara piloto
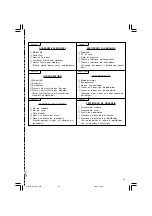
(2) Temperatura de las baterías recargable
La temperatura de las baterías se muestra en la
tabla 2
, y las baterías que se hayan calentado
deberán dejarse enfriar durante cierto tiempo antes
de cargarlas.
Tabla 2
(3) Tiempo de recarga
Dependiendo del tipo de batería, el tiempo de carga
será tal como se indica en la
Tabla 3
.
Temperatura con la
Tipo de batería
que podrá cargarse
la batería
EB2420
–5°C – 60°C
EB2430HA
0°C – 45°C
06Spa_DV24DV_WE
5/8/09, 16:07
46


