54
R
ec
or
din
g
Hints
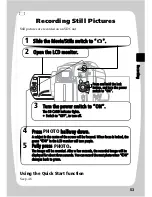
• You can switch the camcorder to movie recording mode by sliding the
movie/stills switch to “
” (p.47) even while the power is on.
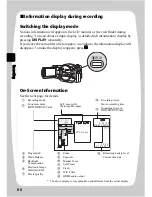
• For details on screen displays during recording, see p.50.
• If you want to compose a shot in which the subject is not centred, first press
PHOTO
halfway with the subject centred in the monitor. Next, with the
button pressed halfway, compose your shot and fully press
PHOTO
.
• If the camcorder has difficulty focusing, adjust the focus manually (p.73).
• Although it is possible to fully press
PHOTO
in a single action without
pressing it halfway, the image may be out of focus.
• You can check the card capacity and number of remaining recordable
pictures (p.178).
• If you are unable to record still pictures, see “Troubleshooting” (p.148).
• About Sleep Mode
– You can also return to recording pause mode from sleep mode by
pressing
PHOTO
. To record, you need to press
PHOTO
again.
– When you return to pause mode from sleep mode, the zoom position
(approx. 1x), manual focus, exposure, and backlight compensation will
return to their default settings (p.70, 73–75).
– Regardless of the power save setting (p.68), the camcorder power will
automatically turn off if standby in sleep mode continues for
approximately 30 minutes. In this case, first turn the power switch to
“OFF”, then back to “ON”.
• If the automatic lens cover has stopped opening halfway, turn the power
switch to “OFF”, then turn it to “ON” again.
Notes
• After recording, do not turn off the power until “
/
” lights green in the
LCD monitor. Doing so may cause an error in the recorded data and you
may not be able to play back the data (p.160).
• The recorded image may be blurred if camera shake occurs.
• Hold the camcorder with both hands and tuck your elbows to your chest or
sides for best recording results.
• When recording with digital zoom, use a tripod for best results.
• The recorded image may differ slightly from the image in the LCD monitor
or viewfinder.

