5 - 1
Disassembly and Reassembly
5
Caution
Since the DZ-GX3300E incorporates high-voltage circuits, take electric charge prevention measures,
such as wearing gloves, and take great care when performing work.
5-1 Items to Be Checked
(1) Checking Disc
Connect the AC adapter/charger or charged battery (power supply), and then press the DISC
EJECT button to make sure that no disc is loaded. After checking, close the disc insertion block.
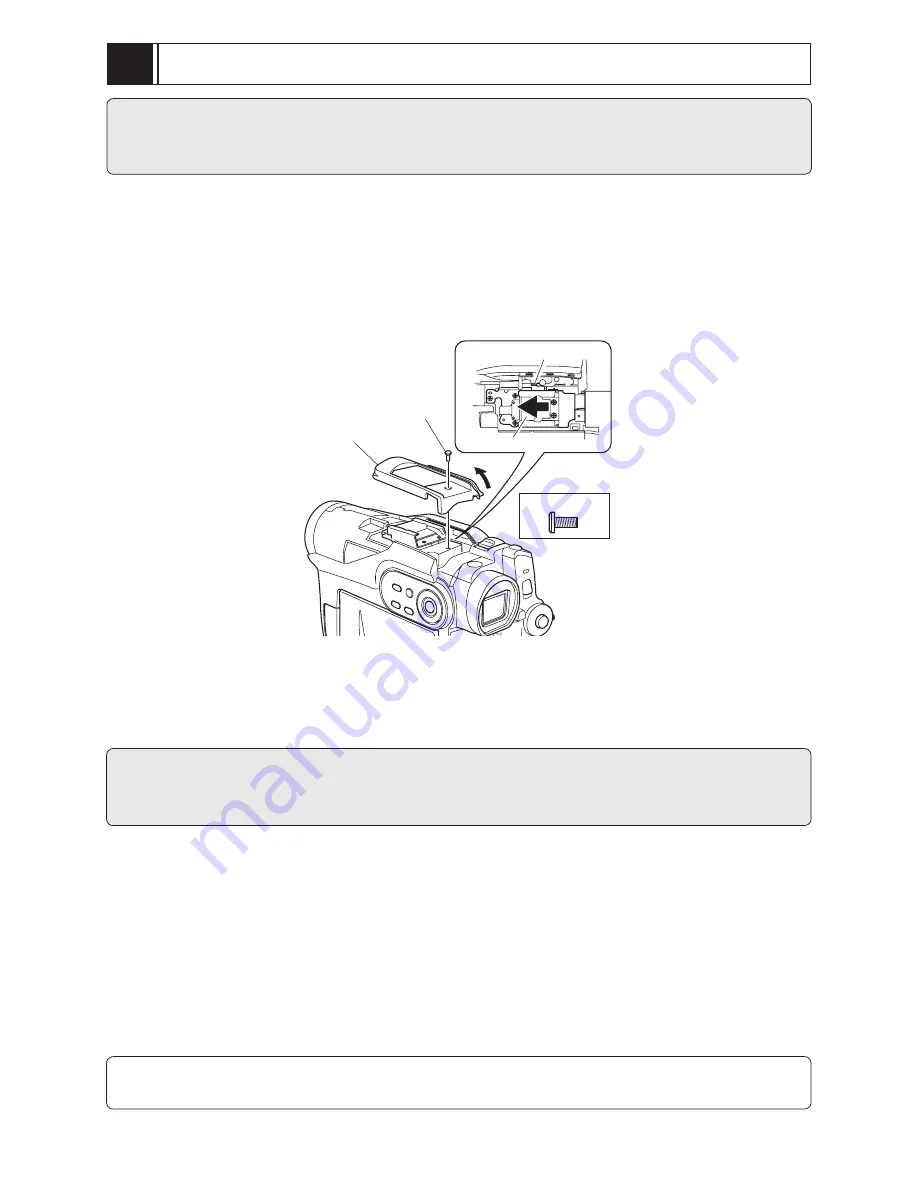
If the disc insertion block does not open normally, remove the top cover, and then move the lock
slider in the direction of the arrow to open the block.
(2) Checking Card
Make sure that no card is loaded in the card slot, and then, close the card slot cover.
Caution
Laser light striking the eye may cause your eyesight to be lost: For safety, be sure to remove any power
supply (AC adapter/charger, battery, etc.) from the DVD video camera/recorder before starting work.
5-2 Order of Disassembly
1) Refer to the disassembly fl owchart in Figs. 5-2-1 for the order of removing each component.
Unless otherwise specifi ed, use the reverse procedure to reassemble the removed components.
2) When replacing the MAN circuit board, it is recommended that you back up the EEPROM data
in advance, referring to “5-4 EEPROM data backup and write”; write the EEPROM data after
replacing the MAN circuit board.
3) After replacing any circuit boards and any units, perform any necessary adjustments according
to “6-3-2 List of adjustments needed after replacing major components”.
Note:
When replacing components, be sure to use only those shown in “Replacement Parts List”.
Fig. 5-1-1 How to open the disc insertion block
2)
1) [A]
(a)
(b)
(c)
[A] M1.7x4(Silver)
3)
(a) Top cover
(b) Lock slider
(c) Top plate (accessory shoe)


