137
CREATING DVD-VIDEO USING IMAGES RECORDED ON HDD/DISC
You can use the images recorded on the DVD video camera/recorder to create a disc that can be
played on other DVD recorders/players.
* A DVD-RW/DVD-R/+RW recorded on this DVD video camera/recorder must be finalized on this
DVD video camera/recorder (see page 112) before importing the images on it.
1
Start ImageMixer 3 for DVDCAM.
2
Choose Hitachi DVDCAM.
Click “Hitachi DVDCAM” displayed on the
left of screen: The images recorded on HDD
or disc will appear.
3
Select the scene you wish to import and click
“Import”.
Click the scene to be played back, and then
click “Import” at the bottom of screen:
Importing the scene will start.
After importing, click “Library” to make sure
that the desired video file has been imported.
4
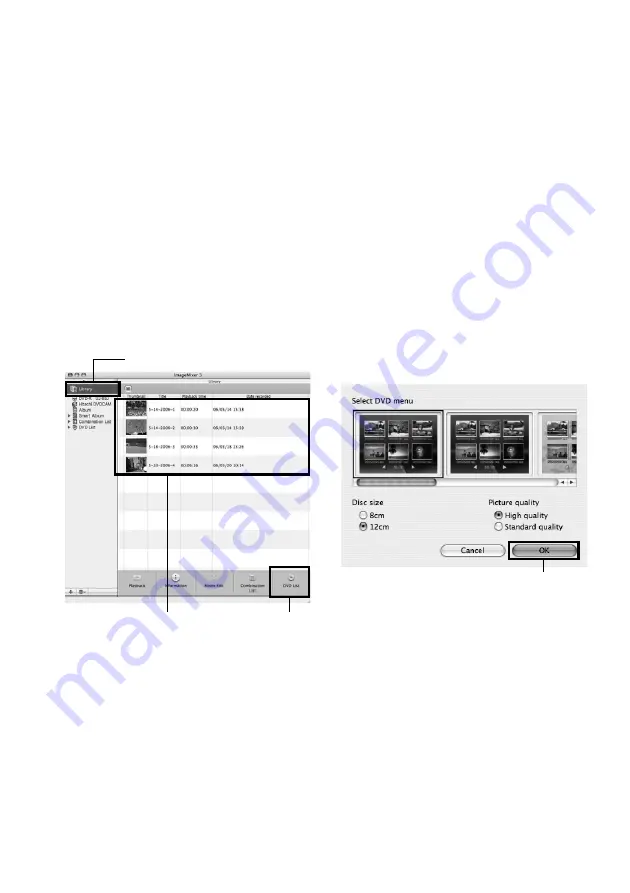
Create a DVD creation list.
Clicking Library will display a list of video
files imported into Macintosh using
ImageMixer 3.
Select the video files from which you wish to
create a DVD-Video, and then click “DVD
List” at the bottom of screen. The screen for
selecting the DVD menu design, size of DVD
disc to be created (8 cm/12 cm), and picture
quality will appear: Choose the desired
settings, and click “OK”.
The created DVD list will be added.
The DVD list has been registered “Untitled”:
Double-click “Untitled” to change the name
of the DVD list. The name of the DVD list will
become the name of the disc.
Note
:
•
You can also use Album or Smart Album to easily
prepare a DVD creation list, by selecting the video
files from which you wish to create a DVD-Video and
clicking “DVD List” at the bottom of screen.
•
Even after creating a DVD list, you can drag a video
file from the library and drop it to the DVD list on the
left of screen: That video file will be added.
•
While a DVD list is being displayed, click the Utility
Menu button at the bottom of screen and choose “Edit
DVD List”: You can re-set the DVD menu design, size
of DVD disc and picture quality.
Click
Select
“DVD List”
Click


