90
English
COMBINING MULTIPLE SCENES (EDIT – COMBINE)
If you have recorded numerous short scenes, combining them will be facilitated by the use of Disc
Navigation.
Be sure to select consecutive multiple scenes. When using the HDD or a DVD-RAM, combining
scenes is possible only when “Category: All” is specified (p. 113). Stills cannot be combined.
1
Press the DISC NAVIGATION button.
2
Press the MENU button, choose “Scene”,
“Edit”, “Combine”, and then press
button.
3
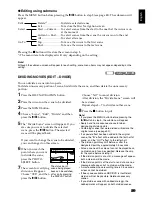
The “Combine Scenes” screen will appear:
Point the cursor at the first scene to be
combined, and then press the
button.
The cursor will change to double frames of
blue and yellow.
4
Use the
2
/
1
/
0
/
/
buttons to
determine the range of scenes to be
combined, point the cursor at the last scene,
and then press the
button.
The cursor will change to a red frame. The
last scene will be double frames of red and
yellow.
5
If you do not wish to change the scenes to be
combined, press the
button.
To change the scenes, press the
(STOP/
EXIT) button to return the cursor to yellow,
and then select the scenes to be combined
again.
6
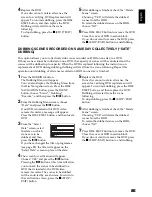
The screen for verifying combination will
appear: Choose “YES”, and then press the
button.
The two images appearing on the verification
screen are those of the first and last scenes to
be combined.
Choose “NO” to cancel combination.
After Yes or No setting, the “Combine
Scenes” screen will be restored.
The thumbnail of the first scene will appear in
the combined scene.
Repeat steps 3 and 6 to combine other scenes.
7
Press the
button to quit.
Note
:
•
You can also select multiple scenes after step 1:
Press the MENU button to continue the procedure of
combination.
•
If you press the MENU button before pressing the
button in step 3, the submenu will appear (see
page 89).
•
With fade effect, the “IN” effect of the first scene in the
selected range and the “OUT” effect on the last scene
will be attached to a combined scene.
•
Scenes in different programmes (different recording
dates) cannot be combined: Create a play list first,
and then combine such scenes on the play list. (see
page 101)
•
When using the HDD, scenes with different VIDEO
Modes or 16:9 mode cannot be combined.
•
If you combine scenes with dubbed marks
, the
dubbed marks will appear on the combined scene.
•
If you combine scenes with and without dubbed mark
, the dubbed mark will not appear on the combined
scene.
ARRANGING ORDER OF SCENES (EDIT – MOVE)
You can arrange scenes within a play list by moving them to desired positions (p. 106). Create a play
list first, and then arrange the scenes [“CREATING NEW PLAY LIST (CREATE)”, p. 101].
HDD
HDD
HDD
HDD


