E2 - 6
3.2
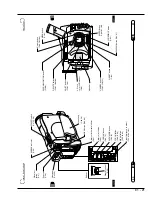
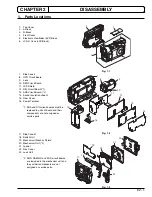
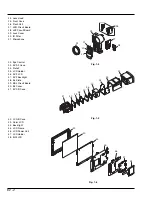
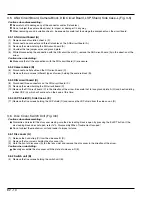
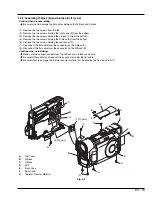
LCD-U Case, LCD Block, Front Block, RUB Sheet (Figs. 3-2-1, 3-2-2)
Cautions when disassembling:
The flash circuit board and flash emitter block have been assembled as a flash unit: Disassemble or reassemble them
together. Be careful not to damage the cable between the flash circuit board and flash emitter block.
The O-ring is removed with the front block.
Be careful not to damage side case-L when removing the RUB sheet.
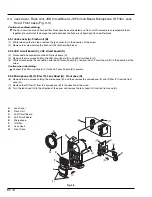
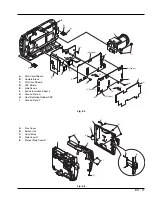
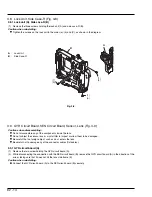
3.2.1 LCD-U case (A), LCD block (B)
(1) Remove the screw.
(2) Remove the two screws holding the LCD-U case (A).
(3) While releasing two tabs, open the LCD-U case (A) in the direction of the arrow.
(4) While releasing three tabs, remove the LCD-U case (A).
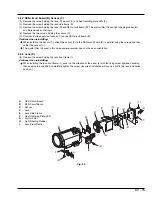
(5) Disconnect the two connectors on the LCD power unit (E).
(6) Remove the two screws holding the LCD block (B).
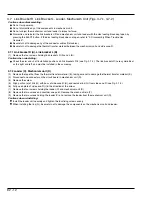
Cautions when reinstalling:
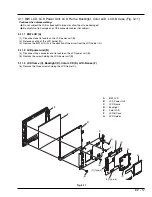
When installing the LCD-U case, first fit in the tabs shown in step (4).
When installing the cable cover (F), take care with its installation position: Do not damage the cable cover (F).
(Take care that the cable does not come into direct contact with the shaft.) (Figs. 3-2-1, 3-2-2)
When installing the LCD-U case, be careful not to catch the backlight cable on anything.
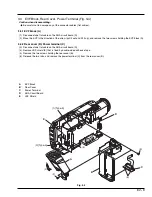
3.2.2 Front block (C)
(7) Unsolder the jumper wire on the LSP shield (H).
(8) Disconnect one connector on the ANA circuit board (I).
(9) Remove the two screws holding the flash circuit board (J).
(10) Disconnect one flat cable on the JKR circuit board (K).
(11) Open the jack cover (L), and remove the two screws holding the front block (C).
(12) Hold the bottom of front block (C), and remove the front block (C) in the direction of the arrow. (Move the flash circuit
board near the front block so that the cable from the flash circuit board is not subject to stress). The O-ring (M) will also
come out at this time.
Cautions when reinstalling:
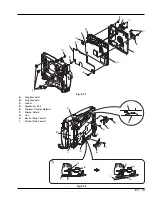
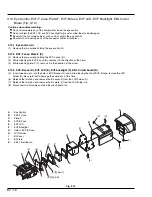
Attach the O-ring to the lens as shown in Fig. 3-2-2.
Install the flash circuit board after installing the front block. Be careful of the layout of cable between the flash circuit board
and flash emitter block.
After installing the lens, view the lens from the front and make sure that there is no drift up, down, to the left or to the right.
Be careful that the cable from the DIG circuit board is not caught by any cases.
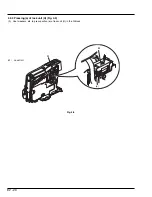
3.2.3 RUB sheet (D)
(13) Remove the RUB sheet (D) on the side case-L (N) with double-sided adhesive tape.

