21
PJ-LC9(C12H)
6-6 Air filter
WARNING
●Before caring, make sure the power switch is off and the power cable is not plugged in, then allow the
projector to cool sufficiently. The care in a high temperature state of the projector could cause an electric
shock, a burn and/or malfunction to the projector.
●Use only the air filter of the specified type. Do not use the projector with the air filter and the filter cover
removed. Do not remove the filter cover and the air filter in a smoky or dusty place. It could result in a fire
and/or malfunction to the projector.
●The air filter should be cleaned periodically. If the air filter becomes clogged by dust or the like, internal
temperatures rise and could cause a fire, a burn and/or malfunction to the projector.
CAUTION
●Please be careful for the projector not to fall. While the projector is placed lens-side up, hold the projector.
If the air filter becomes clogged by dust or the like, internal temperatures rise and could cause a fire, a burn
and/or malfunction to the projector.When the indicators or a message prompts you to clean the air filter,
clean the air filter as soon as possible. Please check and clean the air filter periodically, even if there is no
message.
Please replace the air filter when it is damaged or too soiled. Preparation of a new air filter is recommended.
When you replace the lamp, please replace the air filter. An air filter of specified type will come together with
a replacement lamp for this projector.
1. Turn the projector off, and unplug the power cord. Allow the lamp to cool sufficiently.
2. When the projector is suspended from the ceiling, apply the vacuum cleaner to and around the filter cover
first, to prevent of dust or the like.
3. Disconnect all the connectors and adapters that were connected to the projector’s ports. Then slowly turn
the projector so that the lens-side is facing up. While the projector is placed lens-side up, hold the projec-
tor.
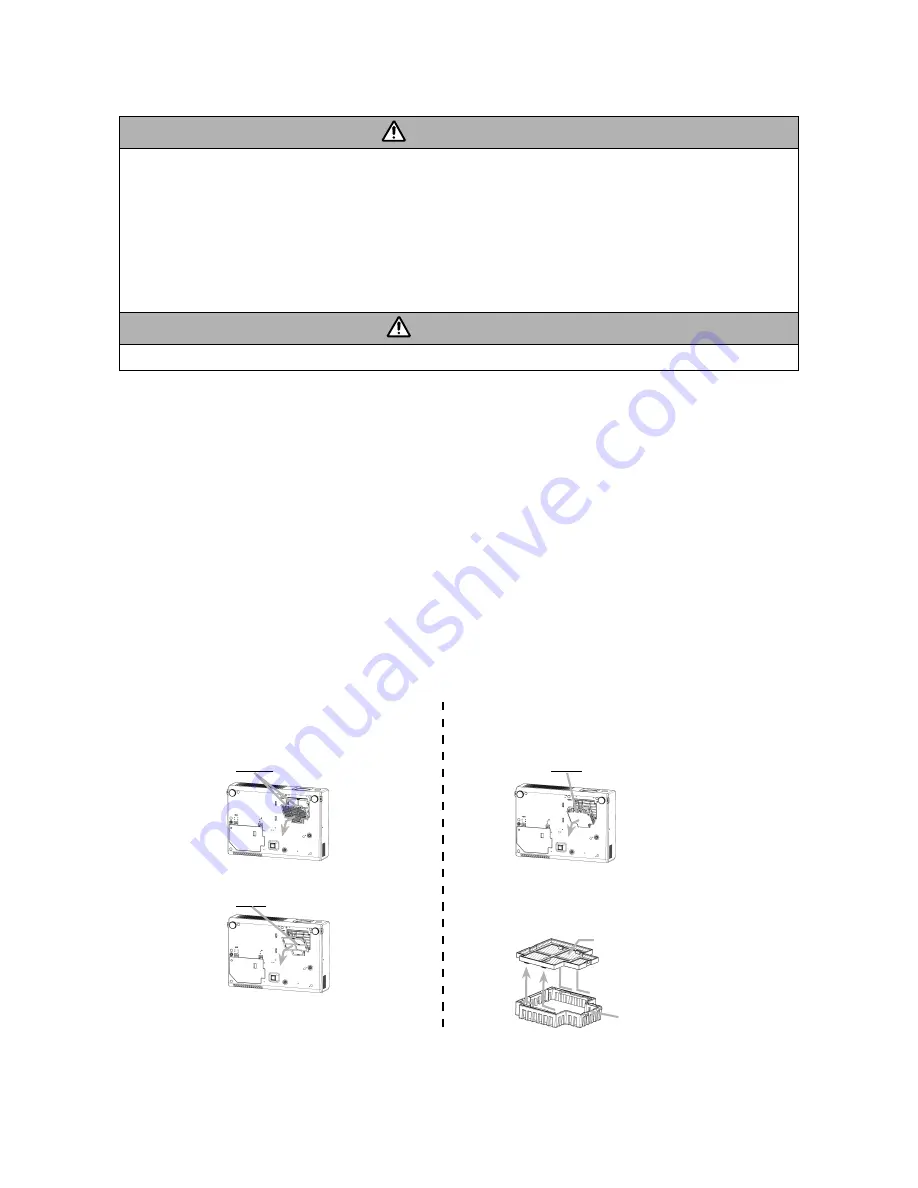
4. Remove the filter cover and the air filter. Then slowly turn the projector, so that the bottom is facing up.
Usual filter cover
Filter cover for bottom-up use
(1) Remove the filter cover.
Hold the knobs while pulling out it.
(2) Remove the air filter.
Hold the knob while pulling out it.
(3) Slowly turn the projector bottom up.
(1) Remove the filter cover.
Hold the knob while pulling out it.
(2) Slowly turn the projector bottom up.
(3) Remove the air filter from the filter cover.
5. Apply a vacuum cleaner to the vent of the projector for the air filter, the air filter and filter cover.
Please replace the air filter when it is damaged or too soiled.
Air filter
Filter cover
Summary of Contents for EDPJ32
Page 34: ...34 PJ LC9 C12H ...
Page 51: ...51 PJ LC9 C12H 12 Connector connection diagram Connector connection diagram CN103 ...
Page 55: ...1 2 3 4 5 6 6 1 2 3 4 5 D G F E C B A PWB assembly MAIN 1 C12H ...
Page 56: ...1 2 3 4 5 6 6 1 2 3 4 5 D G F E C B A PWB assembly MAIN 2 C12H ...
Page 57: ...1 2 3 4 5 6 6 1 2 3 4 5 D G F E C B A PWB assembly MAIN 3 C12H ...
Page 58: ...1 2 3 4 5 6 6 1 2 3 4 5 D G F E C B A PWB assembly MAIN 4 C12H ...
Page 59: ...1 2 3 4 5 6 6 1 2 3 4 5 D G F E C B A PWB assembly MAIN 5 C12H ...
Page 60: ...1 2 3 4 5 6 6 1 2 3 4 5 D G F E C B A PWB assembly MAIN 6 C12H ...
Page 61: ...1 2 3 4 5 6 6 1 2 3 4 5 D G F E C B A PWB assembly MAIN 7 C12H ...
Page 62: ...1 2 3 4 5 6 6 1 2 3 4 5 D G F E C B A PWB assembly MAIN 8 C12H ...
Page 63: ...1 2 3 4 5 6 6 1 2 3 4 5 D G F E C B A PWB assembly MAIN 9 C12H ...
Page 64: ...1 2 3 4 5 6 6 1 2 3 4 5 D G F E C B A PWB assembly MAIN 10 C12H ...
Page 65: ...1 2 3 4 5 6 6 1 2 3 4 5 D G F E C B A PWB assembly MAIN 11 C12H ...
Page 66: ...MEMO ...
Page 68: ...QR65311 Digital Media Division Printed in Japan JE PJ LC9 YK No 0556 ...


