30
MAINTENANCE
(CONTINUED)
●
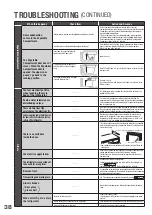
Do not place your hand in the mechanical section
of the automatic ice maker.
(Rotation of the ice tray may cause injury.)
Warning
Ice Maker Cleaning
When using for the first time
When not used for more than one week
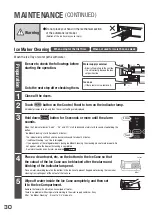
Be sure to check the followings before
starting the operation.
Go to the next step after checking them.
Close all the doors.
Preparation
1
Water supply container
・
Water is filled in it up to the limit line.
・
It is set correctly beyond the tank
set position line.
Ice case
・
If there remains ice, remove it.
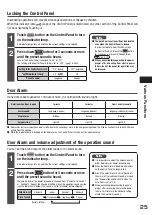
Touch
button on the Control Panel to turn on the indicator lamp.
All indicator lamps turn on, and then the current settings are displayed.
Hold down
button for 5 seconds or more until the alarm
sounds.
When the 3 indicator lamps “Quick” , “On” and “Off” start to blink and alarm starts to sound, stop holding the
button.
“Ice Maker Cleaning” starts (for about 4 minutes).
・
The indicator lamp will flash and the buzzer will sound for about 4 minutes.
・
“Ice Maker Cleaning” can’ t be interrupted.
・
If you open any of the refrigerator doors during Ice Maker Cleaning, the cleaning may not work properly. Do
not open or close the door until cleaning is completed.
・
Door alarm sounds even if alarm is disabled.
Pg.25
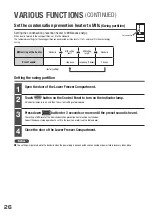
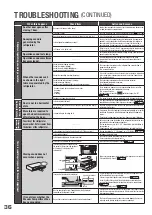
Place a clean towel, etc. on the bottom in the Ice Case so that
the cutout of the Ice Case can be blocked after the alarm and
blinking of the indicator lamp end.
Place a water-absorbing towel on the bottom in the Ice Case to prevent trapped water during the ice maker
cleaning from spilling out of the cutout of the Ice Case.
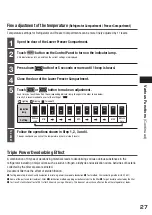
Wipe off water inside the Ice Case completely, and then set
it to the Ice Compartment.
Remove the towel with which you have wiped off water.
There is no problem with using water remaining in the water supply container, if any.
After “Ice Maker Cleaning” , it is set to “On” mode, etc.
2
3
4
5
Touch it
11-4
It blinks
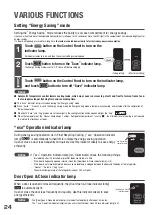
Wash the Ice Tray or water paths with water.
Cutout
Towel

