

--- 14 ---
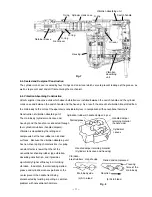
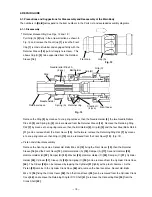
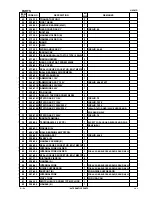
First gear and crank shaft disassembly
Remove the grease from the Connecting Rod [34] side and the First Gear [53] side of the Cylinder Crank
Case [48]. Remove the two Seal Lock Hex. Socket Flat Hd. Bolts M5 x 12 [44] fixing Bearing Cover (A) [45].
Then place the Connecting Rod [34] side of the Cylinder Crank Case [48] downward on a workbench and
apply pressure on the end surface of the Crank Shaft [42] with a hand press to remove the First Gear [53] and
the Crank Shaft [42] (Fig. 14). Before removing them, make sure that the two Seal Lock Hex. Socket Flat Hd.
Bolts M5 x 12 [44] fixing Bearing Cover (A) [45] are removed.
Fig. 14
Crank Shaft
Apply pressure on the end
surface of the crank shaft
with a hand press.
Cylinder Crank Case
Bearing Cover (A)
First Gear
Workbench
9-1-2. Reassembly
Reassembly can be accomplished by following the disassembly procedure in reverse. However, special attention
should be given to the following items.
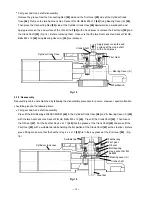
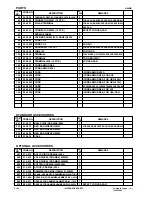
First gear and crank shaft reassembly
Press-fit the Ball Bearing 6203DDCMPS2L [46] in the Cylinder Crank Case [48] and fix Bearing Cover (A) [45]
with the two Seal Lock Hex. Socket Flat Hd. Bolts M5 x 12 [44]. Press-fit the Crank Shaft [42]. Then mount
the Oil Seal [47]. Put the Feather Key 4 x 4x 10 [43] into the groove of the Crank Shaft [42] and press-fit the
First Gear [53] with a suitable tool while holding the flat portion of the Crank Shaft [42] with a steel bar. Before
press-fitting, make sure that the Feather Key 4 x 4 x 10 [43] fits in the key groove of the First Gear [53]. (Fig.
15)
Feather key
Suitable tool
Hex. socket hd. flat
bolt M5
First gear
Oil seal
Ball bearing
Cylinder crank case
Steel bar
Fig. 15
Bearing cover (A)
Crank shaft
Summary of Contents for H 45MR
Page 26: ......


