


REV0 10.02.15
-H9-3-
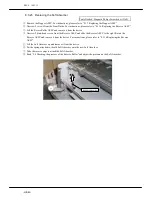
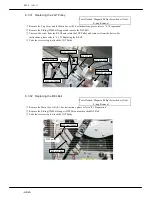
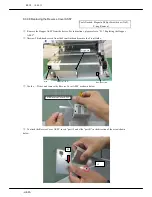
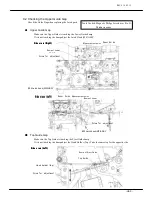
9.2 Checking the Upper Guide Gap
Check the Guide Gap when replacing the Latch parts.
●
Upper Guide Gap
●
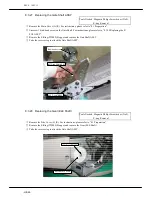
Top Guide Gap
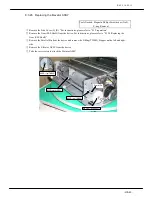
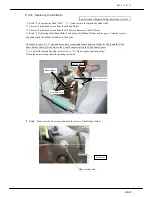
Make sure the Upper Guide is touching the Lower Guide bump
If it is not touching the bump adjust the Latch Hook (MF) ASSY
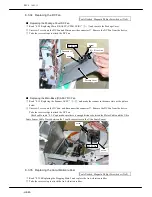
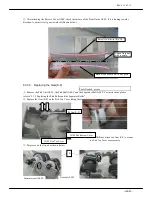
Make sure the Top Guide is touching the Eject Guide bump
If it is not touching the bump adjust the Hook Holder (Top). Take the same step for the opposite side.
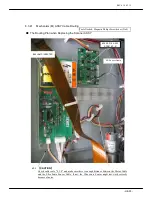
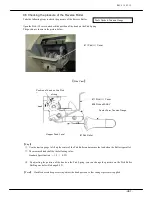
Upper Guide
Measurement point
Bump of Lower
Guide
#94 Latch hook (MR)ASSY
Upper Guide
Screw for adjustment
σ
#93 Latch hook(MF)ASSY
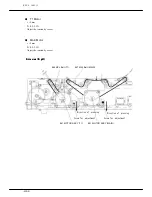
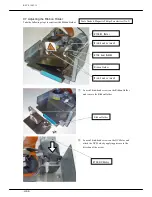
Hook holder
(
top
)
Screw for adjustment
Top Guide
Bump of Eject Guide
Side view
Side view
Side view
Side view (
((
(Right)
Right)
Right)
Right)
Side view
Side view
Side view
Side view (
((
(Left
Left
Left
Left)
))
)
Side view
Side view
Side view
Side view (
((
(Left
Left
Left
Left)
))
)
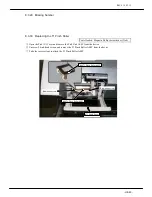
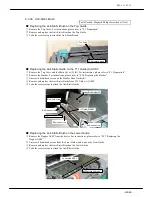
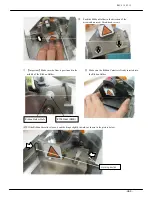
Screw for adjustment
Measurement point
Bump of Lower
Tools Needed: Magnetic Philips Screwdriver (No.2),
Thickness gauge
Summary of Contents for HT-4139-28
Page 1: ...HT 4139 28 48 Scanner Maintenance Manual ...
Page 2: ......
Page 11: ... H2 5 2 5 Block Diagram ...
Page 22: ...REV0 10 02 15 H3 10 Lens Mirror Motor Mirror No 1 Mirror No 3 Mirror No 2 ...
Page 35: ...REV0 10 02 15 H7 2 ...
Page 63: ...REV0 2010 02 15 H7 30 ...
Page 89: ...REV0 10 02 15 H8 26 ...


