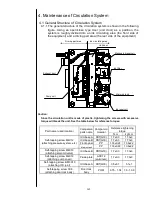


4-6
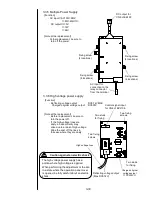
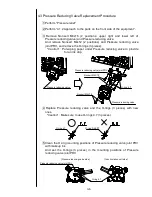
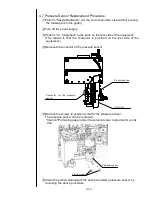
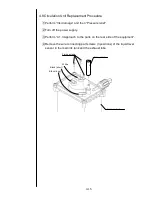
4.3 Pressure Reducing Valve Replacement Procedure
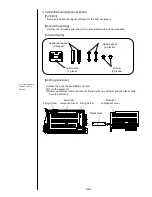
1 Perform “Pressure relief”.
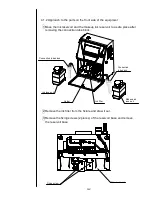
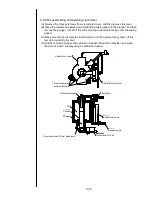
2 Perform “4.1.2 Approach to the parts on the front side of the equipment”.
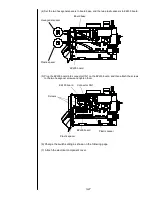
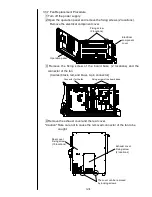
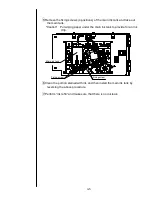
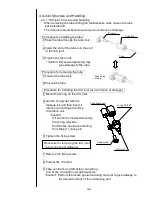
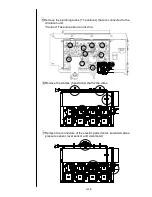
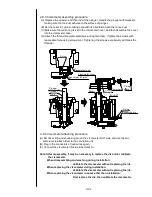
3 Remove Nonsert M4x16 (2 positions: upper right and lower left of
Pressure reducing valve) and Pressure reducing valve.
And remove Nonsert M4x12 (2 positions) and Pressure reducing valve
joint PRV, and remove the O-rings (3 pieces).
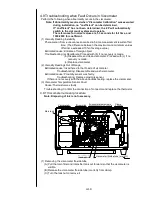
"Caution" : Put wiping paper under Pressure reducing valve to provide
for an ink drip.
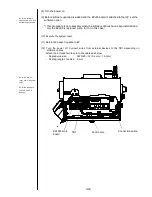
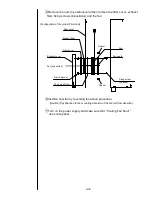
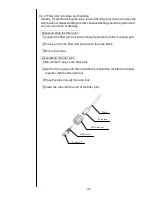
4 Replace Pressure reducing valve and the O-rings (3 pieces) with new
ones.
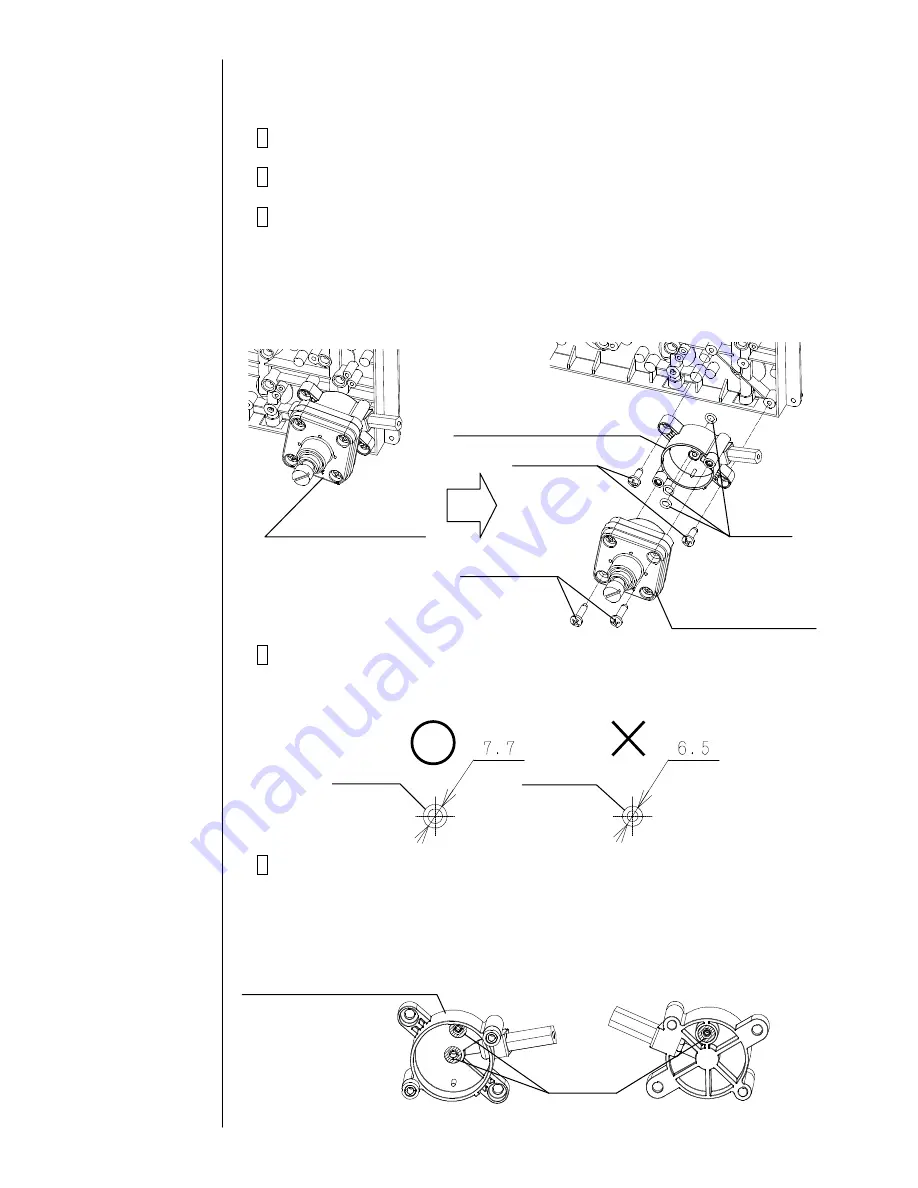
"Caution" : Make sure to use O-rings 4.7 (3 pieces).
5 Clean the O-ring mounting positions of Pressure reducing valve joint PRV
with makeup ink.
And set the O-rings (3 pieces) in the mounting positions of Pressure
reducing valve joint PRV.
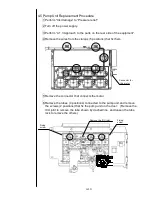
Pressure reducing valve
Pressure reducing valve joint PRV
Pressure reducing valve
Nonsert M4X16
O-ring 4.7
Nonsert M4X12
O-ring 4.7
O-ring S-4EPT
[Pressure reducing valve side]
[Ink circulation unit side]
O-ring 4.7
Pressure reducing valve joint PRV
Summary of Contents for IJ PH
Page 1: ...Service Manual HITACHI Printer Model PH Revision Aug 2011 Version First edition ...
Page 2: ... Revision of PH service manual Revision Chapter Revised Page ...
Page 13: ...1 2 2 Main body internal PH D 1 8 ...
Page 80: ...3 25 3 25 Circuit diagram of EZJ95 ...
Page 201: ...7 1 7 Attached Drawing 7 1 Circulation System Diagram ...
Page 202: ...7 2 7 2 Electrical Connection Diagram ...
Page 205: ...7 5 7 4 Dimensions around charge electrode and deflection electrode Nozzle diameter 65 um ...


