2-6
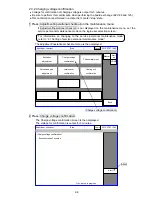
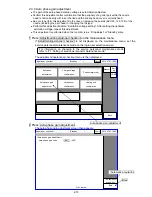
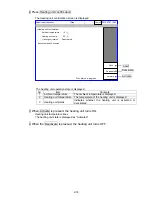
3 Press Automatic adjustment.
During automatic a
djustment, “in progress” is displayed as the processing status.
The excitation voltage is automatically adjusted inside the IJ printer.
The excitation voltage is gradually increased, and the adjustment is completed
at 60 V ± 5V p-p. (Excitation adjustment is automatically completed within 10 minutes.)
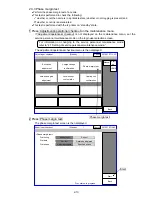
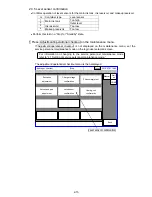
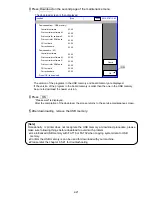
4 When completed, the processing status
is displayed to be “Ended”.
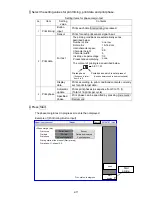
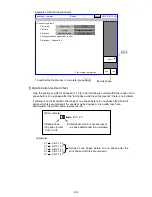
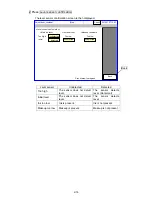
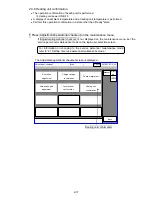
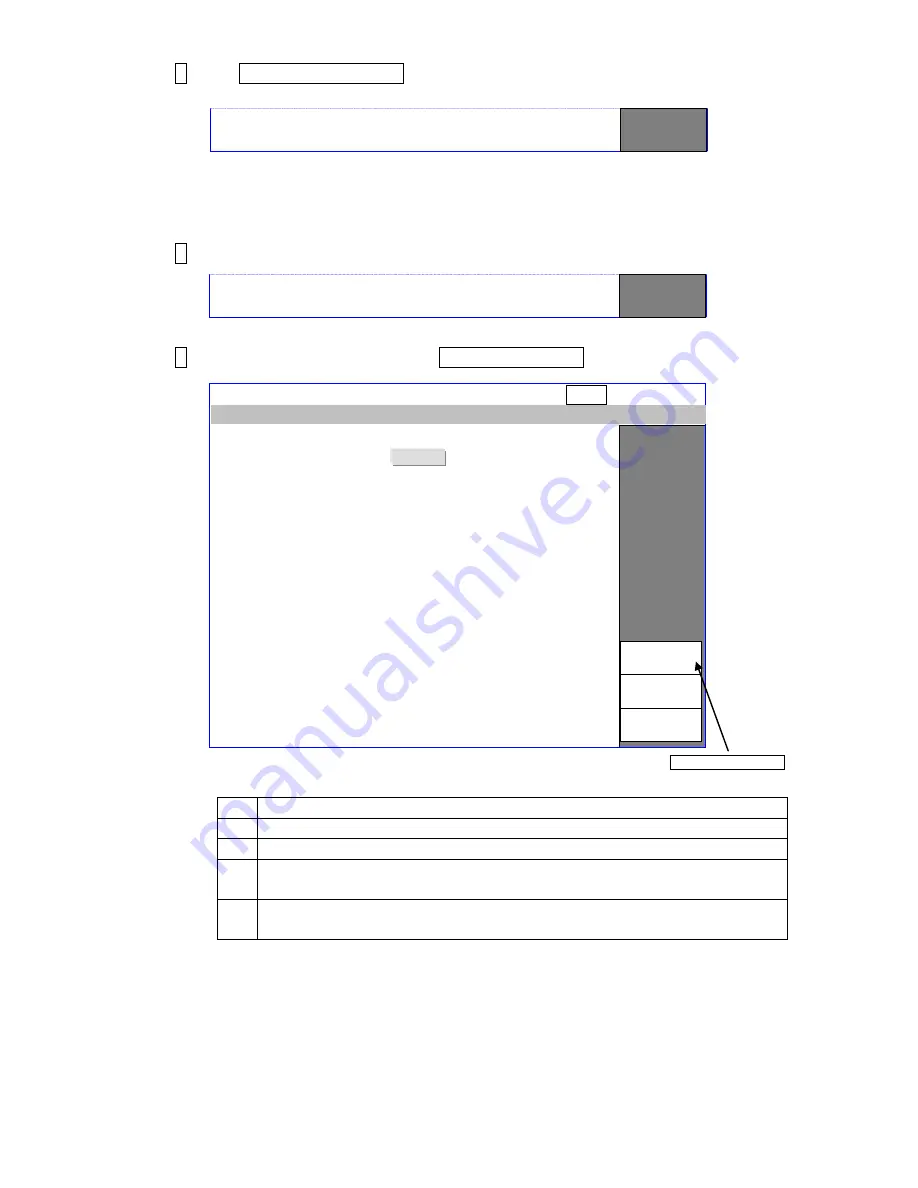
5 If automatic adjustment fails, the Manual adjustment key is displayed.
Main causes of automatic adjustment failure
№
Cause
1
The connection of the EZJ126 board and EZJ125 board is insufficient.
2
The dip switch on the EZJ125 board is incorrectly set.
3
The connection of the coaxial cable connector for excitation (EZJ125 CN5) is
insufficient.
4
Replacement parts are out of order (EZJ126/EZJ125 board, nozzle, head
cable).
Proc. status: In progress
Proc. status: Ended
Adjust./oper. checkout
<Excitation adjustment>
0752
Excitation voltage value
(0-2047)
Proc. status: Failed
[Stop ]
2015.07.07 12:45
Com=0
Back
Automatic
adjustment
Manual
adjustment
Manual adjustment
Summary of Contents for IJ RX2
Page 1: ...Service Manual HITACHI Printer Model RX2 Revision Feb 2014 Version A ...
Page 13: ...1 8 2 External views Rear side 1 2 2 Main body internal ...
Page 14: ...1 9 1 2 3 Print head ...
Page 101: ...3 26 Circuit diagram of EZJ127A ...
Page 102: ...3 27 Circuit diagram of EZJ127B ...
Page 116: ...3 41 Circuit diagram of EZJ129 ...
Page 164: ...4 40 5 Reset the time of the R air filter to 0 on the Parts usage time management screen ...
Page 247: ...7 Attached Drawing 7 1 Circulation System Diagram Circulation System Diagram 7 1 ...
Page 249: ...7 3 7 2 2 Electrical Connection Diagram RX2 B Basic model 7 3 ...


