background image

Basic Operation

Powering ON/OFF

•  Press the 

STANDBY

 button to switch the unit on.

•  Press the 

STANDBY

 button again to switch the unit back to standby mode.

•  Disconnect the mains adapter from the mains socket if you want to switch the unit off 

completely.

Selecting Modes

Press the 

DAB/FM

 button repeatedly to switch between modes (

DAB

 or 

FM

).

Adjusting the Volume

Adjust the volume to the desired level by pressing the 

VOL+/–

 buttons.

Mute Function

Press the 

MUTE

 button to temporarily stop the speakers emitting sound. The display will 

show “

MUTE

” and flash. To cancel mute and restore the sound, press the 

MUTE

 button 

again or the 

VOL +/–

 buttons, “

MUTE

” will disappear from the display.

Setting the Time

The clock can only set and be updated if you can receive DAB signals in your location. In 

order for the clock to synchronise to the current local time you must leave it on one DAB 

station for a short period of time. If after 3 minutes the clock has not automatically set itself 

try repositioning the radio to get better reception.
If the radio cannot find a DAB frequency to set the clock. You can use the FM mode (some 

FM stations also transmit time and date information).
1.  Switch to FM mode by pressing the 

DAB/FM

 button.

2.  Search for a station by pressing the 

SCAN

 button.

3.  Press the 

DISPLAY

 button repeatedly to explore the Time & Date display.

4.  If the FM station is transmitting time it will set itself automatically. Please be aware that 

not all FM stations transmit the time. If the time does not set after 3 minutes then press 

the 

SCAN

 button to find another station. Repeat until the time is set.

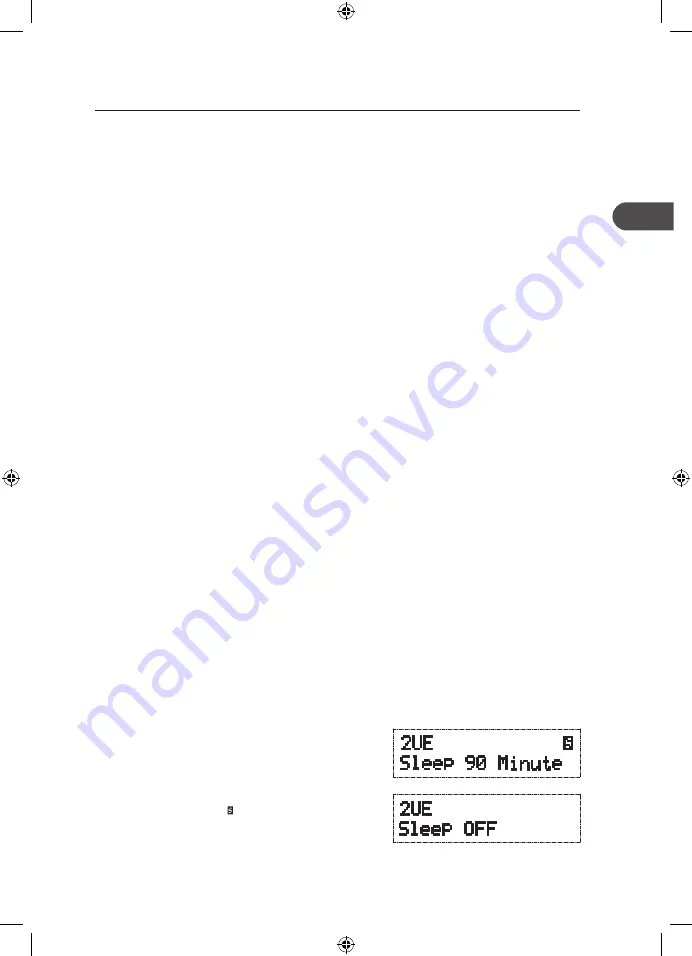
Setting the Sleep Timer

Press the 

SLEEP

 button to set the sleep time. You can 

select from five options 

OFF

,

 90 Minute

,

 60 Minute,


30 Minute

 and

 10 Minute

 by pressing the 

SLEEP


button repeatedly. The selection you make will be 

automatically confirmed after 5 seconds or by pressing 

the 

SELECT

 button. The “ ” icon will be displayed when 

the sleep timer is on. To look at the remaining sleep 

time, press the 

DISPLAY

 button repeatedly to check 

the remaining sleep time. To cancel the sleep function, 

press the 

SLEEP

 button once.

13

GB

KH330E_IB_GB_110321.indd   13

3/21/11   2:54 PM

Summary of Contents for KH330E

Page 1: ...Instruction Manual KH330E DAB FM Radio GB KH330E_IB_GB_110321 indd 1 3 21 11 2 54 PM ...

Page 2: ...KH330E_IB_GB_110321 indd 2 3 21 11 2 54 PM ...

Page 3: ... 13 Adjusting the Volume 13 Mute Function 13 Setting the Time 13 Setting the Sleep Timer 13 DAB Operation 14 DAB Auto Scan 14 Secondary Services 15 Manual Tuning 15 Storing Stations 15 Recalling a Stored Station 16 System Reset 16 DAB Display Modes 17 FM Operation 18 Switching from DAB to FM Mode 18 Auto Scan 18 Manual Tune 18 Audio Mode 18 Storing Stations 18 Recalling a Stored Station 19 System ...

Page 4: ...lled with liquids such as vases to be placed on the equipment DON T place hot objects or naked flame sources such as lighted candles or nightlights on or close to equipment High temperatures can melt plastic and lead to fires DON T use makeshift stands and NEVER fix legs with wood screws to ensure complete safety always fit the manufacturer s approved stand or legs with the fixings provided accord...

Page 5: ...uidelines are followed Store unused batteries in their packaging and away from metal objects which may cause a short circuit resulting in leakage or in extreme cases fire or even an explosion Keep loose button cells away from young children Never attempt to recharge ordinary batteries either in a charger or by applying heat to them They may leak cause fire or even explode There are special recharg...

Page 6: ...uid into the unit it can cause serious damage Switch it off at the mains immediately Withdraw the mains adapter and consult your dealer Ventilation To prevent the risk of electric shock or fire hazard due to overheating ensure that curtains and other materials do not obstruct the ventilation vents Do not install or place this unit in a bookcase built in cabinet or in another confined space Ensure ...

Page 7: ... electric shock The exclamation point within an equilateral triangle is intended to alert the user to the presence of important operating and maintenance servicing instructions in the manual accompanying the unit Service To reduce the risk of electric shock do not remove screws The unit does not contain any user serviceable parts Please leave all maintenance work to qualified personnel Do not open...

Page 8: ...Main Unit Thank you for purchasing your new Hitachi DAB FM Radio We recommend that you spend some time reading this instruction manual in order that you fully understand all the operational features it offers You will also find some hints and tips to help you resolve any issues Read all the safety instructions carefully before use and keep this instruction manual for future reference 8 GB KH330E_I...

Page 9: ...ew Front View 1 2 3 4 5 7 8 9 10 12 11 6 13 1 SLEEP Button 2 PRESET SAVE Button 3 SCAN Button 4 MUTE Button 5 LCD Display 6 STANDBY Button 7 SELECT Button 8 Button 9 Button 10 DAB FM Button 11 DISPLAY Button 12 VOL Button 13 VOL Button 9 GB KH330E_IB_GB_110321 indd 9 3 21 11 2 54 PM ...

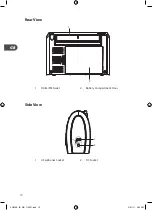
Page 10: ...Rear View Side View 1 DAB FM Aerial 1 Earphones Socket 2 Battery Compartment Door 2 DC Socket 1 2 2 1 10 GB KH330E_IB_GB_110321 indd 10 3 21 11 2 54 PM ...

Page 11: ...ains socket Battery Power Insert 4 X C size UM 2 R14 battery not included into the battery compartment located at the rear of the unit Make sure to match the and ends of the battery with the and ends indicated in the battery compartment Power Source Mains Power Before use make sure that the rated voltage of the mains adapter matches your local voltage To completely disconnect the unit from the mai...

Page 12: ... Improper or incorrect use of batteries may cause corrosion or battery leakage which could cause personal injury or damage to property Install the batteries correctly by following the polarity and indications in the battery compartment Use only the types of the batteries which are indicated in this manual Do not install new batteries with used ones and do not mix different types of batteries Do no...

Page 13: ...tioning the radio to get better reception If the radio cannot find a DAB frequency to set the clock You can use the FM mode some FM stations also transmit time and date information 1 Switch to FM mode by pressing the DAB FM button 2 Search for a station by pressing the SCAN button 3 Press the DISPLAY button repeatedly to explore the Time Date display 4 If the FM station is transmitting time it wil...

Page 14: ... be stored automatically To explore and select listening to the found stations press the buttons When you find a station that you would like to listen to press the SELECT button If the unit is connected to the mains power and then switched on from standby for the first time the unit will automatically enter into the DAB mode and perform auto scan function The display will show Scan Services Quick ...

Page 15: ...rvices are inserted directly after the primary station in the station list To select the secondary station press the SELECT button When the secondary service ends the unit will automatically switch back to the primary station Manual Tuning As well as the auto tune function you can manually tune the receiver This can help you when aligning your aerial or when adding stations that were missed while ...

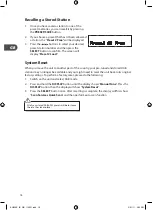
Page 16: ...s taken place System Reset When you move the unit to another part of the country your pre tuned and stored DAB stations may no longer be available and you might need to reset the unit back to its original factory settings To perform a factory reset please do the following 1 Switch on the unit and select DAB mode 2 Press and hold the DISPLAY button until the display shows Manual Tune Press the DISP...

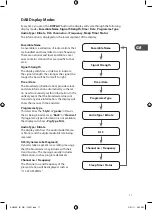
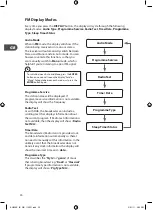
Page 17: ...amme Type This describes the Style or genre of music that is being broadcast e g Rock or Classical If programme type information is not available the display will show Prg Type N A Audio Type Bitrate The display will show the audio mode Stereo or Mono and the digital audio bit rate being received DLS Dynamic Label Segment Dynamic label segment is a scrolling message that the broadcaster may includ...

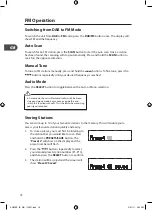
Page 18: ... manually press and hold the buttons To fine tune press the buttons repeatedly until your desired frequency is reached Audio Mode Press the SELECT button to toggle between the Auto or Mono selection 1 To store a preset you must first be listening to the station that you would like to save Press and hold the PRESETS SAVE button The Preset will show on the display and the preset number will flash 2 ...

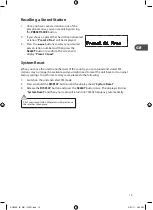
Page 19: ... lost once the reset has taken place System Reset When you move the unit to another part of the country your pre tuned and stored FM stations may no longer be available and you might need to reset the unit back to its original factory settings To perform a factory reset please do the following 1 Switch on the unit and select FM mode 2 Press and hold the DISPLAY button until the display shows Syste...

Page 20: ...oggle between each mode just press the ENTER button again Programme Service The station name will be displayed If programme service information is not available the display will show the frequency Radio Text As with DAB the broadcaster can include a scrolling text that displays information about the current program If Radio text information is not available then the display will show Radio Text N ...

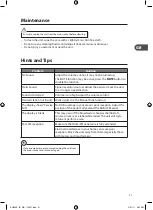
Page 21: ...The display is blank This may occur if the broadcaster changes the label of a service or removes a label while tuned The unit will try to retune or perform a scan Poor FM reception Make sure the DAB FM aerial wire is fully extended Electrical interference in your home can cause poor reception Move the unit away from them especially those with motors and transformers To clean the unit wipe the case...

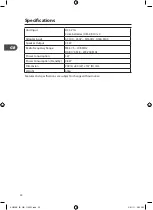
Page 22: ...18A MAX Speaker Output 2 5W Radio Frequency Range FM 87 5 108 MHz DAB 174 928 239 200 MHz Power Consumption 5W Power Consumption Standby 0 8W Dimension 200 L x 80 W x 137 H mm Weight 646g Features and specifications are subject to change without notice 22 GB KH330E_IB_GB_110321 indd 22 3 21 11 2 54 PM ...

Page 23: ...KH330E_IB_GB_110321 indd 23 3 21 11 2 54 PM ...

Page 24: ...ction systems available If the batteries or accumulators included with this equipment display the chemical symbol Hg Cd or Pb then it means that the battery has a heavy metal content of more than 0 0005 Mercury or more than 0 002 Cadmium or more than 0 004 Lead All trademarks are the property of their respective owners and all rights are acknowledged In the unlikely event of a problem developing p...

Reviews: