background image

Contents

Safety Warnings .......................................................................................... 6
Unpacking ................................................................................................... 9
Product Overview .....................................................................................10

Front View ................................................................................................................... 10
Rear View ..................................................................................................................... 10
Top View ...................................................................................................................... 11
Side View ..................................................................................................................... 11

Power Source ............................................................................................12

Mains Power ............................................................................................................... 12
Battery Power ............................................................................................................ 12
Battery Life (Approx. hours) .................................................................................. 13
Knowing when to Replace the Batteries .......................................................... 13

Connections ..............................................................................................14

Using Earphones ...................................................................................................... 14

Basic Operation ........................................................................................15

Powering ON/OFF .................................................................................................... 15
Selecting Modes ....................................................................................................... 15
Adjusting the Volume ............................................................................................. 15
Automatically Setting the Clock ......................................................................... 15

DAB Operation ..........................................................................................16

Station List .................................................................................................................. 16
Secondary Services .................................................................................................. 17
Full Scan ....................................................................................................................... 17
Manual Tuning........................................................................................................... 17
Prune Invalid .............................................................................................................. 18
DRC (Dynamic Range Control) ............................................................................ 18
Viewing Station Information ................................................................................ 18
Showing Signal Strength ....................................................................................... 18
Presetting Stations ................................................................................................... 19
Recalling a Preset Station ...................................................................................... 19

KHD150E_IB_1_GB_Final180906V2.indd   2

10/9/2018   2:19 PM

Summary of Contents for KHD150E

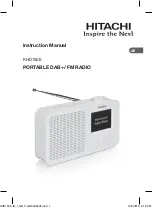
Page 1: ...Instruction Manual KHD150E PORTABLE DAB FM RADIO GB KHD150E_IB_1_GB_Final180906V2 indd 1 10 9 2018 2 19 PM ...

Page 2: ...ons 14 Using Earphones 14 Basic Operation 15 Powering ON OFF 15 Selecting Modes 15 Adjusting the Volume 15 Automatically Setting the Clock 15 DAB Operation 16 Station List 16 Secondary Services 17 Full Scan 17 Manual Tuning 17 Prune Invalid 18 DRC Dynamic Range Control 18 Viewing Station Information 18 Showing Signal Strength 18 Presetting Stations 19 Recalling a Preset Station 19 KHD150E_IB_1_GB_...

Page 3: ...Stored Station 22 System Settings 23 Setting Sleep Timer 23 Setting Alarm 24 Snooze Function 24 Setting Equaliser 25 Setting the Time and Date 25 Setting Backlight 26 Setting Language 26 Factory Reset 27 Software Update 27 Software Version 27 Maintenance 28 Hints and Tips 28 Specifications 29 Main Unit 29 Mains Adapter 29 KHD150E_IB_1_GB_Final180906V2 indd 3 10 9 2018 2 19 PM ...

Page 4: ...aced on the equipment DON T place hot objects or naked flame sources such as lighted candles or nightlights on or close to equipment High temperatures can melt plastic and lead to fires DON T use makeshift stands and NEVER fix legs with wood screws to ensure complete safety always fit the manufacturer s approved stand or legs with the fixings provided according to the instructions DON T use equipm...

Page 5: ...k and cause damage Store unused batteries in their packaging and away from metal objects which may cause a short circuit resulting in leakage or in extreme cases fire or even an explosion Never dispose of batteries in fire as this can cause them to explode Please recycle dead batteries do not put with the normal household waste Supervise children if they are replacing batteries themselves in order...

Page 6: ... direct sunlight and other sources of heat Attention should be drawn to the use of apparatus in moderate climates Naked Flames Never place any type of candle or naked flame on the top of or near the unit Moisture To reduce the risk of fire electric shock or product damage do not expose this unit to rain moisture dripping or splashing No objects filled with liquids such as vases should be placed on...

Page 7: ...etic interference If you do it may adversely affect the operating performance of the unit and cause a distorted picture or sound Earphones Listening to loud sounds for prolonged periods of time may permanently damage your hearing Before putting on earphones turn the volume down then put the earphones on and slowly increase the volume until you reach a comfortable listening level Batteries Batterie...

Page 8: ...able parts Please leave all maintenance work to qualified personnel Do not open any fixed covers as this may expose dangerous voltages Maintenance Ensure to unplug the unit from the power supply before cleaning Do not use any type of abrasive pad or abrasive cleaning solutions as these may damage the unit s surface Do not use liquids to clean the unit This equipment is a Class II or double insulat...

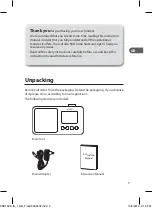
Page 9: ...erational features it offers You will also find some hints and tips to help you resolve any issues Read all the safety instructions carefully before use and keep this instruction manual for future reference Unpacking Remove all items from the packaging Retain the packaging If you dispose of it please do so according to local regulations The following items are included KHD150E_IB_1_GB_Final180906V...

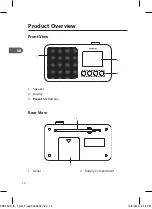
Page 10: ...Product Overview Front View 1 2 3 1 Speaker 2 Display 3 Preset 1 4 Buttons Rear View 1 Aerial 2 Battery Compartment 1 2 10 GB KHD150E_IB_1_GB_Final180906V2 indd 10 10 9 2018 2 19 PM ...

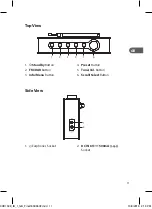
Page 11: ...op View 1 Earphones Socket 1 Standby Button 2 FM DAB Button 3 Info Menu Button 2 DC IN 6V 500mA Socket 4 Preset Button 5 Tune Vol Button 6 Scroll Select Button 1 2 11 GB KHD150E_IB_1_GB_Final180906V2 indd 11 10 9 2018 2 19 PM ...

Page 12: ...unit and then connect the mains adapter to the mains socket Make sure the mains adapter is firmly inserted into the mains socket The unit is now ready to use 2 To switch the unit off completely unplug the mains plug from the mains socket Battery Power Insert 4 X 1 5V AA batteries not included correctly by following the polarity or indications in the battery compartment 12 GB KHD150E_IB_1_GB_Final1...

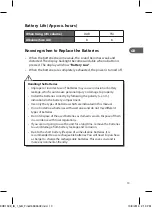
Page 13: ...owing the polarity and indications in the battery compartment Use only the types of batteries which are indicated in this manual Do not install new batteries with used ones and do not mix different types of batteries Do not dispose of the used batteries as domestic waste Dispose of them in accordance with local regulations If you are not going to use the unit for a long time remove the batteries t...

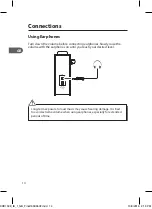
Page 14: ...ise the volume with the earphones on until you reach your desired level Long term exposure to loud music may cause hearing damage It is best to avoid extreme volume when using earphones especially for extended periods of time 14 GB KHD150E_IB_1_GB_Final180906V2 indd 14 10 9 2018 2 19 PM ...

Page 15: ...tton to switch to Standby mode Press the Standby button again to switch on the unit Press and hold the Standby button to switch off the unit Selecting Modes Press the FM DAB button repeatedly to switch between modes DAB or FM Adjusting the Volume Turn the Scroll Select dial clockwise anticlockwise to increase decrease the volume Automatically Setting the Clock The clock will be updated automatical...

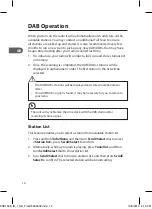
Page 16: ... be selected The DAB DAB stations will be displayed and stored in alphanumeric order If no DAB DAB signal is found it may be necessary for you to relocate your radio The unit will synchronize the time clock with the DAB station after receiving its time signal Station List This feature enables you to select a station from available station list 1 Press and hold Info Menu and then turn Scroll Select...

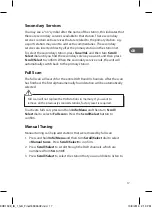
Page 17: ...ll scan will search for the entire DAB Band III channels After the scan has finished the first alphanumerically found station will be automatically selected Full scan will not replace the DAB stations in memory If you want to remove all the previously scanned stations factory reset is required To activate full scan press and hold Info Menu and then turn Scroll Select dial to select Full scan Press...

Page 18: ...ct dial to select DRC high low off Press Scroll Select to confirm the setting Viewing Station Information It is possible to view the information that is displayed on the display when listening to a DAB DAB program by pressing Info Menu repeatedly The display will show the information through Scrolling text Program Type Ensemble Frequency Signal quality Signal strength Bitrate and Codec and Date Sh...

Page 19: ...ress Scroll Select to confirm 3 The station will be stored and the screen will show Preset saved Recalling a Preset Station 1 Once you have saved a station you can recall it by pressing the Preset button 2 Turn Scroll Select dial to select the desired preset station number 3 Press Scroll Select to confirm 4 If you choose a preset station number that has not been allocated a station Preset Empty wi...

Page 20: ...ial Turn Scroll Select dial clockwise anti clockwise until your desired frequency is reached With FM radio it may be necessary to fine tune each station by turning Scroll Select dial Each turn will adjust the frequency by 0 05 MHz If reception is still poor adjust the position of the aerial or try moving the radio to another location Scan Setting This is a scanning option to scan all stations or j...

Page 21: ...e information that is displayed on the display when listening to a FM program by pressing Info Menu repeatedly The display will show the information through Radio Text Program Type Program Name Audio info and Date Presetting Stations You can store up to 20 of your favourite stations to the memory This will enable you to access your favourite stations quickly and easily 1 To store a preset you must...

Page 22: ...set station number 3 Press Scroll Select to confirm 4 If you choose a preset station number that has not been allocated a station Preset Empty will be displayed You may also press and hold 1 2 3 or 4 button to store your favourite stations To recall Preset Store 1 2 3 4 press 1 2 3 or 4 22 GB KHD150E_IB_1_GB_Final180906V2 indd 22 10 9 2018 2 19 PM ...

Page 23: ...elect to confirm 2 Turn the Scroll Select dial to view options Sleep Timer Off 15 30 45 60 or 90 minutes Select Sleep Timer Off and then press Scroll Select to confirm Sleep function will be switched off 3 Turn the Scroll Select dial to select 15 30 45 60 or 90 minutes Press the Scroll Select to confirm The sleep icon will show on the display To view the set sleep time redo above step 1 2 23 GB KH...

Page 24: ...uzz or Digital Radio FM If the wake up source is Digital Radio and the DAB signal strength is low the Buzz alarm will be triggered Preset Last listened or saved preset station not available for Buzz mode Duration 15 30 45 60 90 120 Alarm Volume Turn Scroll Select dial to adjust the alarm volume 4 Press and hold Info Menu to exit alarm setting or icon will show on the display Snooze Function 1 When...

Page 25: ...ect to confirm Turn Scroll Select dial to select Treble or Bass and then press Scroll Select to confirm Turn Scroll Select dial to set the value of Treble and Bass among 7 to 7 and then press Scroll Select dial to confirm Setting the Time and Date 1 Press and hold Info Menu to display the menu and then turn Scroll Select dial to select System Settings and then press Scroll Select to confirm 2 Turn...

Page 26: ...al to set backlight level and backlight timeout and then press Scroll Select to confirm the setting On Level High Medium Low Dim Level High Medium Low Off Setting Language This feature enables you to change menu language 1 Press and hold Info Menu and then turn Scroll Select dial to select System Settings Press Scroll Select to confirm 2 Turn Scroll Select dial to select Language and then press Sc...

Page 27: ...to start the system reset Restarting will show on the display After the reset is complete the unit will automatically scan for DAB stations After the factory reset all the tuned stations DAB FM preset stations will be erased Software Update This is for service professional only If you selected Software Update turn Scroll Select dial to select No Press Scroll Select to confirm Software Version 1 Pr...

Page 28: ...rial or move the unit to a stronger signal location Sound is distorted Volume is too high Adjust the volume FM station not found Weak signal Search manually DAB station not found No DAB coverage in your area or poor reception Adjust the position of the aerial The display is blank This may occur if the broadcaster changes the label of a service or removes a label while tuned The unit will try to re...

Page 29: ...ion Operation 3 W Max Standby 1 W Dimension L x W x H 200 55 120 mm Net Weight 0 42 kg Mains Adapter Model HKP04 0600500dV Manufacturer Hung Kay Industrial Co Ltd Power Supply Input AC 100 240 V 50 60 Hz 0 2A Output DC 6 V 500 mA Features and specifications are subject to change without prior notice 29 GB KHD150E_IB_1_GB_Final180906V2 indd 29 10 9 2018 2 19 PM ...

Page 30: ...KHD150E_IB_1_GB_Final180906V2 indd 30 10 9 2018 2 19 PM ...

Page 31: ...KHD150E_IB_1_GB_Final180906V2 indd 31 10 9 2018 2 19 PM ...

Page 32: ...ase contact the store where you purchased your equipment We continually strive to improve our products specifications may change without prior notice For advice on where to purchase accessories please contact the store where you purchased your equipment The symbol on the product or its packaging indicates that this product must not be disposed of with your other household waste Instead it is your ...

Reviews: