background image

8

PREPARATION

Supplied Accessories

When you unpack the player, please check to 
ensure the following accessories are supplied 
before installation.  In case of missing or 
damaged, please contact the dealer immediately.

User manual (x2)

AC power adaptor (x1)

Car power adaptor (x1)

USB cable (x1)

Earphones (x1)

Stylus (x1)

Suction cup windscreen mount (x1)

Mounting bracket (x1)

Warranty card (x1)

CD-ROM (x1)

Velvet pouch (x1)

Using the AC Power Adaptor

Connect the AC power adaptor to the power 
socket on the player.

Connect the plug of the AC power adaptor to 
the wall outlet.

Using the Car Power Adaptor

Connect the car power adaptor to the power 
socket on the player.

Connect the other end of the car power 
adaptor to the car cigarette lighter socket.

Ɣ
Ɣ
Ɣ
Ɣ
Ɣ
Ɣ
Ɣ
Ɣ
Ɣ
Ɣ
Ɣ

1.

2.

1.

2.

Using the Built-in Battery

To Charge the Battery

When the battery is charging, the Charge Indicator 
is orange.  When the battery is fully charged, the 
Charge Indicator turns off.

To charge the player using an electrical wall 
outlet, connect the AC power adaptor to the 
player and the wall outlet.

To charge the player in a vehicle, connect the 
car power adaptor to the player and the car 
cigarette lighter socket.

Note

s

:

Do not disconnect the AC power adaptor or 
car power adaptor during charging.

The charging time of a battery is about 2.5
hours and it depends on the environmental 
conditions.

The fully charged battery provides about 2
hours of navigation operation.

It is normal for the battery to become warm 
during charging.

The battery can be charged when the player is 
turned on.  The charging time will be longer.

Regular recharging a partially charged battery 
does not cause harm.

Do not use the battery under high temperature 
or near heat sources.

The battery should be used at environmental 
temperature of 5°C to 35°C.

Do not dispose the battery in fire, water or 
heat it up.

To prolong the battery life, if it is not used for 
a long period of time, it should be charged 
for about 30 minutes before turning on the 
player.

To prolong the battery life, charge it under or 
close to indoor temperature.

Ɣ

Ɣ

Ɣ

Ɣ

Ɣ

Ɣ

Ɣ

Ɣ

Ɣ

Ɣ

Ɣ

Ɣ

Ɣ

MMP-401 IM.indd   8

03-08-2006   11:49:56 AM

Summary of Contents for MMP-401

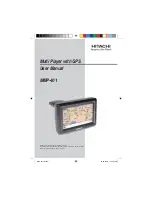
Page 1: ...er Manual MMP 401 Thank you for purchasing this HITACHI product To obtain the best performance and safety please read this manual carefully Please keep this manual for future reference MMP 401 IM indd 1 03 08 2006 11 49 53 AM ...

Page 2: ...iving Before using the product on the road make yourself familiar with the product and its operation Do not rely on the navigation system to search for medical emergency services e g hospital It is not guaranteed that the suggested route will take you to the nearest emergency services In this case use local information sources Due to the constantly changing traffic routes it is not guaranteed that ...

Page 3: ... Using the AC Power Adaptor Using the Car Power Adaptor Using the Built in Battery Positioning the Player in a Vehicle 2 4 6 6 6 6 7 7 8 8 8 8 8 9 BASIC OPERATION Getting Started Navigation Brightness Setting Volume Setting Entertainment Entertainment Screen Buttons TROUBLESHOOTING SPECIFICATIONS 10 10 10 10 11 11 12 13 14 MMP 401 IM indd 3 03 08 2006 11 49 54 AM ...

Page 4: ...ch as a bookcase or rack unless proper ventilation is provided 1 2 3 4 5 6 7 8 9 or the manufacturer s instructions have been adhered to Power Sources The product should be operated only from the type of power source indicated on the marking label If you are not sure of the type of power supply to your home consult your appliance dealer or local power company For products intended to operate from ...

Page 5: ...cement parts specified by the manufacturer or have the same characteristics as the original part Unauthorized substitutions may result in fire electric shock or other hazards 16 17 18 a b c d e f 19 Safety Check Upon completion of any service or repairs to the product ask the service technician to perform safety checks to determine that the product is in proper operating condition Heat Do not instal...

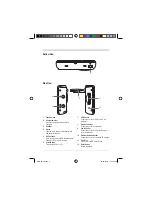
Page 6: ...6 FUNCTIONAL OVERVIEW FrontView 1 2 RearView 4 3 5 TopView 6 MMP 401 IM indd 6 03 08 2006 11 49 55 AM ...

Page 7: ... to the horizontal position Power Button Turns the player on or off 1 2 3 4 5 6 USB Socket Connection socket for USB cable to your computer Earphone Socket Connection socket for earphones Power Socket Connection socket for AC power adaptor or car power adaptor External Antenna Socket Connection socket for external GPS antenna Card Slot Slot for SD or MMC memory card Reset Button Resets the player ...

Page 8: ...ing an electrical wall outlet connect the AC power adaptor to the player and the wall outlet To charge the player in a vehicle connect the car power adaptor to the player and the car cigarette lighter socket Notes Do not disconnect the AC power adaptor or car power adaptor during charging The charging time of a battery is about 2 5 hours and it depends on the environmental conditions The fully cha...

Page 9: ...will be mounted to 3 Press the suction cup firmly to the windscreen then push the lever towards the windscreen 4 lever 1 2 3 4 Place the player onto the mounting bracket Ensure the player is secured onto the mounting bracket 5 Bend the arm of the suction cup windscreen mount so that the player will be visible to the driver Lift up the GPS antenna to the horizontal position and the player is ready t...

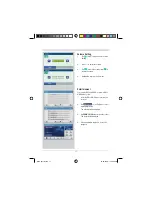
Page 10: ...n the Top Menu to enter navigation mode The Destinator Menu will be displayed Note Please refer to Hitachi Destinator User Manual for the navigation operation Tap Quit to quit Destinator and return to the Top Menu Brightness Setting Tap on the Top Menu to enter Brightness Setting Tap or to adjust the brightness of the touch screen Tap Back to return to the Top Menu Ɣ Ɣ 1 Ɣ 2 1 2 3 MMP 401 IM indd ...

Page 11: ...tainment You can play MP3 and MPEG 4 stored in SD or MMC memory card Insert the SD or MMC memory card to the card slot Tap on the Top Menu to enter media player mode The folder list will be displayed Tap SDMMC DISK folder to open the folder The file list will be displayed Select and double tap the file to start the playback 1 2 3 4 1 2 3 4 MMP 401 IM indd 11 03 08 2006 11 49 58 AM ...

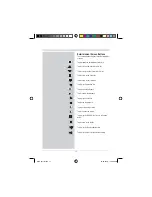
Page 12: ...to the folder list Tap to return to the Top Menu Tap to play the previous file Tap to pause the playback Tap to resume the playback Tap to play the next file Tap to stop the playback Tap to decrease the volume Tap to increase the volume Tap to play the MPEG 4 file avi in full screen mode Tap to return to the file list Tap to play the files in random order Tap to play the file or all the files repeatedly ...

Page 13: ...el The touch screen is too dark The touch screen is not bright enough Increase the brightness level The player does not receive GPS signals The GPS antenna is unable to receive signal Check the position of the player in the vehicle The GPS antenna requires a clear view of sky to receive information from the GPS satellites Ensure the GPS antenna is in the horizontal position If the player is used i...

Page 14: ...tellites Refresh Frequency TFT LCD Monitor Size Resolution H x V Main Unit Dimensions Weight 1575 42 MHz 20 1 sec 4 inch 480 x 272 RGB 115 x 75 x 28 mm 215g Specification are subject to change without notice for improvement MMP 401 IM indd 14 03 08 2006 11 49 59 AM ...

Page 15: ...15 MEMO MMP 401 IM indd 15 03 08 2006 11 49 59 AM ...

Page 16: ...MMP 401 IM indd 16 03 08 2006 11 49 59 AM ...

Reviews: