--- 33 ---
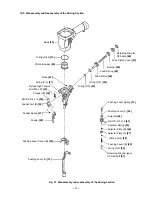
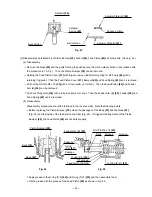
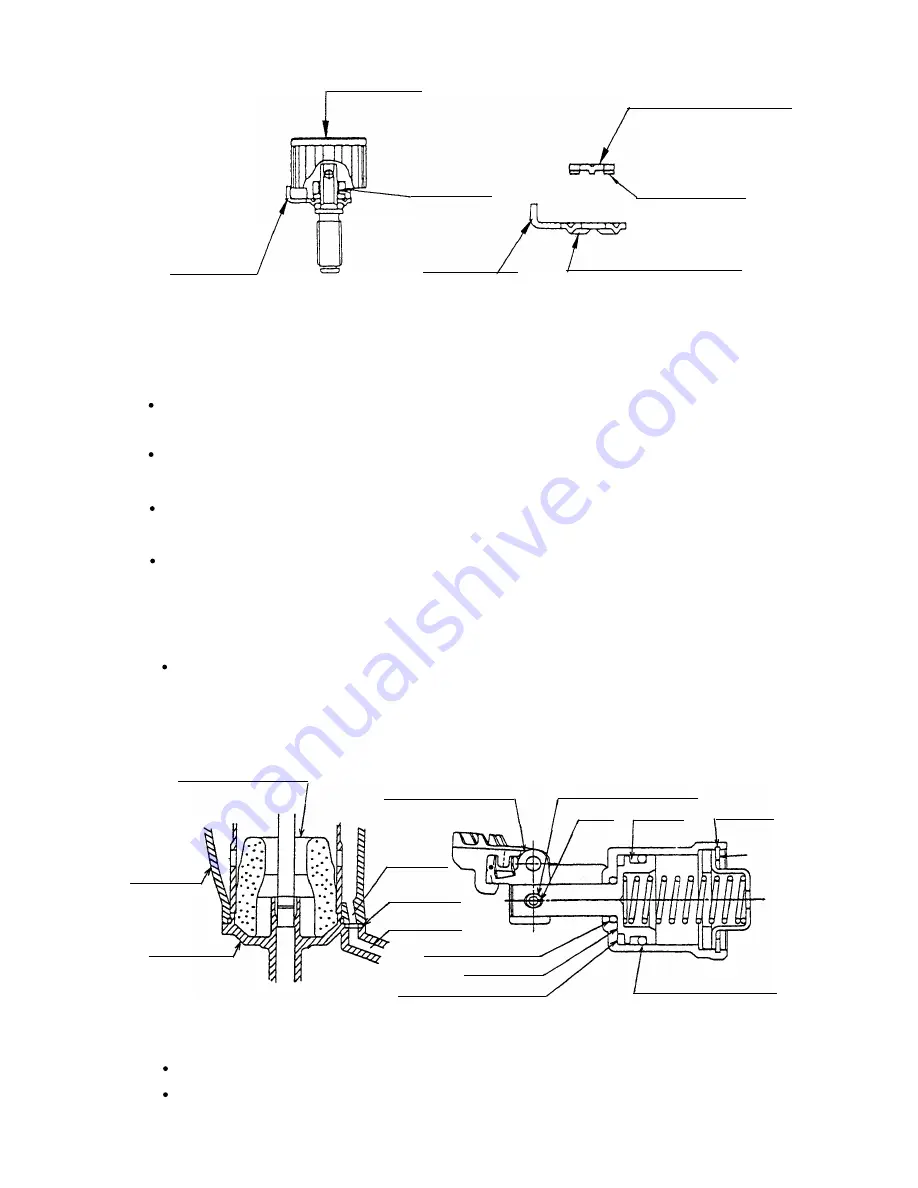
Fig. 23
Adjuster [44]
Adjuster
Spring [45]
Adjuster Plate (B) [46]
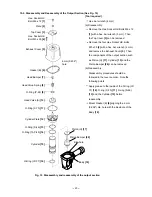
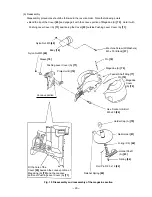
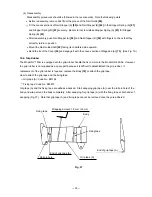
(3) Disassembly and reassembly of Piston Bumper [20], Feeder [28], Feed Piston [64] and other parts. (See Fig. 24.)
(a) Disassembly
Remove the Nose [22] and the parts forming the pushing lever from the output section in accordance with
the procedure in 10-5 (1). Then the Piston Bumper [20] can be removed.
Holding the Feed Piston Cover [67] with fingers, remove the Retaining Ring for D28 Hole [68] with a
retaining ring puller. Then the Feed Piston Cover [67], Bumper [66] and Feed Spring [65] can be removed.
Pull out the Roll Pin D4 x 16 [25] with a roll pin puller (4 mm dia.). Then the Feed Piston [64] and Feeder
Arm (B) [26] can be removed.
Push out Plunger (B) [24] with a roll pin puller (4 mm dia.). Then the Feeder Arm (B) [26], Feeder [28] and
Feed Spring [65] can be removed.
(b) Reassembly
Disassembly procedures should be followed in the reverse order. Note the following points.
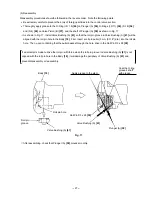
Before replacing the Piston Bumper [20], clean the passages of the Body [18] and the Nose [22]
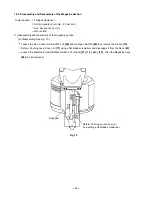
(Fig. 24) and the inside of the feed piston chamber (Fig. 25). If clogged with fragments of the Piston
Bumper [20], the Feed Piston [64] will not work properly.
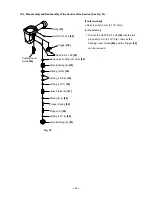
Fig. 25
Roll Pin D4 x 16 [25]
Body [18]
O-Ring (P-21) [63]
Nose [22]
Split
Piston Bumper [20]
Feed piston chamber
Bent portion
Bent portion
Convex portion
Adjuster Plate (A) [47]
Feeder Arm (B) [26]
Apply grease to the O-ring (P-9) [62] and O-ring (P-21) [63] and then assemble them.
Fill the grease with the groove of the Feed Piston [64] as shown in Fig. 25.
Passage
Passage
O-ring
(P-4) [21]
Groove
Groove
O-ring (P-9) [62]
"A" groove
Fig. 24
Summary of Contents for NV 75AG
Page 45: ......


