


2–6
z
2.1 Startup
Section 2
5.
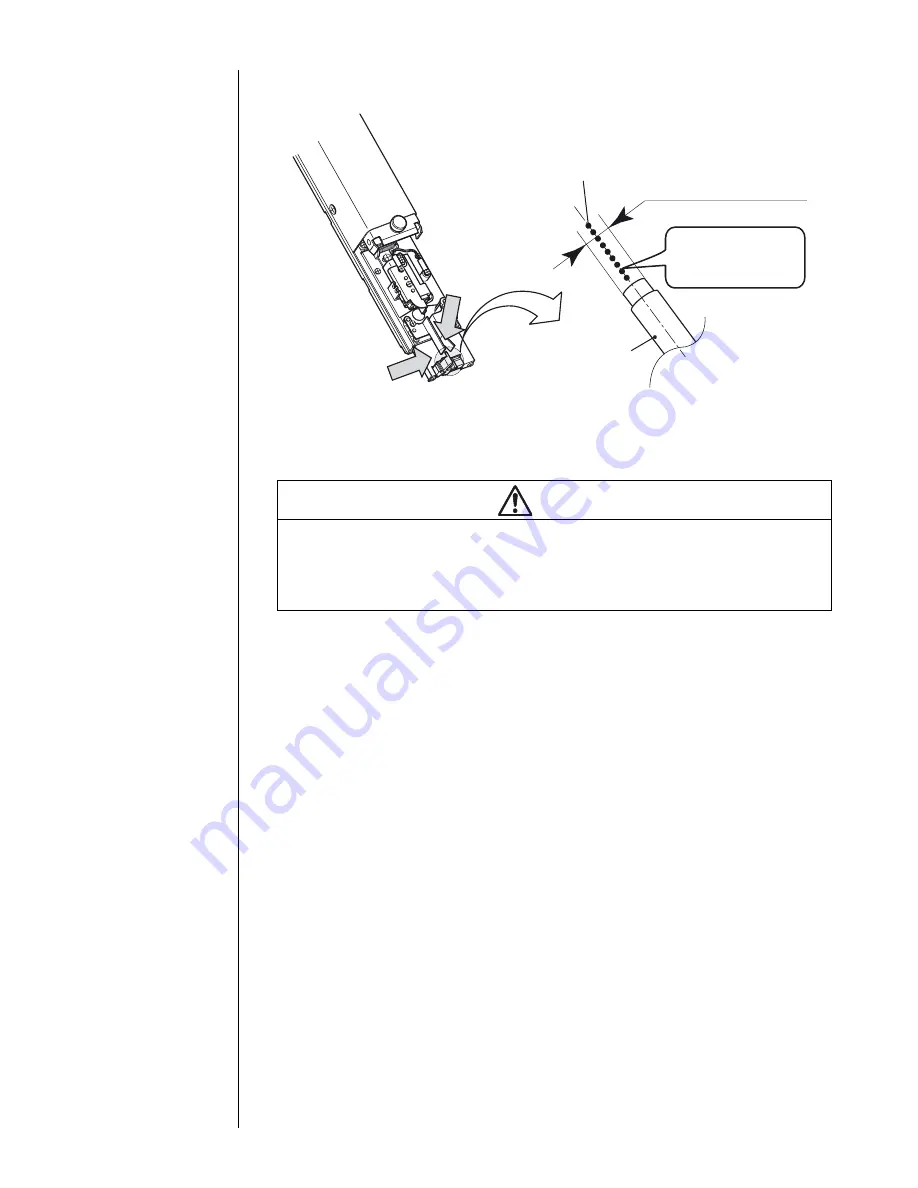
Make sure that the ink beam is positioned in the center of the gutter both
horizontally and vertically as shown in the following figure.
If the ink beam is not positioned in the center of the gutter, perform step 1 to stop the
ink ejection, and then proceed as described in
Section 6.6 in the Instruction
Manual,
"Correcting a Bent Ink
Beam and Clogged Nozzle"
.
6.
Install the print head cover.
z
If the "Cover open" fault is indicated, press the [Erase message] key.
7.
Wait until the status changes to "Ready".
8.
Input the print target detection signal and verify the printing results.
(
Section 2.1.1, "Starting an operation"
.)
DANGER
z
When checking the ink beam position, wear protectors (goggles and mask).
z
If the ink or makeup ink should enter your eyes or mouth, immediately flush with
warm or cold water and see a physician.
z
Before ejecting the ink, ensure that there is no person in the path of ejection.
(The end of the print head must be placed in a beaker or similar.)
*XWWHU
,QNVWUHDP
6LGHGLUHFWLRQ
8SSHUGLUHFWLRQ
*XWWHUHQWUDQFHGLDPHWHU
7KHLQNVWUHDPVKRXOG
EHSRVLWLRQHGDWWKH
FHQWHURIWKHJXWWHU
LQOHW
Summary of Contents for PB Series
Page 10: ...x ...
Page 36: ...2 12 z 2 2 Shutdown Section 2 ...
Page 64: ...3 28 z 3 7 Recalling Saved Data Section 3 ...
Page 78: ...4 14 z 4 5 Controlling the Executable Functions Section 4 ...
Page 100: ...6 10 z 6 3 Viewing the Warning Condition and Fault Occurrences Section 6 ...
Page 102: ...7 2 z Emergency Procedures Section 7 ...
Page 108: ...8 6 z 8 3 Parts to be replaced periodically Section 8 ...


